Where is Mayaotaki Shrine?
◈ Surface ◇ Sky ⊞ All
⌕ Explore shrines All regions Great Sky Island Hyrule Field Tabantha Hebra Great Hyrule Forest Akkala Eldin Lanayru Necluda Faron Gerudo
Gutanbac Shrine Great Sky Island · 0709, -1383, 1582 ↗ In-isa Shrine Great Sky Island · 0026, -1504, 1409 ↗ Nachoyah Shrine Great Sky Island · 0390, -1661, 2284 ↗ Ukouh Shrine Great Sky Island · 0275, -0913, 1460 ↗ En-oma Shrine Hyrule Field · 0103, -2518, -0061 ↗ Ishodag Shrine Hyrule Field · -0879, 0423, 0074 ↗ Jinodok Shrine Hyrule Field · -1257, -1487, 1016 ↗ Jiosin Shrine Hyrule Field · -0241, -0371, 0052 ↗ Jojon Shrine Hyrule Field · 1202, 0330, 0052 ↗ Kamizun Shrine Hyrule Field · -0178, -1558, 0048 ↗ Kyokugon Shrine Hyrule Field · -0709, -1551, 0032 ↗ Kyononis Shrine Hyrule Field · -0205, 0451, 0046 ↗ Makurukis Shrine Hyrule Field · -2847, 0630, 0255 ↗ Mayachin Shrine Hyrule Field · -0706, -0869, 0057 ↗ Ren-iz Shrine Hyrule Field · 0756, 0824, 0106 ↗ Riogok Shrine Hyrule Field · -1441, -1616, 0113 ↗ Runakit Shrine Hyrule Field · -2530, 1170, 0200 ↗ Sepapa Shrine Hyrule Field · 0222, 1085, 0053 ↗ Serutabomac Shrine Hyrule Field · -0179, 1170, 0301 ↗ Sinakawak Shrine Hyrule Field · -1415, 0757, 0113 ↗ Sonapan Shrine Hyrule Field · -1922, -0359, 0250 ↗ Susuyai Shrine Hyrule Field · -0785, -0434, 0044 ↗ Tadarok Shrine Hyrule Field · -1082, -2187, 0152 ↗ Tajikats Shrine Hyrule Field · 0344, -1009, 0042 ↗ Taki-ihaban Shrine Hyrule Field · -1830, 1195, 0171 ↗ Teniten Shrine Hyrule Field · -0075, -1116, 0046 ↗ Tenmaten Shrine Hyrule Field · -0595, 1551, 0011 ↗ Tsutsu-um Shrine Hyrule Field · -1423, -1351, 0092 ↗ Usazum Shrine Hyrule Field · -2139, -0874, 0118 ↗ Yamiyo Shrine Hyrule Field · 0333, 0470, 0054 ↗ Ga-ahisas Shrine Tabantha · -3596, 0961, 1694 ↗ Ganos Shrine Tabantha · -3370, 0467, 1691 ↗ Gasas Shrine Tabantha · -4153, 0098, 0066 ↗ Gatakis Shrine Tabantha · -3652, 1806, 0191 ↗ Ikatak Shrine Tabantha · -3951, 1139, 0135 ↗ Iun-orok Shrine Tabantha · -3539, 0851, -0105 ↗ Mayausiy Shrine Tabantha · -1167, 2602, -0057 ↗ Nouda Shrine Tabantha · -2318, 2201, 0196 ↗ Oromuwak Shrine Tabantha · -3079, 1617, 0264 ↗ Taunhiy Shrine Tabantha · -2402, 0825, 0630 ↗ Turakawak Shrine Tabantha · -3498, -0197, 0090 ↗ Wao-os Shrine Tabantha · -4058, 1990, 0206 ↗ Eutoum Shrine Hebra · -3507, 3570, 0406 ↗ Ijo-o Shrine Hebra · -3861, 2682, 0716 ↗ Kahatanaum Shrine Hebra · -3296, 3432, 1349 ↗ Mayaotaki Shrine Hebra · -0825, 3535, 0256 ↗ Mayaumekis Shrine Hebra · -2948, 3051, 0907 ↗ Orochium Shrine Hebra · -1637, 2642, 0261 ↗ Oshozan-u Shrine Hebra · -1404, 3678, 0308 ↗ Otak Shrine Hebra · -4391, 3714, 0234 ↗ Rutafu-um Shrine Hebra · -2998, 3102, 0531 ↗ Sahirow Shrine Hebra · -3354, 2386, 0380 ↗ Sisuran Shrine Hebra · -2559, 3354, 0266 ↗ Taninoud Shrine Hebra · -1802, 3407, 0958 ↗ Tauyosipun Shrine Hebra · -4539, 2880, 0283 ↗ Tenbez Shrine Hebra · -0970, 3535, 1019 ↗ Ekochiu Shrine Great Hyrule Forest · 1063, 1280, 0071 ↗ Kikakin Shrine Great Hyrule Forest · -0396, 2736, 0308 ↗ Kiuyoyou Shrine Great Hyrule Forest · -1107, 2088, 0128 ↗ Mayam Shrine Great Hyrule Forest · 0340, 2815, 1814 ↗ Musanokir Shrine Great Hyrule Forest · 0408, 2134, 0167 ↗ Ninjis Shrine Great Hyrule Forest · 0355, 1892, 0201 ↗ Pupunke Shrine Great Hyrule Forest · 0621, 2211, 0187 ↗ Sakunbomar Shrine Great Hyrule Forest · 0167, 2320, 0202 ↗ Simosiwak Shrine Great Hyrule Forest · 0162, 1972, 0771 ↗ Domizuin Shrine Akkala · 3305, 1443, 0444 ↗ Gatanisis Shrine Akkala · 4498, 0826, 0119 ↗ Gemimik Shrine Akkala · 4513, 2116, 0027 ↗ Gikaku Shrine Akkala · 4506, 2166, 1160 ↗ Igashuk Shrine Akkala · 4655, 3714, 0154 ↗ Jochi-ihiga Shrine Akkala · 3811, 1219, 0115 ↗ Jochi-iu Shrine Akkala · 4347, 2876, 0188 ↗ Kamatukis Shrine Akkala · 3431, 3357, 0095 ↗ Mogisari Shrine Akkala · 4655, 3500, 1018 ↗ Natak Shrine Akkala · 3671, 1484, 1163 ↗ Rasitakiwak Shrine Akkala · 4167, 1323, 0251 ↗ Rasiwak Shrine Akkala · 4664, 3263, 0027 ↗ Sinatanika Shrine Akkala · 3842, 2300, 0073 ↗ Isisim Shrine Eldin · 1842, 2842, 0383 ↗ Jiotak Shrine Eldin · 1834, 3180, 0279 ↗ Kadaunar Shrine Eldin · 1882, 1203, 1255 ↗ Kimayat Shrine Eldin · 2864, 3638, 0262 ↗ Kisinona Shrine Eldin · 2568, 1246, 0196 ↗ Marakuguc Shrine Eldin · 1762, 2510, 0455 ↗ Mayachideg Shrine Eldin · 3061, 1824, 0238 ↗ Mayak Shrine Eldin · 1270, 3733, 0130 ↗ Minetak Shrine Eldin · 0394, 3485, 0093 ↗ Momosik Shrine Eldin · 2960, 2758, 0541 ↗ Moshapin Shrine Eldin · 2679, 1904, 0154 ↗ Sibajitak Shrine Eldin · 2400, 3275, 0421 ↗ Sikukuu Shrine Eldin · 0699, 2793, 0248 ↗ Sitsum Shrine Eldin · 2369, 2596, 0802 ↗ Timawak Shrine Eldin · 1800, 1640, 0332 ↗ Apogek Shrine Lanayru · 3887, -0217, 0187 ↗ Igoshon Shrine Lanayru · 3481, 0666, 1328 ↗ Ihen-a Shrine Lanayru · 3786, 0578, 0503 ↗ Jikais Shrine Lanayru · 4267, -1673, 0204 ↗ Jirutagumac Shrine Lanayru · 2916, 0534, 0960 ↗ Joniu Shrine Lanayru · 2918, 0507, 0178 ↗ Jonsau Shrine Lanayru · 1744, 0018, 0051 ↗ Kurakat Shrine Lanayru · 2361, -0511, 0179 ↗ Maoikes Shrine Lanayru · 2276, 0147, 0103 ↗ Mayanas Shrine Lanayru · 4613, -0947, 1784 ↗ Mogawak Shrine Lanayru · 3300, 0424, 0136 ↗ Morok Shrine Lanayru · 1182, -0779, 0157 ↗ O-ogim Shrine Lanayru · 2756, -1089, 0124 ↗ Sihajog Shrine Lanayru · 4546, -0846, 1127 ↗ Tukarok Shrine Lanayru · 0915, -0251, 0059 ↗ Yomizuk Shrine Lanayru · 4413, -0613, 0060 ↗ Zakusu Shrine Lanayru · 3526, -1482, 0190 ↗ Anedamimik Shrine Necluda · 4232, -2178, 0013 ↗ Bamitok Shrine Necluda · 3094, -3210, 0106 ↗ Eshos Shrine Necluda · 1566, -1945, 0180 ↗ Jochisiu Shrine Necluda · 0931, -1903, 0055 ↗ Jogou Shrine Necluda · 3346, -1187, 0082 ↗ Joju-u-u Shrine Necluda · 1515, -3577, 0165 ↗ Josiu Shrine Necluda · 1758, -1208, 0933 ↗ Kumamayn Shrine Necluda · 2857, -2856, 1216 ↗ Makasura Shrine Necluda · 1770, -1052, 0189 ↗ Marari-in Shrine Necluda · 4631, -3712, 0044 ↗ Mayahisik Shrine Necluda · 3729, -2059, 0211 ↗ Sifumim Shrine Necluda · 2826, -3270, 0102 ↗ Susub Shrine Necluda · 0349, -2052, -0001 ↗ Tokiy Shrine Necluda · 2304, -2378, -0003 ↗ Ukoojisi Shrine Necluda · 1469, -2169, 0601 ↗ Utojis Shrine Necluda · 1218, -2543, 0121 ↗ Yansamin Shrine Necluda · 2351, -1783, 1475 ↗ Zanmik Shrine Necluda · 3470, -2181, 0171 ↗ Ishokin Shrine Faron · -0565, -3524, 0152 ↗ Jiukoum Shrine Faron · 0868, -2278, 0165 ↗ Joku-u Shrine Faron · 1376, -3340, 0447 ↗ Joku-usin Shrine Faron · 1075, -3348, 0798 ↗ Utsushok Shrine Faron · 0670, -3358, 0096 ↗ Chichim Shrine Gerudo · -3211, -3007, -0024 ↗ Irasak Shrine Gerudo · -4159, -3825, 0053 ↗ Karahatag Shrine Gerudo · -3728, -3625, 0068 ↗ Kitawak Shrine Gerudo · -1530, -2929, 0341 ↗ Kudanisar Shrine Gerudo · -4167, -2143, 0075 ↗ Mayamats Shrine Gerudo · -4638, -1513, 0470 ↗ Mayasiar Shrine Gerudo · -3547, -0321, 1956 ↗ Mayatat Shrine Gerudo · -3291, -2512, 0050 ↗ Miryotanog Shrine Gerudo · -4680, -3086, 0079 ↗ Motsusis Shrine Gerudo · -1795, -3487, 0070 ↗ Otutsum Shrine Gerudo · -4469, -0671, 0526 ↗ Rakakudaj Shrine Gerudo · -2037, -1853, 0089 ↗ Rakashog Shrine Gerudo · -1715, -2119, 1155 ↗ Rotsumamu Shrine Gerudo · -3407, -1363, 0355 ↗ Siwakama Shrine Gerudo · -2446, -3344, 0067 ↗ Siyamotsus Shrine Gerudo · -1795, -3295, 1019 ↗ Soryotanog Shrine Gerudo · -3882, -2963, 0147 ↗ Suariwak Shrine Gerudo · -2524, -1770, 0155 ↗ Turakamik Shrine Gerudo · -2657, -2237, 0092 ↗ No shrine matches those filters.
↑N + − ⛶
Terrain Coordinate grid
◈ Select a shrine to explore its location.
Height is a reference value; it may differ from the map marker height.
In a cave — the marker is not the cave entrance.
Some terrain tiles could not load. Switch to the coordinate grid or retry. Retry terrain
Inside North Lomei Labyrinth in the Hebra Mountains. Launch from Pikida Stonegrove Skyview Tower and glide northeast to the labyrinth, or travel east from Oshozan-u Shrine if it is already unlocked. Enter the labyrinth from its western side; the entrance is at -0957, 3534, 0234, beside a small camp and a trail of Hylian Pine Cones. The shrine coordinates match our 152-shrine table .
Item Detail Trial Rauru’s Blessing Region Hebra (surface, North Lomei Labyrinth) Coordinates -0825, 3535, 0256 Type Blessing — labyrinth route, no interior puzzle Chests 1 (Diamond) Names 馬亞歐塔奇神廟 (zh-TW) · 马亚欧塔奇神庙 (zh-CN)
Video walkthrough
Step-by-step solution
The route through North Lomei Labyrinth is the trial. The shrine itself is a short Rauru’s Blessing room.
1. Reach the West Entrance and Create an Updraft
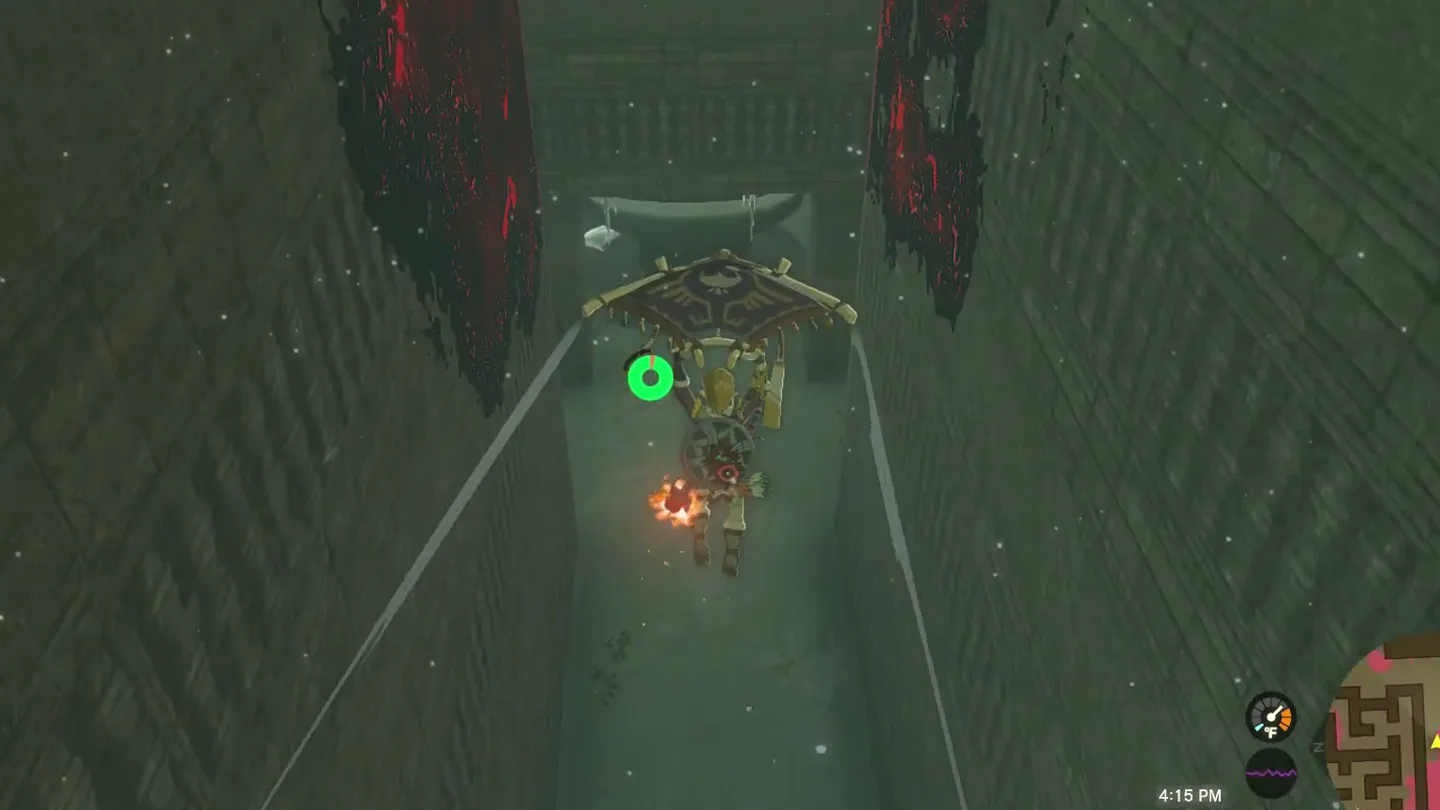
Reach the west entrance. Launch from Pikida Stonegrove Skyview Tower and glide northeast, then approach the labyrinth from the west.
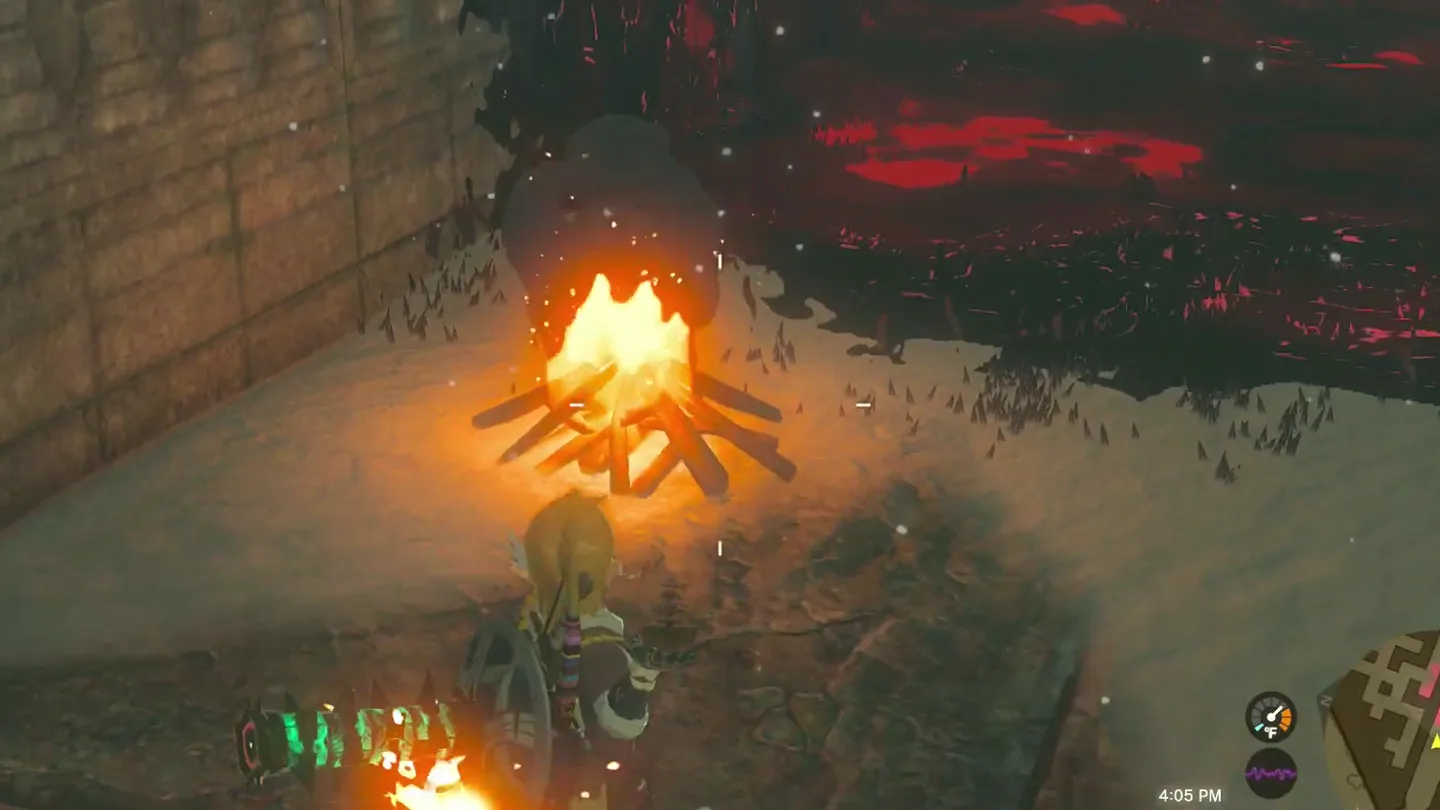
Use the entrance campfire. Throw a Hylian Pine Cone into the campfire to create a strong updraft, then glide across the gap.
1 At the west entrance, throw a Hylian Pine Cone into the campfire ① to make a strong updraft. Screenshot (cropped) from SweetJohnnyCage - Narrated Guides & Walkthroughs
· used with permission
Ride the updraft and glide across the gap. Screenshot (cropped) from SweetJohnnyCage - Narrated Guides & Walkthroughs
· used with permission
2. Navigate the Labyrinth and Ascend to the Walls
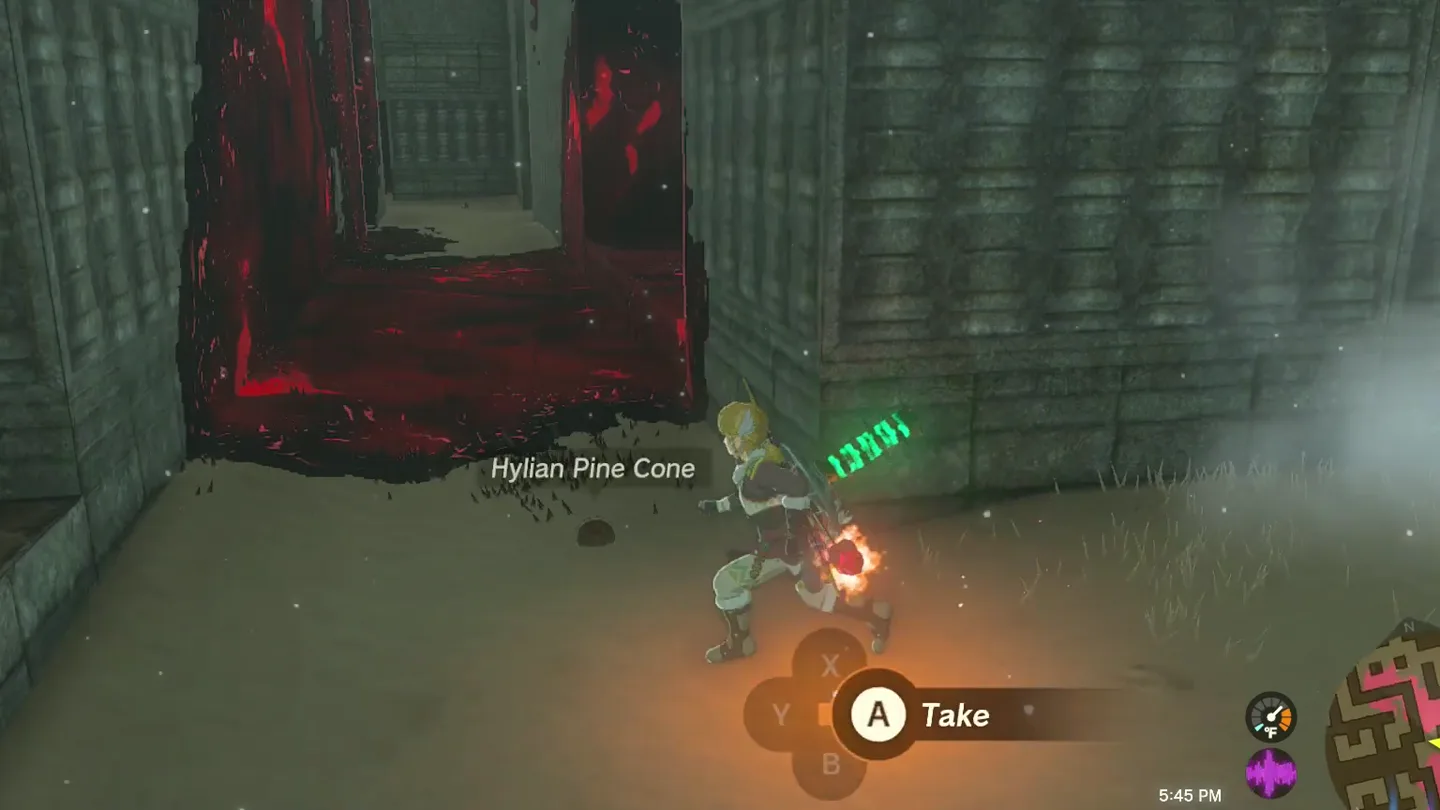
Follow the pine cones. Continue along the trail of Hylian Pine Cones through the labyrinth.
Ascend to the walls. When the trail passes a low niche, use Ascend to reach the top of the maze walls.
Keep following the trail of Hylian Pine Cones through the labyrinth; Ascend to the wall tops at the low niche. Screenshot (cropped) from SweetJohnnyCage - Narrated Guides & Walkthroughs
· used with permission
3. Cross the Top and Descend to the Shrine
Walk east. Cross the top of the labyrinth toward the eastern side until two glowing torches are visible below.
Glide to the torches. Drop from the wall and glide down beside them, then resume following the pine-cone trail.
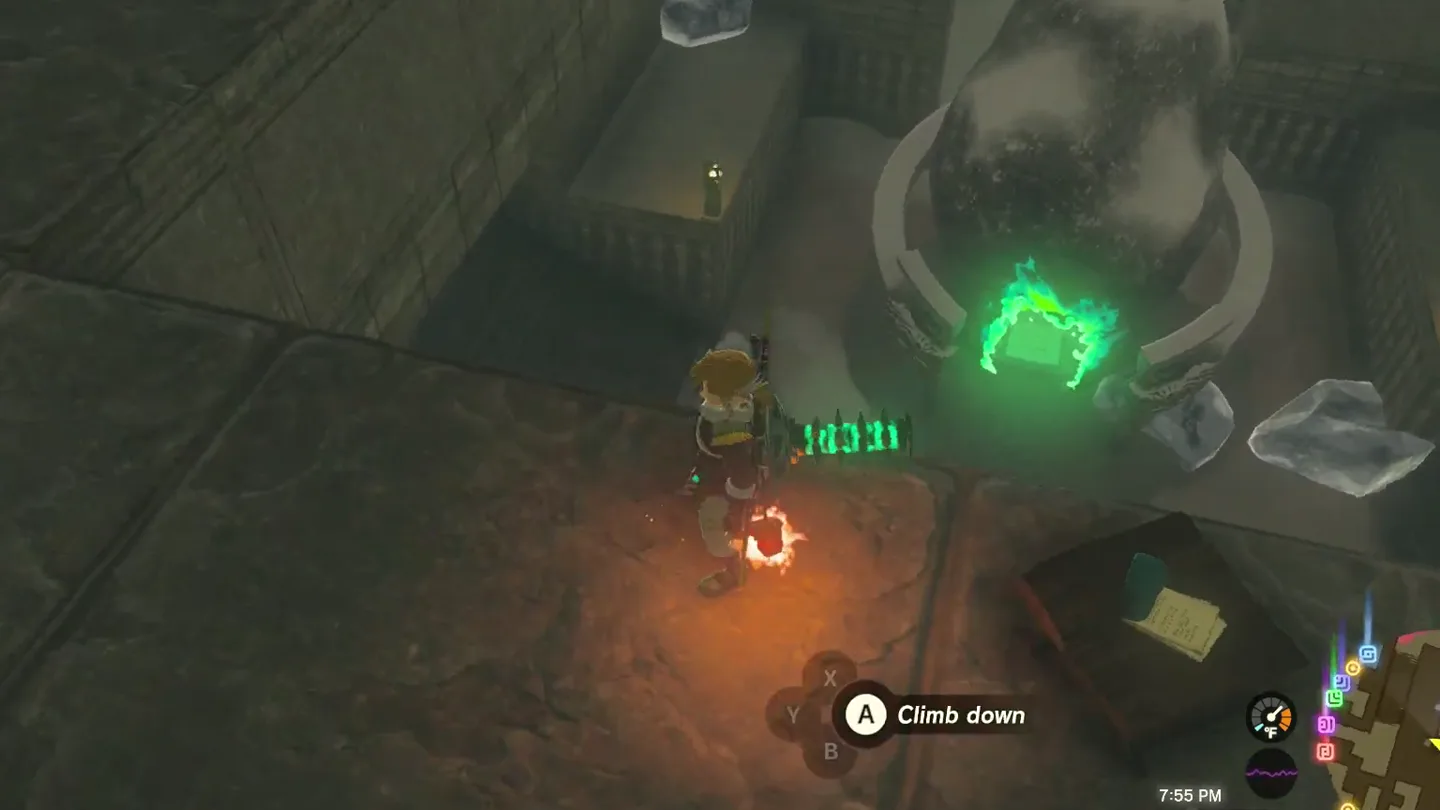
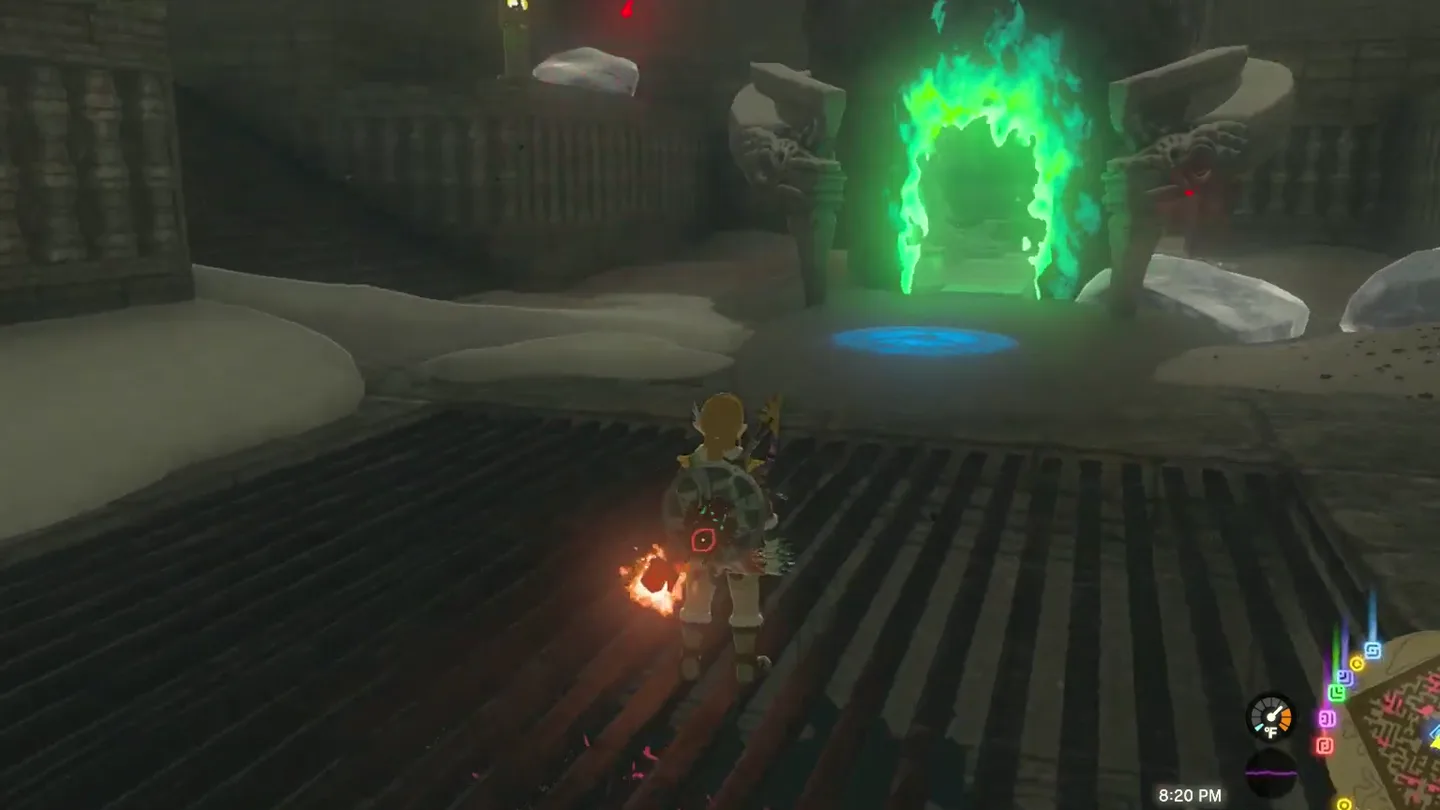
Clear the entrance. Melt the ice surrounding the shrine entrance with a fire item or a campfire.
1 Near the east side, melt the ice around the shrine entrance ① with a fire item or a campfire. Screenshot (cropped) from SweetJohnnyCage - Narrated Guides & Walkthroughs
· used with permission
With the ice gone, enter Mayaotaki Shrine. Screenshot (cropped) from SweetJohnnyCage - Narrated Guides & Walkthroughs
· used with permission
4. Enter the Shrine and Collect the Blessing
Open the chest. Enter the shrine and collect the Diamond from the chest.
Altar. Continue forward and examine the altar for the Light of Blessing .
Prepare for cold and Gloom
North Lomei Labyrinth is cold and contains Gloom. Bring cold resistance, plus a way to recover hearts affected by Gloom, before entering.
Chests
Chest Contents How 1 Diamond Reach the shrine through North Lomei Labyrinth, then open the chest inside