

TotK Korok Seeds Map: All 900 Locations, Puzzles, Hestu Costs
Every Korok seed in Tears of the Kingdom on one map: all 900 spots by region with puzzle details, the 20 puzzle types, Hestu's slot prices and rewards.
Korok Seeds are the currency for inventory slots, and you need less than half of them. This page explains the 1,000-versus-900 discrepancy, lists the 20 puzzle types with their solutions, maps all 900 spots, gives Hestu’s price ladder and tells you when to stop.
How many Korok Seeds are there?
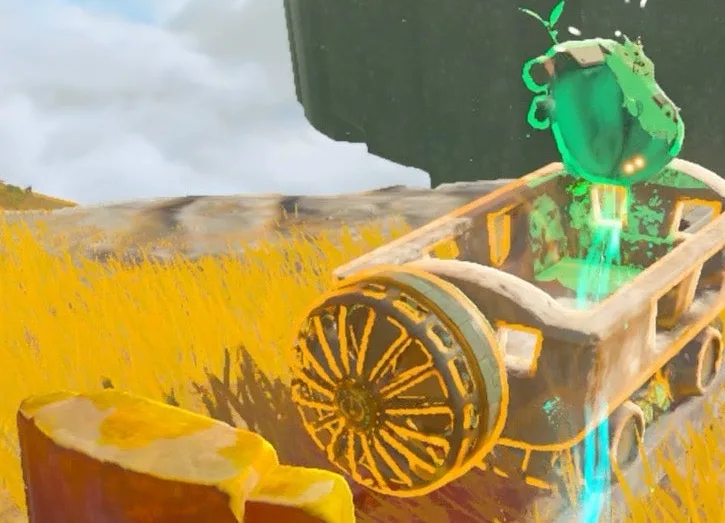
There are 1,000 seeds in 900 locations. The difference is the “Make Friends Meet” puzzle: you find a Korok with a backpack who wants to reach a friend, carry or build a vehicle to deliver it, and receive two seeds. Everything else gives one. A tally of “765 Koroks + 100 transport starts” is the same 900 spots counted a different way.
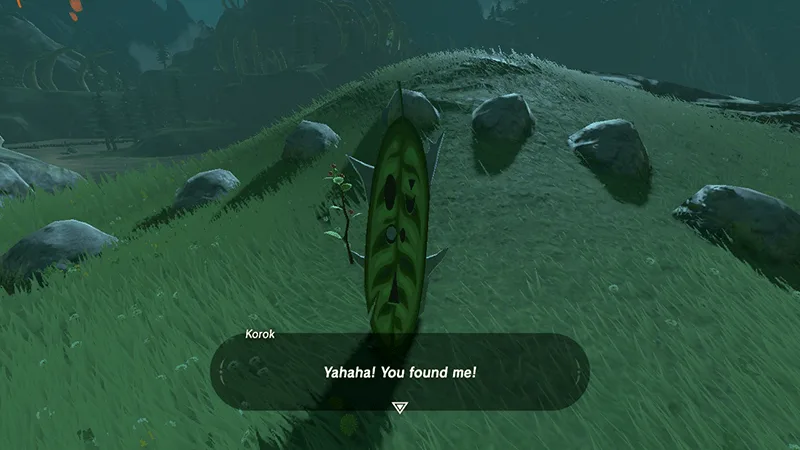
What are the 20 Korok puzzle types?
There are 20 puzzle types.
| Puzzle | How to solve it |
|---|---|
| Make Friends Meet | Carry the backpack Korok to the friend shown on its sign — Ultrahand, a vehicle or a Zonai wing. 2 seeds |
| Get Near Flowers | Follow the yellow flowers in order until they stop |
| Catch Cotton or Wool | Chase the floating fluff and touch it |
| Pick Up Stones | Lift the odd rock in a pattern of rocks |
| Arrange Stones | Complete the circle or pattern with the missing stone |
| Puzzle Blocks | Ultrahand the block into the matching shape |
| Examine Light Sparkles | Interact with the sparkle on the ground or tree |
| Jump in the Water | Dive into the ring of lily pads |
| Shoot Targets | Hit the balloons or targets with arrows |
| Reach Goal in Time | Race to the flag before the timer ends |
| Break Acorn | Shoot the hanging acorn |
| Jizo Offering | Put the missing fruit on the empty offering plate in front of the small statues |
| Put Rock on the Tree | Drop a boulder into the hollow stump |
| Corkscrew | Follow the spiral of stones to the center |
| Ascend | Use Ascend to pop through the rock formation |
| Fix the Roof | Ultrahand the missing roof piece into place |
| Fly and Land | Glide onto the marked platform |
| Ring a Bell | Strike the bell (often with an arrow) |
| Wall Stump | Sky only — find the stump set into a wall |
| Catch Fragments by Speeding Up | Sky only — dive through the falling fragments |

How many seeds does each Hestu upgrade cost?
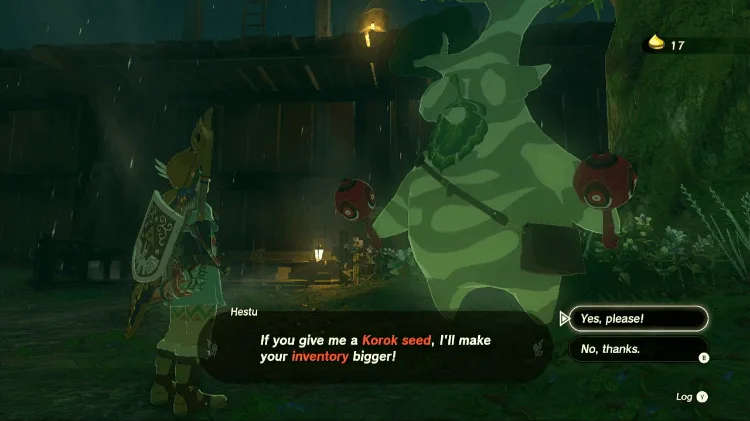
Hestu first appears at the foot of Lindor’s Brow, moves to Lookout Landing after two upgrades, and returns to Korok Forest once the forest’s trouble is solved (see Korok Forest). If you have already cleared any temple, he starts at Lookout Landing. At the first meeting he only expands two slots; you have to find him again for the rest.
| Slot | Weapons | Bows | Shields |
|---|---|---|---|
| Starting slots | 9 | 5 | 4 |
| +1 | 1 seed | 1 | 1 |
| +2 | 2 | 2 | 2 |
| +3 | 3 | 3 | 3 |
| +4 | 5 | 5 | 4 |
| +5 | 8 | 8 | 5 |
| +6 | 12 | 12 | 10 |
| +7 | 17 | 17 | 10 |
| +8 | 25 | 25 | 10 |
| +9 | 35 | 35 | 10 |
| +10 | 45 | — | 10 |
| +11 to +15 | — | — | 15 each |
| +16 | — | — | 20 |
| Total | 153 | 108 | 160 |
Expanding every slot takes 421 seeds in total. Practically: 421 is the number that matters, and the remaining 579 seeds are for completion.
Hestu’s locations at Lindor’s Brow, Lookout Landing and Korok Forest, plus the full price ladder, are in TotK inventory expansion.
Browse Korok Seeds by region
Choose a region for its own map, all puzzle locations and a solution reference. Seeds and locations are counted separately.
| Region | Locations | Seeds |
|---|---|---|
| Akkala | 57 | 65 |
| Eldin | 67 | 80 |
| Faron | 31 | 36 |
| Gerudo | 97 | 108 |
| Great Hyrule Forest | 15 | 17 |
| Great Sky Island | 14 | 15 |
| Hebra | 64 | 70 |
| Hyrule Field | 221 | 243 |
| Lanayru | 112 | 124 |
| Necluda | 150 | 166 |
| Tabantha | 72 | 76 |
| Total | 900 | 1000 |
Where are all 900 Korok locations?
Loading the terrain map… slow connections can take a few seconds.
Some terrain tiles failed to load.
Drag to move and zoom in to tell the points apart; on a computer, click the map first and the mouse wheel zooms it. Ticks are saved in this browser only; no account is needed.
Progress cannot be saved in this browser session.
Every spot comes from the game’s own placement data: 800 hidden Koroks worth one seed each, and 100 Koroks who want to reach a friend, worth two — 1,000 seeds. Zoom into the map and switch between the ground and the sky islands with the buttons above it; click any point for its puzzle, place and coordinates, and tick it off once found — the ticks stay in this browser. The map data sorts the puzzles into 24 kinds; the most common are lift a rock 160, take the korok to its friend (2 seeds) 100, touch a sparkle that stays put 75, build the shape from the blocks 59, complete a rock pattern 48, follow a flower trail 45. Those puzzle names are descriptive labels — the game itself never names Korok puzzles.
“Nearest landmark” is the closest place name on the map; the region is the region of the nearest shrine. For a Korok who wants to reach a friend, the last column is where the friend waits; the “Map” button after the place name shows it on the map.
Hyrule Field (221)
Click “Show on map” to move the map above to that spot.
| # | Puzzle | Nearest landmark | Region | Location | Where the friend waits |
|---|---|---|---|---|---|
| 1 | Ascend through the rock | Rutile Lake | Hyrule Field | Show on map | |
| 2 | Ascend through the rock | Dalite Forest | Hyrule Field | Show on map | |
| 3 | Ascend through the rock | Lindor's Brow | Hyrule Field | Show on map | |
| 4 | Ascend through the rock | East Castle Town | Hyrule Field | Show on map | |
| 5 | Ascend through the rock | Mount Gustaf | Hyrule Field | Show on map | |
| 6 | Ascend through the rock | Great Plateau | Hyrule Field | Show on map | |
| 7 | Ascend through the rock | Temple of Time Ruins | Hyrule Field | Show on map | |
| 8 | Ascend through the rock | Crenel Peak | Hyrule Field | Show on map | |
| 9 | Ascend through the rock | Proxim Bridge | Hyrule Field | Show on map | |
| 10 | Ascend through the rock | Temple of Time | Hyrule Field | Show on map | |
| 11 | Build the shape from the blocks | Tamio River | Hyrule Field | Show on map | |
| 12 | Build the shape from the blocks | Eastern Abbey | Hyrule Field | Show on map | |
| 13 | Build the shape from the blocks | Temple of Time Ruins | Hyrule Field | Show on map | |
| 14 | Build the shape from the blocks | Batrea Lake | Hyrule Field | Show on map | |
| 15 | Build the shape from the blocks | Library | Hyrule Field | Show on map | |
| 16 | Build the shape from the blocks | Upland Lindor | Hyrule Field | Show on map | |
| 17 | Build the shape from the blocks | Sage Temple Ruins | Hyrule Field | Show on map | |
| 18 | Build the shape from the blocks | Regencia River | Hyrule Field | Show on map | |
| 19 | Build the shape from the blocks | First Gatehouse | Hyrule Field | Show on map | |
| 20 | Build the shape from the blocks | Water Reservoir | Hyrule Field | Show on map | |
| 21 | Catch a falling seed | Giant's Forest | Hyrule Field | Show on map | |
| 22 | Catch a falling seed | Regencia River | Hyrule Field | Show on map | |
| 23 | Catch a falling seed | Coliseum Ruins | Hyrule Field | Show on map | |
| 24 | Catch a falling seed | Whistling Hill | Hyrule Field | Show on map | |
| 25 | Catch a falling seed | Orsedd Bridge | Hyrule Field | Show on map | |
| 26 | Catch a falling seed | Batrea Lake | Hyrule Field | Show on map | |
| 27 | Catch a falling seed | Crenel Peak | Hyrule Field | Show on map | |
| 28 | Chase a moving sparkle | Ludfo's Bog | Hyrule Field | Show on map | |
| 29 | Chase a moving sparkle | West Hyrule Plains | Hyrule Field | Show on map | |
| 30 | Chase a moving sparkle | Regencia River | Hyrule Field | Show on map | |
| 31 | Chase a moving sparkle | Regencia River | Hyrule Field | Show on map | |
| 32 | Chase a moving sparkle | Hopper Pond | Hyrule Field | Show on map | |
| 33 | Chase a moving sparkle | Guards' Chamber | Hyrule Field | Show on map | |
| 34 | Chase a moving sparkle | Quarry Ruins | Hyrule Field | Show on map | |
| 35 | Chase a moving sparkle | Castle Town Prison | Hyrule Field | Show on map | |
| 36 | Chase a moving sparkle | Scout's Hill | Hyrule Field | Show on map | |
| 37 | Chase a moving sparkle | Crenel Hills | Hyrule Field | Show on map | |
| 38 | Chase a moving sparkle | Hyrule Forest Park | Hyrule Field | Show on map | |
| 39 | Chase a moving sparkle | Whistling Hill | Hyrule Field | Show on map | |
| 40 | Complete a rock pattern | Mount Rhoam | Hyrule Field | Show on map | |
| 41 | Complete a rock pattern | Tamio River | Hyrule Field | Show on map | |
| 42 | Complete a rock pattern | Carok Bridge | Hyrule Field | Show on map | |
| 43 | Complete a rock pattern | Mount Daphnes | Hyrule Field | Show on map | |
| 44 | Complete a rock pattern | Mount Faloraa | Hyrule Field | Show on map | |
| 45 | Complete a rock pattern | Dining Hall | Hyrule Field | Show on map | |
| 46 | Complete a rock pattern | Lake Kolomo | Hyrule Field | Show on map | |
| 47 | Complete a rock pattern | Applean Forest | Hyrule Field | Show on map | |
| 48 | Dive into the ring of lily pads | Mount Rhoam | Hyrule Field | Show on map | |
| 49 | Dive into the ring of lily pads | Aquame Bridge | Hyrule Field | Show on map | |
| 50 | Dive into the ring of lily pads | Docks | Hyrule Field | Show on map | |
| 51 | Dive into the ring of lily pads | Hyrule Castle Moat | Hyrule Field | Show on map | |
| 52 | Dive into the ring of lily pads | Orsedd Bridge | Hyrule Field | Show on map | |
| 53 | Follow a flower trail | Illumeni Plateau | Hyrule Field | Show on map | |
| 54 | Follow a flower trail | Rutile Lake | Hyrule Field | Show on map | |
| 55 | Follow a flower trail | Hopper Pond | Hyrule Field | Show on map | |
| 56 | Follow a flower trail | Dalite Forest | Hyrule Field | Show on map | |
| 57 | Follow a flower trail | Crenel Hills | Hyrule Field | Show on map | |
| 58 | Follow a flower trail | Tabantha Bridge Stable | Hyrule Field | Show on map | |
| 59 | Follow a flower trail | Guards' Chamber | Hyrule Field | Show on map | |
| 60 | Follow a flower trail | Bargainer Statue | Hyrule Field | Show on map | |
| 61 | Follow a flower trail | Cora Lake | Hyrule Field | Show on map | |
| 62 | Follow a flower trail | Crenel Peak | Hyrule Field | Show on map | |
| 63 | Follow a flower trail | Romani Plains | Hyrule Field | Show on map | |
| 64 | Land on the target | Rutile Lake | Hyrule Field | Show on map | |
| 65 | Land on the target | North Hyrule Plain | Hyrule Field | Show on map | |
| 66 | Land on the target | Ancient Tree Stump | Hyrule Field | Show on map | |
| 67 | Land on the target | Docks | Hyrule Field | Show on map | |
| 68 | Land on the target | Eastern Abbey | Hyrule Field | Show on map | |
| 69 | Lift a rock | Tabantha Bridge Stable | Hyrule Field | Show on map | |
| 70 | Lift a rock | Tanagar Canyon | Hyrule Field | Show on map | |
| 71 | Lift a rock | Hyrule Ridge | Hyrule Field | Show on map | |
| 72 | Lift a rock | Thundra Plateau | Hyrule Field | Show on map | |
| 73 | Lift a rock | Rutile Lake | Hyrule Field | Show on map | |
| 74 | Lift a rock | Nima Plain | Hyrule Field | Show on map | |
| 75 | Lift a rock | Satori Mountain | Hyrule Field | Show on map | |
| 76 | Lift a rock | Dalite Forest | Hyrule Field | Show on map | |
| 77 | Lift a rock | North Hyrule Plain | Hyrule Field | Show on map | |
| 78 | Lift a rock | Giant's Forest | Hyrule Field | Show on map | |
| 79 | Lift a rock | Jeddo Bridge | Hyrule Field | Show on map | |
| 80 | Lift a rock | Nima Plain | Hyrule Field | Show on map | |
| 81 | Lift a rock | Regencia River | Hyrule Field | Show on map | |
| 82 | Lift a rock | Nima Plain | Hyrule Field | Show on map | |
| 83 | Lift a rock | Mini Stable | Hyrule Field | Show on map | |
| 84 | Lift a rock | Digdogg Suspension Bridge | Hyrule Field | Show on map | |
| 85 | Lift a rock | Regencia River | Hyrule Field | Show on map | |
| 86 | Lift a rock | Gerudo Canyon Pass | Hyrule Field | Show on map | |
| 87 | Lift a rock | Mount Hylia | Hyrule Field | Show on map | |
| 88 | Lift a rock | Dining Hall | Hyrule Field | Show on map | |
| 89 | Lift a rock | Hyrule Castle Moat | Hyrule Field | Show on map | |
| 90 | Lift a rock | First Gatehouse | Hyrule Field | Show on map | |
| 91 | Lift a rock | Bargainer Statue | Hyrule Field | Show on map | |
| 92 | Lift a rock | Central Square | Hyrule Field | Show on map | |
| 93 | Lift a rock | Hyrule Castle Town Ruins | Hyrule Field | Show on map | |
| 94 | Lift a rock | Hyrule Castle Moat | Hyrule Field | Show on map | |
| 95 | Lift a rock | Mount Gustaf | Hyrule Field | Show on map | |
| 96 | Lift a rock | Windvane Meadow | Hyrule Field | Show on map | |
| 97 | Lift a rock | Windvane Meadow | Hyrule Field | Show on map | |
| 98 | Lift a rock | Great Plateau | Hyrule Field | Show on map | |
| 99 | Lift a rock | Lake Kolomo | Hyrule Field | Show on map | |
| 100 | Lift a rock | Lake Kolomo | Hyrule Field | Show on map | |
| 101 | Lift a rock | Lake Hylia | Hyrule Field | Show on map | |
| 102 | Lift a rock | Mount Faloraa | Hyrule Field | Show on map | |
| 103 | Lift a rock | Cora Lake | Hyrule Field | Show on map | |
| 104 | Lift a rock | Ranch Ruins | Hyrule Field | Show on map | |
| 105 | Lift a rock | Bottomless Pond | Hyrule Field | Show on map | |
| 106 | Lift a rock | Owlan Bridge | Hyrule Field | Show on map | |
| 107 | Lift a rock | Proxim Bridge | Hyrule Field | Show on map | |
| 108 | Lift a rock | Nabi Lake | Hyrule Field | Show on map | |
| 109 | Lift a rock | Lake Hylia | Hyrule Field | Show on map | |
| 110 | Lift a rock | Thims Bridge | Hyrule Field | Show on map | |
| 111 | Lift a rock | Crenel Peak | Hyrule Field | Show on map | |
| 112 | Lift a rock | Moor Garrison Ruins | Hyrule Field | Show on map | |
| 113 | Lift a rock | South Hyrule Sky Archipelago | Hyrule Field | Show on map | |
| 114 | Lift a rock | Faron Sky Archipelago | Hyrule Field | Show on map | |
| 115 | Lift a rock | Great Sky Island | Hyrule Field | Show on map | |
| 116 | Lift a rock | Princess Zelda's Room | Hyrule Field | Show on map | |
| 117 | Lift a rock | Hyrule Garrison Ruins | Hyrule Field | Show on map | |
| 118 | Pull out the plug | Regencia River | Hyrule Field | Show on map | |
| 119 | Pull out the plug | Mini Stable | Hyrule Field | Show on map | |
| 120 | Pull out the plug | Forest of Spirits | Hyrule Field | Show on map | |
| 121 | Put a boulder on its stand | Rutile Lake | Hyrule Field | Show on map | |
| 122 | Put a boulder on its stand | New Serenne Stable | Hyrule Field | Show on map | |
| 123 | Put a boulder on its stand | Squabble River | Hyrule Field | Show on map | |
| 124 | Put a boulder on its stand | Hylia River | Hyrule Field | Show on map | |
| 125 | Put a boulder on its stand | Deya Lake | Hyrule Field | Show on map | |
| 126 | Put a boulder on its stand | Lake Hylia | Hyrule Field | Show on map | |
| 127 | Put a boulder on its stand | Cora Lake | Hyrule Field | Show on map | |
| 128 | Put a boulder on its stand | Finra Woods | Hyrule Field | Show on map | |
| 129 | Put the missing fruit on the offering plate | North Hyrule Plain | Hyrule Field | Show on map | |
| 130 | Put the missing fruit on the offering plate | Safula Hill | Hyrule Field | Show on map | |
| 131 | Put the missing fruit on the offering plate | Outskirt Stable | Hyrule Field | Show on map | |
| 132 | Put the missing fruit on the offering plate | Aldor Foothills | Hyrule Field | Show on map | |
| 133 | Put the missing fruit on the offering plate | Temple of Time Ruins | Hyrule Field | Show on map | |
| 134 | Put the missing fruit on the offering plate | Zelo Pond | Hyrule Field | Show on map | |
| 135 | Put the roof back together | Great Fairy Fountain | Hyrule Field | Show on map | |
| 136 | Put the roof back together | Lake Hylia | Hyrule Field | Show on map | |
| 137 | Put the roof back together | Proxim Bridge | Hyrule Field | Show on map | |
| 138 | Reach the goal before time runs out | Tanagar Canyon | Hyrule Field | Show on map | |
| 139 | Reach the goal before time runs out | Upland Lindor | Hyrule Field | Show on map | |
| 140 | Reach the goal before time runs out | Tabantha Bridge Stable | Hyrule Field | Show on map | |
| 141 | Reach the goal before time runs out | Castle Town Prison | Hyrule Field | Show on map | |
| 142 | Reach the goal before time runs out | Gatepost Town Ruins | Hyrule Field | Show on map | |
| 143 | Reach the goal before time runs out | Bridge of Hylia | Hyrule Field | Show on map | |
| 144 | Ring the bell | Sanctum | Hyrule Field | Show on map | |
| 145 | Shoot a balloon | Ultra Ball Haul Check-In | Hyrule Field | Show on map | |
| 146 | Shoot a balloon | Mini Stable | Hyrule Field | Show on map | |
| 147 | Shoot a balloon | Moat Bridge | Hyrule Field | Show on map | |
| 148 | Shoot a balloon | Mount Gustaf | Hyrule Field | Show on map | |
| 149 | Shoot a balloon | Temple of Time Ruins | Hyrule Field | Show on map | |
| 150 | Shoot a balloon | Thims Bridge | Hyrule Field | Show on map | |
| 151 | Shoot a balloon | Princess Zelda's Study | Hyrule Field | Show on map | |
| 152 | Shoot a balloon | Second Gatehouse | Hyrule Field | Show on map | |
| 153 | Shoot a hanging acorn | Hyrule Castle Moat | Hyrule Field | Show on map | |
| 154 | Shoot a hanging acorn | Helmhead Bridge | Hyrule Field | Show on map | |
| 155 | Shoot a hanging acorn | Breach of Demise | Hyrule Field | Show on map | |
| 156 | Shoot a hanging acorn | Regencia River | Hyrule Field | Show on map | |
| 157 | Shoot a hanging acorn | Mount Daphnes | Hyrule Field | Show on map | |
| 158 | Shoot a hanging acorn | Manhala Bridge | Hyrule Field | Show on map | |
| 159 | Shoot a hanging acorn | Docks | Hyrule Field | Show on map | |
| 160 | Shoot a hanging acorn | Gatepost Town Ruins | Hyrule Field | Show on map | |
| 161 | Shoot a hanging acorn | Bridge of Hylia | Hyrule Field | Show on map | |
| 162 | Shoot a hanging acorn | Boneyard Bridge | Hyrule Field | Show on map | |
| 163 | Shoot a hanging acorn | Zelo Pond | Hyrule Field | Show on map | |
| 164 | Shoot the acorn in a hole | Nima Plain | Hyrule Field | Show on map | |
| 165 | Shoot the acorn in a hole | Outskirt Stable | Hyrule Field | Show on map | |
| 166 | Shoot the acorn in a hole | Hyrule Cathedral | Hyrule Field | Show on map | |
| 167 | Shoot the acorn in a hole | Ranch Ruins | Hyrule Field | Show on map | |
| 168 | Shoot the acorn in a hole | Batrea Lake | Hyrule Field | Show on map | |
| 169 | Shoot the acorn in a hole | Hyrule Castle Moat | Hyrule Field | Show on map | |
| 170 | Shoot the acorn in a hole | Mount Gustaf | Hyrule Field | Show on map | |
| 171 | Shoot the acorn in a hole | Windvane Meadow | Hyrule Field | Show on map | |
| 172 | Shoot the acorn in a hole | Thims Bridge | Hyrule Field | Show on map | |
| 173 | Shoot the balloons by a pinwheel | Jeddo Bridge | Hyrule Field | Show on map | |
| 174 | Shoot the balloons by a pinwheel | Regencia River | Hyrule Field | Show on map | |
| 175 | Shoot the balloons by a pinwheel | Observation Room | Hyrule Field | Show on map | |
| 176 | Shoot the balloons by a pinwheel | Lockup | Hyrule Field | Show on map | |
| 177 | Shoot the balloons by a pinwheel | Passeri Greenbelt | Hyrule Field | Show on map | |
| 178 | Shoot the balloons by a pinwheel | Forest of Spirits | Hyrule Field | Show on map | |
| 179 | Shoot the balloons by a pinwheel | Forest of Time | Hyrule Field | Show on map | |
| 180 | Shoot the balloons by a pinwheel | Lake Hylia | Hyrule Field | Show on map | |
| 181 | Shoot the balloons by a pinwheel | Moor Garrison Ruins | Hyrule Field | Show on map | |
| 182 | Shoot the balloons by a pinwheel | Princess Zelda's Study | Hyrule Field | Show on map | |
| 183 | Take the Korok to its friend (2 seeds) | Illumeni Plateau | Hyrule Field | Show on map | Illumeni Plateau Map |
| 184 | Take the Korok to its friend (2 seeds) | Ludfo's Bog | Hyrule Field | Show on map | Ludfo's Bog Map |
| 185 | Take the Korok to its friend (2 seeds) | Tabantha Bridge Stable | Hyrule Field | Show on map | Washa's Bluff Map |
| 186 | Take the Korok to its friend (2 seeds) | Salari Hill | Hyrule Field | Show on map | Irch Plain Map |
| 187 | Take the Korok to its friend (2 seeds) | Manhala Bridge | Hyrule Field | Show on map | Regencia River Map |
| 188 | Take the Korok to its friend (2 seeds) | Jeddo Bridge | Hyrule Field | Show on map | Jeddo Bridge Map |
| 189 | Take the Korok to its friend (2 seeds) | Outskirt Stable | Hyrule Field | Show on map | Outskirt Stable Map |
| 190 | Take the Korok to its friend (2 seeds) | Mount Faloraa | Hyrule Field | Show on map | Mount Hylia Map |
| 191 | Take the Korok to its friend (2 seeds) | River of the Dead | Hyrule Field | Show on map | River of the Dead Map |
| 192 | Take the Korok to its friend (2 seeds) | Castle Town Prison | Hyrule Field | Show on map | Hyrule Castle Moat Map |
| 193 | Take the Korok to its friend (2 seeds) | Hyrule Garrison Ruins | Hyrule Field | Show on map | Exchange Ruins Map |
| 194 | Take the Korok to its friend (2 seeds) | Whistling Hill | Hyrule Field | Show on map | East Post Ruins Map |
| 195 | Take the Korok to its friend (2 seeds) | Forest of Time | Hyrule Field | Show on map | Forest of Time Map |
| 196 | Take the Korok to its friend (2 seeds) | Gatepost Town Ruins | Hyrule Field | Show on map | Great Plateau Map |
| 197 | Take the Korok to its friend (2 seeds) | Lake Hylia | Hyrule Field | Show on map | Lake Hylia Map |
| 198 | Take the Korok to its friend (2 seeds) | Helmhead Bridge | Hyrule Field | Show on map | Rauru Settlement Ruins Map |
| 199 | Take the Korok to its friend (2 seeds) | Orsedd Bridge | Hyrule Field | Show on map | Hylia River Map |
| 200 | Take the Korok to its friend (2 seeds) | Horwell Bridge | Hyrule Field | Show on map | Nabi Lake Map |
| 201 | Take the Korok to its friend (2 seeds) | Owlan Bridge | Hyrule Field | Show on map | Hills of Baumer Map |
| 202 | Take the Korok to its friend (2 seeds) | Hylia River | Hyrule Field | Show on map | Squabble River Map |
| 203 | Take the Korok to its friend (2 seeds) | Zelo Pond | Hyrule Field | Show on map | Mercay Island Map |
| 204 | Take the Korok to its friend (2 seeds) | Great Sky Island | Hyrule Field | Show on map | Great Sky Island Map |
| 205 | Touch a sparkle that stays put | Thundra Plateau | Hyrule Field | Show on map | |
| 206 | Touch a sparkle that stays put | Lindor's Brow | Hyrule Field | Show on map | |
| 207 | Touch a sparkle that stays put | Seres Scablands | Hyrule Field | Show on map | |
| 208 | Touch a sparkle that stays put | West Hyrule Plains | Hyrule Field | Show on map | |
| 209 | Touch a sparkle that stays put | Jeddo Bridge | Hyrule Field | Show on map | |
| 210 | Touch a sparkle that stays put | Sanidin Park Ruins | Hyrule Field | Show on map | |
| 211 | Touch a sparkle that stays put | River of the Dead | Hyrule Field | Show on map | |
| 212 | Touch a sparkle that stays put | River of the Dead | Hyrule Field | Show on map | |
| 213 | Touch a sparkle that stays put | Elma Knolls | Hyrule Field | Show on map | |
| 214 | Touch a sparkle that stays put | First Gatehouse | Hyrule Field | Show on map | |
| 215 | Touch a sparkle that stays put | Temple of Time Ruins | Hyrule Field | Show on map | |
| 216 | Touch a sparkle that stays put | Bridge of Hylia | Hyrule Field | Show on map | |
| 217 | Touch a sparkle that stays put | Hylia Island | Hyrule Field | Show on map | |
| 218 | Touch a sparkle that stays put | Lake Hylia | Hyrule Field | Show on map | |
| 219 | Touch a sparkle that stays put | Princess Zelda's Study | Hyrule Field | Show on map | |
| 220 | Touch a sparkle that stays put | Sanctum | Hyrule Field | Show on map | |
| 221 | Touch the target | South Hyrule Sky Archipelago | Hyrule Field | Show on map |
Necluda (150)
Click “Show on map” to move the map above to that spot.
| # | Puzzle | Nearest landmark | Region | Location | Where the friend waits |
|---|---|---|---|---|---|
| 1 | Ascend through the rock | Keelay Plain | Necluda | Show on map | |
| 2 | Ascend through the rock | Floria River | Necluda | Show on map | |
| 3 | Build the shape from the blocks | Dueling Peaks | Necluda | Show on map | |
| 4 | Build the shape from the blocks | Floria Falls | Necluda | Show on map | |
| 5 | Build the shape from the blocks | Purifier Lake | Necluda | Show on map | |
| 6 | Build the shape from the blocks | Deepback Bay | Necluda | Show on map | |
| 7 | Build the shape from the blocks | Floria River | Necluda | Show on map | |
| 8 | Build the shape from the blocks | Meda Mountain | Necluda | Show on map | |
| 9 | Build the shape from the blocks | Ebon Mountain | Necluda | Show on map | |
| 10 | Catch a falling light | North Necluda Sky Archipelago | Necluda | Show on map | |
| 11 | Catch a falling seed | Hills of Baumer | Necluda | Show on map | |
| 12 | Catch a falling seed | Lantern Lake | Necluda | Show on map | |
| 13 | Catch a falling seed | Dueling Peaks | Necluda | Show on map | |
| 14 | Catch a falling seed | Corta Lake | Necluda | Show on map | |
| 15 | Catch a falling seed | Lakeside Stable | Necluda | Show on map | |
| 16 | Catch a falling seed | Floria River | Necluda | Show on map | |
| 17 | Catch a falling seed | Bubinga Forest | Necluda | Show on map | |
| 18 | Catch a falling seed | Hateno Beach | Necluda | Show on map | |
| 19 | Chase a moving sparkle | Deya Village Ruins | Necluda | Show on map | |
| 20 | Chase a moving sparkle | Kakariko Village | Necluda | Show on map | |
| 21 | Chase a moving sparkle | Ubota Point | Necluda | Show on map | |
| 22 | Chase a moving sparkle | Lakeside Stable | Necluda | Show on map | |
| 23 | Chase a moving sparkle | Lake Siela | Necluda | Show on map | |
| 24 | Chase a moving sparkle | Lake Jarrah | Necluda | Show on map | |
| 25 | Chase a moving sparkle | Courage Steppe | Necluda | Show on map | |
| 26 | Chase a moving sparkle | Lake Sumac | Necluda | Show on map | |
| 27 | Chase a moving sparkle | Koholit Rock | Necluda | Show on map | |
| 28 | Complete a rock pattern | Bonooru's Stand | Necluda | Show on map | |
| 29 | Complete a rock pattern | Mount Rozudo | Necluda | Show on map | |
| 30 | Complete a rock pattern | Temto Hill | Necluda | Show on map | |
| 31 | Complete a rock pattern | West Necluda Sky Archipelago | Necluda | Show on map | |
| 32 | Complete a rock pattern | Zonaite Forge Island | Necluda | Show on map | |
| 33 | Complete a rock pattern | Keelay Plain | Necluda | Show on map | |
| 34 | Complete a rock pattern | Keya Pond | Necluda | Show on map | |
| 35 | Dive into the ring of lily pads | Lake Hylia | Necluda | Show on map | |
| 36 | Dive into the ring of lily pads | Damel Forest | Necluda | Show on map | |
| 37 | Dive into the ring of lily pads | Ubota Point | Necluda | Show on map | |
| 38 | Dive into the ring of lily pads | Floria Falls | Necluda | Show on map | |
| 39 | Dive into the ring of lily pads | Fir River | Necluda | Show on map | |
| 40 | Dive into the ring of lily pads | Squabble River | Necluda | Show on map | |
| 41 | Dive into the ring of lily pads | Firly Plateau | Necluda | Show on map | |
| 42 | Follow a flower trail | Hills of Baumer | Necluda | Show on map | |
| 43 | Follow a flower trail | Hickaly Woods | Necluda | Show on map | |
| 44 | Follow a flower trail | Bronas Forest | Necluda | Show on map | |
| 45 | Follow a flower trail | Zonaite Forge Island | Necluda | Show on map | |
| 46 | Follow a flower trail | Scout's Hill | Necluda | Show on map | |
| 47 | Follow a flower trail | Deya Lake | Necluda | Show on map | |
| 48 | Follow a flower trail | Lake Siela | Necluda | Show on map | |
| 49 | Land on the target | Dueling Peaks | Necluda | Show on map | |
| 50 | Land on the target | Atun Valley | Necluda | Show on map | |
| 51 | Land on the target | Camphor Pond | Necluda | Show on map | |
| 52 | Land on the target | West Necluda Sky Archipelago | Necluda | Show on map | |
| 53 | Lift a rock | Deya Lake | Necluda | Show on map | |
| 54 | Lift a rock | Telta Lake | Necluda | Show on map | |
| 55 | Lift a rock | Lantern Lake | Necluda | Show on map | |
| 56 | Lift a rock | Lake Siela | Necluda | Show on map | |
| 57 | Lift a rock | Kakariko Bridge | Necluda | Show on map | |
| 58 | Lift a rock | Kakariko Bridge | Necluda | Show on map | |
| 59 | Lift a rock | Riola Spring | Necluda | Show on map | |
| 60 | Lift a rock | Riola Spring | Necluda | Show on map | |
| 61 | Lift a rock | Floria Bridge | Necluda | Show on map | |
| 62 | Lift a rock | Martha's Landing | Necluda | Show on map | |
| 63 | Lift a rock | Bronas Forest | Necluda | Show on map | |
| 64 | Lift a rock | Bonooru's Stand | Necluda | Show on map | |
| 65 | Lift a rock | Fort Hateno | Necluda | Show on map | |
| 66 | Lift a rock | Marblod Plain | Necluda | Show on map | |
| 67 | Lift a rock | Breman Peak | Necluda | Show on map | |
| 68 | Lift a rock | Oakle's Navel | Necluda | Show on map | |
| 69 | Lift a rock | Kitano Bay | Necluda | Show on map | |
| 70 | Lift a rock | Hateno Pasture | Necluda | Show on map | |
| 71 | Lift a rock | Firly Pond | Necluda | Show on map | |
| 72 | Lift a rock | Cape Cales | Necluda | Show on map | |
| 73 | Lift a rock | Rimba Beach | Necluda | Show on map | |
| 74 | Lift a rock | Solewood Range | Necluda | Show on map | |
| 75 | Lift a rock | Eventide Island | Necluda | Show on map | |
| 76 | Lift a rock | Zonaite Forge Island | Necluda | Show on map | |
| 77 | Lift a rock | Necluda Sky Archipelago | Necluda | Show on map | |
| 78 | Pull out the plug | Dueling Peaks | Necluda | Show on map | |
| 79 | Pull out the plug | Dueling Peaks Stable | Necluda | Show on map | |
| 80 | Pull out the plug | Hickaly Woods | Necluda | Show on map | |
| 81 | Pull out the plug | Squabble River | Necluda | Show on map | |
| 82 | Pull out the plug | Stinger Cliffs | Necluda | Show on map | |
| 83 | Pull out the plug | Solewood Range | Necluda | Show on map | |
| 84 | Pull out the plug | Tenoko Island | Necluda | Show on map | |
| 85 | Put a boulder on its stand | Hills of Baumer | Necluda | Show on map | |
| 86 | Put the missing fruit on the offering plate | Hylia River | Necluda | Show on map | |
| 87 | Put the missing fruit on the offering plate | Ebara Forest | Necluda | Show on map | |
| 88 | Put the missing fruit on the offering plate | Breman Peak | Necluda | Show on map | |
| 89 | Put the missing fruit on the offering plate | Samasa Plain | Necluda | Show on map | |
| 90 | Put the missing fruit on the offering plate | Marblod Plain | Necluda | Show on map | |
| 91 | Reach the goal before time runs out | Deya Lake | Necluda | Show on map | |
| 92 | Reach the goal before time runs out | Aris Beach | Necluda | Show on map | |
| 93 | Reach the goal before time runs out | Mount Taran | Necluda | Show on map | |
| 94 | Reach the goal before time runs out | Temto Hill | Necluda | Show on map | |
| 95 | Reach the goal before time runs out | Lurelin Village | Necluda | Show on map | |
| 96 | Reach the goal before time runs out | Zonaite Forge Island | Necluda | Show on map | |
| 97 | Ring the bell | Hateno School | Necluda | Show on map | |
| 98 | Shoot a balloon | Dueling Peaks | Necluda | Show on map | |
| 99 | Shoot a balloon | Cliffs of Quince | Necluda | Show on map | |
| 100 | Shoot a balloon | Squabble River | Necluda | Show on map | |
| 101 | Shoot a hanging acorn | Ring Ruins | Necluda | Show on map | |
| 102 | Shoot a hanging acorn | Zonai Survey Team Base | Necluda | Show on map | |
| 103 | Shoot a hanging acorn | Mount Floria | Necluda | Show on map | |
| 104 | Shoot the acorn in a hole | Squabble River | Necluda | Show on map | |
| 105 | Shoot the acorn in a hole | South Nabi Lake | Necluda | Show on map | |
| 106 | Shoot the acorn in a hole | Mable Ridge | Necluda | Show on map | |
| 107 | Shoot the acorn in a hole | Cape Cales | Necluda | Show on map | |
| 108 | Shoot the balloons by a pinwheel | Dueling Peaks | Necluda | Show on map | |
| 109 | Shoot the balloons by a pinwheel | Dueling Peaks | Necluda | Show on map | |
| 110 | Shoot the balloons by a pinwheel | Mount Floria | Necluda | Show on map | |
| 111 | Shoot the balloons by a pinwheel | Breman Peak | Necluda | Show on map | |
| 112 | Shoot the balloons by a pinwheel | Yambi Lake | Necluda | Show on map | |
| 113 | Shoot the balloons by a pinwheel | Ebon Mountain | Necluda | Show on map | |
| 114 | Shoot the balloons by a pinwheel | Retsam Forest | Necluda | Show on map | |
| 115 | Shoot the balloons by a pinwheel | Toronbo Beach | Necluda | Show on map | |
| 116 | Take the Korok to its friend (2 seeds) | Deya Lake | Necluda | Show on map | Deya Lake Map |
| 117 | Take the Korok to its friend (2 seeds) | Dueling Peaks | Necluda | Show on map | Dueling Peaks Map |
| 118 | Take the Korok to its friend (2 seeds) | Dueling Peaks Stable | Necluda | Show on map | Fort Hateno Map |
| 119 | Take the Korok to its friend (2 seeds) | Lakeside Stable | Necluda | Show on map | Ebara Forest Map |
| 120 | Take the Korok to its friend (2 seeds) | Lakeside Stable | Necluda | Show on map | Martha's Landing Map |
| 121 | Take the Korok to its friend (2 seeds) | East Hill | Necluda | Show on map | Quatta's Shelf Map |
| 122 | Take the Korok to its friend (2 seeds) | Cliffs of Quince | Necluda | Show on map | Cliffs of Quince Map |
| 123 | Take the Korok to its friend (2 seeds) | Oakle's Navel | Necluda | Show on map | Oakle's Navel Map |
| 124 | Take the Korok to its friend (2 seeds) | Rabella Wetlands | Necluda | Show on map | Dunsel Plateau Map |
| 125 | Take the Korok to its friend (2 seeds) | Temto Hill | Necluda | Show on map | Clarnet Coast Map |
| 126 | Take the Korok to its friend (2 seeds) | Clarnet Coast | Necluda | Show on map | Clarnet Coast Map |
| 127 | Take the Korok to its friend (2 seeds) | Hateno Pasture | Necluda | Show on map | Hateno Bay Map |
| 128 | Take the Korok to its friend (2 seeds) | Firly Pond | Necluda | Show on map | Ebon Mountain Map |
| 129 | Take the Korok to its friend (2 seeds) | Fir River | Necluda | Show on map | Ginner Woods Map |
| 130 | Take the Korok to its friend (2 seeds) | Palmorae Beach | Necluda | Show on map | Cape Cresia Map |
| 131 | Take the Korok to its friend (2 seeds) | Cape Cales | Necluda | Show on map | Toronbo Beach Map |
| 132 | Touch a sparkle that stays put | Lantern Lake | Necluda | Show on map | |
| 133 | Touch a sparkle that stays put | Jia Highlands | Necluda | Show on map | |
| 134 | Touch a sparkle that stays put | Mount Floria | Necluda | Show on map | |
| 135 | Touch a sparkle that stays put | Lake Floria | Necluda | Show on map | |
| 136 | Touch a sparkle that stays put | Squabble River | Necluda | Show on map | |
| 137 | Touch a sparkle that stays put | Ash Swamp | Necluda | Show on map | |
| 138 | Touch a sparkle that stays put | Taran Pass | Necluda | Show on map | |
| 139 | Touch a sparkle that stays put | Uten Marsh | Necluda | Show on map | |
| 140 | Touch a sparkle that stays put | Lake Jarrah | Necluda | Show on map | |
| 141 | Touch a sparkle that stays put | Naydra Snowfield | Necluda | Show on map | |
| 142 | Touch a sparkle that stays put | Firly Pond | Necluda | Show on map | |
| 143 | Touch a sparkle that stays put | Hateno Bay | Necluda | Show on map | |
| 144 | Touch a sparkle that stays put | Retsam Forest | Necluda | Show on map | |
| 145 | Touch a sparkle that stays put | Soka Point | Necluda | Show on map | |
| 146 | Touch a sparkle that stays put | Palmorae Ruins | Necluda | Show on map | |
| 147 | Touch a sparkle that stays put | Tenoko Island | Necluda | Show on map | |
| 148 | Touch a sparkle that stays put | Hateno Bay | Necluda | Show on map | |
| 149 | Touch a sparkle that stays put | Eventide Island | Necluda | Show on map | |
| 150 | Touch the target | Necluda Sky Archipelago | Necluda | Show on map |
Lanayru (112)
Click “Show on map” to move the map above to that spot.
| # | Puzzle | Nearest landmark | Region | Location | Where the friend waits |
|---|---|---|---|---|---|
| 1 | Ascend through the rock | Zodobon Highlands | Lanayru | Show on map | |
| 2 | Ascend through the rock | Robred Dropoff | Lanayru | Show on map | |
| 3 | Ascend through the rock | Ulria Grotto | Lanayru | Show on map | |
| 4 | Ascend through the rock | Talus Plateau | Lanayru | Show on map | |
| 5 | Build the shape from the blocks | Lanayru Great Spring | Lanayru | Show on map | |
| 6 | Build the shape from the blocks | Spool Bight | Lanayru | Show on map | |
| 7 | Build the shape from the blocks | Lodrum Headland | Lanayru | Show on map | |
| 8 | Build the shape from the blocks | Boné Pond | Lanayru | Show on map | |
| 9 | Build the shape from the blocks | Ploymus Mountain | Lanayru | Show on map | |
| 10 | Build the shape from the blocks | Spool Bight | Lanayru | Show on map | |
| 11 | Catch a falling light | Valor Island | Lanayru | Show on map | |
| 12 | Catch a falling light | Valor Island | Lanayru | Show on map | |
| 13 | Catch a falling light | Wellspring Island | Lanayru | Show on map | |
| 14 | Catch a falling seed | Rebonae Bridge | Lanayru | Show on map | |
| 15 | Catch a falling seed | Millennio Sandbar | Lanayru | Show on map | |
| 16 | Catch a falling seed | Mount Lanayru | Lanayru | Show on map | |
| 17 | Catch a falling seed | Horon Lagoon | Lanayru | Show on map | |
| 18 | Chase a moving sparkle | Ternio Trail | Lanayru | Show on map | |
| 19 | Chase a moving sparkle | Wintre Island | Lanayru | Show on map | |
| 20 | Chase a moving sparkle | Wellspring Island | Lanayru | Show on map | |
| 21 | Complete a rock pattern | Hylia River | Lanayru | Show on map | |
| 22 | Complete a rock pattern | Rutala River | Lanayru | Show on map | |
| 23 | Complete a rock pattern | Trotter's Downfall | Lanayru | Show on map | |
| 24 | Complete a rock pattern | Sokkala Bridge | Lanayru | Show on map | |
| 25 | Complete a rock pattern | Veiled Falls | Lanayru | Show on map | |
| 26 | Complete a rock pattern | Brynna Plain | Lanayru | Show on map | |
| 27 | Complete a rock pattern | Nirvata Lake | Lanayru | Show on map | |
| 28 | Complete a rock pattern | Walnot Mountain | Lanayru | Show on map | |
| 29 | Dive into the ring of lily pads | Zauz Island | Lanayru | Show on map | |
| 30 | Dive into the ring of lily pads | Nabi Lake | Lanayru | Show on map | |
| 31 | Dive into the ring of lily pads | Boné Pond | Lanayru | Show on map | |
| 32 | Dive into the ring of lily pads | Toto Lake | Lanayru | Show on map | |
| 33 | Dive into the ring of lily pads | Rutala River | Lanayru | Show on map | |
| 34 | Dive into the ring of lily pads | Tarm Point | Lanayru | Show on map | |
| 35 | Follow a flower trail | Bank of Wishes | Lanayru | Show on map | |
| 36 | Follow a flower trail | Rutala River | Lanayru | Show on map | |
| 37 | Follow a flower trail | Lanayru Promenade | Lanayru | Show on map | |
| 38 | Follow a flower trail | Lanayru Bay | Lanayru | Show on map | |
| 39 | Follow a flower trail | Tarm Point | Lanayru | Show on map | |
| 40 | Follow a flower trail | Afromsia Coast | Lanayru | Show on map | |
| 41 | Follow a flower trail | Sahasra Slope | Lanayru | Show on map | |
| 42 | Follow a flower trail | Shatterback Point | Lanayru | Show on map | |
| 43 | Land on the target | Ruto Mountain | Lanayru | Show on map | |
| 44 | Lift a rock | Hylia River | Lanayru | Show on map | |
| 45 | Lift a rock | Bottomless Pond | Lanayru | Show on map | |
| 46 | Lift a rock | Zelo Pond | Lanayru | Show on map | |
| 47 | Lift a rock | Sahasra Slope | Lanayru | Show on map | |
| 48 | Lift a rock | Molida Island | Lanayru | Show on map | |
| 49 | Lift a rock | Bannan Island | Lanayru | Show on map | |
| 50 | Lift a rock | Tabahl Woods | Lanayru | Show on map | |
| 51 | Lift a rock | Oren Bridge | Lanayru | Show on map | |
| 52 | Lift a rock | Rabia Plain | Lanayru | Show on map | |
| 53 | Lift a rock | Lanayru Promenade | Lanayru | Show on map | |
| 54 | Lift a rock | Great Zora Bridge | Lanayru | Show on map | |
| 55 | Lift a rock | Upland Zorana | Lanayru | Show on map | |
| 56 | Lift a rock | Zora's Domain | Lanayru | Show on map | |
| 57 | Lift a rock | Samasa Plain | Lanayru | Show on map | |
| 58 | Lift a rock | Spool Bight | Lanayru | Show on map | |
| 59 | Lift a rock | Tal Tal Peak | Lanayru | Show on map | |
| 60 | Lift a rock | Tal Tal Peak | Lanayru | Show on map | |
| 61 | Lift a rock | Talus Plateau | Lanayru | Show on map | |
| 62 | Pull out the plug | Eagus Bridge | Lanayru | Show on map | |
| 63 | Pull out the plug | Bank of Wishes | Lanayru | Show on map | |
| 64 | Pull out the plug | Peak of Awakening | Lanayru | Show on map | |
| 65 | Pull out the plug | Mount Lanayru | Lanayru | Show on map | |
| 66 | Put a boulder on its stand | Lanayru Road - West Gate | Lanayru | Show on map | |
| 67 | Put a boulder on its stand | Lake Siela | Lanayru | Show on map | |
| 68 | Put a boulder on its stand | Tal Tal Peak | Lanayru | Show on map | |
| 69 | Put a boulder on its stand | Lanayru Range | Lanayru | Show on map | |
| 70 | Put the missing fruit on the offering plate | Lanayru Road - West Gate | Lanayru | Show on map | |
| 71 | Put the roof back together | Rebonae Bridge | Lanayru | Show on map | |
| 72 | Reach the goal before time runs out | Rebonae Bridge | Lanayru | Show on map | |
| 73 | Reach the goal before time runs out | Nabi Lake | Lanayru | Show on map | |
| 74 | Reach the goal before time runs out | Zora River | Lanayru | Show on map | |
| 75 | Reach the goal before time runs out | Veiled Falls | Lanayru | Show on map | |
| 76 | Reach the goal before time runs out | Ralis Pond | Lanayru | Show on map | |
| 77 | Reach the goal before time runs out | Horon Lagoon | Lanayru | Show on map | |
| 78 | Shoot a balloon | Millennio Sandbar | Lanayru | Show on map | |
| 79 | Shoot a balloon | Lake Siela | Lanayru | Show on map | |
| 80 | Shoot a balloon | Mikau Lake | Lanayru | Show on map | |
| 81 | Shoot a hanging acorn | Inogo Bridge | Lanayru | Show on map | |
| 82 | Shoot a hanging acorn | Sahasra Slope | Lanayru | Show on map | |
| 83 | Shoot a hanging acorn | Rutala River | Lanayru | Show on map | |
| 84 | Shoot a hanging acorn | Phalian Highlands | Lanayru | Show on map | |
| 85 | Shoot the acorn in a hole | Ralis Pond | Lanayru | Show on map | |
| 86 | Shoot the balloons by a pinwheel | Inogo Bridge | Lanayru | Show on map | |
| 87 | Shoot the balloons by a pinwheel | Ja'Abu Ridge | Lanayru | Show on map | |
| 88 | Shoot the balloons by a pinwheel | Great Zora Bridge | Lanayru | Show on map | |
| 89 | Shoot the balloons by a pinwheel | Oren Bridge | Lanayru | Show on map | |
| 90 | Shoot the balloons by a pinwheel | Wellspring Island | Lanayru | Show on map | |
| 91 | Shoot the balloons by a pinwheel | Valor Island | Lanayru | Show on map | |
| 92 | Take the Korok to its friend (2 seeds) | Hylia River | Lanayru | Show on map | Hylia River Map |
| 93 | Take the Korok to its friend (2 seeds) | Wetland Stable | Lanayru | Show on map | Sahasra Slope Map |
| 94 | Take the Korok to its friend (2 seeds) | Goponga Island | Lanayru | Show on map | Linebeck Island Map |
| 95 | Take the Korok to its friend (2 seeds) | Bank of Wishes | Lanayru | Show on map | Tabahl Woods Map |
| 96 | Take the Korok to its friend (2 seeds) | Ternio Trail | Lanayru | Show on map | Ternio Trail Map |
| 97 | Take the Korok to its friend (2 seeds) | Inogo Bridge | Lanayru | Show on map | Zora River Map |
| 98 | Take the Korok to its friend (2 seeds) | Rabia Plain | Lanayru | Show on map | Rabia Plain Map |
| 99 | Take the Korok to its friend (2 seeds) | Shatterback Point | Lanayru | Show on map | Mipha Court Map |
| 100 | Take the Korok to its friend (2 seeds) | Rutala Dam | Lanayru | Show on map | Shatterback Point Map |
| 101 | Take the Korok to its friend (2 seeds) | Lanayru Bay | Lanayru | Show on map | Lanayru Bay Map |
| 102 | Take the Korok to its friend (2 seeds) | Ja'Abu Ridge | Lanayru | Show on map | Lodrum Headland Map |
| 103 | Take the Korok to its friend (2 seeds) | Naydra Snowfield | Lanayru | Show on map | Naydra Snowfield Map |
| 104 | Touch a sparkle that stays put | Hylia River | Lanayru | Show on map | |
| 105 | Touch a sparkle that stays put | Inogo Bridge | Lanayru | Show on map | |
| 106 | Touch a sparkle that stays put | Oren Bridge | Lanayru | Show on map | |
| 107 | Touch a sparkle that stays put | Zora's Domain | Lanayru | Show on map | |
| 108 | Touch a sparkle that stays put | Ruto Lake | Lanayru | Show on map | |
| 109 | Touch a sparkle that stays put | Madorna Mountain | Lanayru | Show on map | |
| 110 | Touch a sparkle that stays put | Naydra Snowfield | Lanayru | Show on map | |
| 111 | Touch a sparkle that stays put | Madorna Mountain | Lanayru | Show on map | |
| 112 | Touch a sparkle that stays put | Horon Lagoon | Lanayru | Show on map |
Gerudo (97)
Click “Show on map” to move the map above to that spot.
| # | Puzzle | Nearest landmark | Region | Location | Where the friend waits |
|---|---|---|---|---|---|
| 1 | Ascend through the rock | Gerudo Town | Gerudo | Show on map | |
| 2 | Ascend through the rock | West Gerudo Ruins | Gerudo | Show on map | |
| 3 | Ascend through the rock | Laparoh Mesa | Gerudo | Show on map | |
| 4 | Ascend through the rock | North Gerudo Ruins | Gerudo | Show on map | |
| 5 | Ascend through the rock | Zirco Mesa | Gerudo | Show on map | |
| 6 | Ascend through the rock | East Gerudo Mesa | Gerudo | Show on map | |
| 7 | Build the Korok a shelter | Laparoh Mesa | Gerudo | Show on map | |
| 8 | Build the Korok a shelter | Zirco Mesa | Gerudo | Show on map | |
| 9 | Build the shape from the blocks | Mount Agaat | Gerudo | Show on map | |
| 10 | Build the shape from the blocks | Meadela's Mantle | Gerudo | Show on map | |
| 11 | Build the shape from the blocks | Yarna Valley | Gerudo | Show on map | |
| 12 | Build the shape from the blocks | Daval Peak | Gerudo | Show on map | |
| 13 | Build the shape from the blocks | Mount Granajh | Gerudo | Show on map | |
| 14 | Build the shape from the blocks | Karusa Valley | Gerudo | Show on map | |
| 15 | Build the shape from the blocks | Meadela's Mantle | Gerudo | Show on map | |
| 16 | Build the shape from the blocks | Birida Lookout | Gerudo | Show on map | |
| 17 | Catch a falling light | South Lomei Castle Top Floor | Gerudo | Show on map | |
| 18 | Catch a falling seed | West Gerudo Ruins | Gerudo | Show on map | |
| 19 | Catch a falling seed | Birida Lookout | Gerudo | Show on map | |
| 20 | Catch a falling seed | Desert Rift | Gerudo | Show on map | |
| 21 | Catch a falling seed | East Barrens | Gerudo | Show on map | |
| 22 | Chase a moving sparkle | North Gerudo Ruins | Gerudo | Show on map | |
| 23 | Chase a moving sparkle | Gerudo Summit | Gerudo | Show on map | |
| 24 | Chase a moving sparkle | Great Cliffs | Gerudo | Show on map | |
| 25 | Chase a moving sparkle | East Barrens | Gerudo | Show on map | |
| 26 | Complete a rock pattern | Risoka Snowfield | Gerudo | Show on map | |
| 27 | Complete a rock pattern | Yiga Clan Hideout | Gerudo | Show on map | |
| 28 | Complete a rock pattern | Great Cliffs | Gerudo | Show on map | |
| 29 | Complete a rock pattern | Zirco Mesa | Gerudo | Show on map | |
| 30 | Complete a rock pattern | Stalry Plateau | Gerudo | Show on map | |
| 31 | Complete a rock pattern | Mount Nabooru | Gerudo | Show on map | |
| 32 | Complete a rock pattern | Daval Peak | Gerudo | Show on map | |
| 33 | Follow a flower trail | Vatorsa Snowfield | Gerudo | Show on map | |
| 34 | Follow a flower trail | Gerudo Town | Gerudo | Show on map | |
| 35 | Follow a flower trail | Gerudo Desert Gateway | Gerudo | Show on map | |
| 36 | Follow a flower trail | West Gerudo Ruins | Gerudo | Show on map | |
| 37 | Land on the target | West Gerudo Ruins | Gerudo | Show on map | |
| 38 | Land on the target | Palu Wasteland | Gerudo | Show on map | |
| 39 | Land on the target | East Gerudo Sky Archipelago | Gerudo | Show on map | |
| 40 | Lift a rock | Statue of the Eighth Heroine | Gerudo | Show on map | |
| 41 | Lift a rock | Karusa Valley | Gerudo | Show on map | |
| 42 | Lift a rock | Dragon's Exile | Gerudo | Show on map | |
| 43 | Lift a rock | Gerudo Highlands | Gerudo | Show on map | |
| 44 | Lift a rock | Vatorsa Snowfield | Gerudo | Show on map | |
| 45 | Lift a rock | Gerudo Highlands | Gerudo | Show on map | |
| 46 | Lift a rock | Sapphia's Table | Gerudo | Show on map | |
| 47 | Lift a rock | Sapphia's Table | Gerudo | Show on map | |
| 48 | Lift a rock | Northern Icehouse | Gerudo | Show on map | |
| 49 | Lift a rock | Koukot Plateau | Gerudo | Show on map | |
| 50 | Lift a rock | Nephra Hill | Gerudo | Show on map | |
| 51 | Lift a rock | Koukot Plateau | Gerudo | Show on map | |
| 52 | Lift a rock | Gerudo Canyon | Gerudo | Show on map | |
| 53 | Lift a rock | Gerudo Canyon | Gerudo | Show on map | |
| 54 | Lift a rock | Champion's Gate | Gerudo | Show on map | |
| 55 | Lift a rock | Daval Peak | Gerudo | Show on map | |
| 56 | Pull out the plug | Birida Lookout | Gerudo | Show on map | |
| 57 | Pull out the plug | Laparoh Mesa | Gerudo | Show on map | |
| 58 | Pull out the plug | Taafei Hill | Gerudo | Show on map | |
| 59 | Pull out the plug | East Gerudo Mesa | Gerudo | Show on map | |
| 60 | Put a boulder on its stand | Statue of the Eighth Heroine | Gerudo | Show on map | |
| 61 | Put a boulder on its stand | Yiga Clan Hideout | Gerudo | Show on map | |
| 62 | Put a boulder on its stand | Gerudo Canyon | Gerudo | Show on map | |
| 63 | Put the missing fruit on the offering plate | Meadela's Mantle | Gerudo | Show on map | |
| 64 | Reach the goal before time runs out | Cliffs of Ruvara | Gerudo | Show on map | |
| 65 | Reach the goal before time runs out | Yiga Clan Hideout | Gerudo | Show on map | |
| 66 | Reach the goal before time runs out | Gerudo Town | Gerudo | Show on map | |
| 67 | Reach the goal before time runs out | Laparoh Mesa | Gerudo | Show on map | |
| 68 | Reach the goal before time runs out | Gerudo Canyon | Gerudo | Show on map | |
| 69 | Reach the goal before time runs out | East Gerudo Ruins | Gerudo | Show on map | |
| 70 | Shoot a balloon | Risoka Snowfield | Gerudo | Show on map | |
| 71 | Shoot a hanging acorn | Spectacle Rock | Gerudo | Show on map | |
| 72 | Shoot a hanging acorn | Karusa Valley | Gerudo | Show on map | |
| 73 | Shoot a hanging acorn | Sapphia's Table | Gerudo | Show on map | |
| 74 | Shoot a hanging acorn | Birida Lookout | Gerudo | Show on map | |
| 75 | Shoot a hanging acorn | Koukot Plateau | Gerudo | Show on map | |
| 76 | Shoot a hanging acorn | Gerudo Canyon Stable | Gerudo | Show on map | |
| 77 | Shoot the balloons by a pinwheel | Karusa Valley | Gerudo | Show on map | |
| 78 | Shoot the balloons by a pinwheel | Vatorsa Snowfield | Gerudo | Show on map | |
| 79 | Shoot the balloons by a pinwheel | Birida Lookout | Gerudo | Show on map | |
| 80 | Shoot the balloons by a pinwheel | South Lomei Labyrinth | Gerudo | Show on map | |
| 81 | Take the Korok to its friend (2 seeds) | Rutimala Hill | Gerudo | Show on map | Risoka Snowfield Map |
| 82 | Take the Korok to its friend (2 seeds) | West Gerudo Ruins | Gerudo | Show on map | Karusa Valley Map |
| 83 | Take the Korok to its friend (2 seeds) | Dragon's Exile | Gerudo | Show on map | Dragon's Exile Map |
| 84 | Take the Korok to its friend (2 seeds) | Laparoh Mesa | Gerudo | Show on map | Tamio River Map |
| 85 | Take the Korok to its friend (2 seeds) | Gerudo Desert Gateway | Gerudo | Show on map | Kara Kara Bazaar Map |
| 86 | Take the Korok to its friend (2 seeds) | Palu Wasteland | Gerudo | Show on map | Palu Wasteland Map |
| 87 | Take the Korok to its friend (2 seeds) | Gerudo Town | Gerudo | Show on map | Gerudo Desert Map |
| 88 | Take the Korok to its friend (2 seeds) | Gerudo Canyon | Gerudo | Show on map | Gerudo Canyon Map |
| 89 | Take the Korok to its friend (2 seeds) | East Barrens | Gerudo | Show on map | East Barrens Map |
| 90 | Take the Korok to its friend (2 seeds) | Gerudo Canyon Pass | Gerudo | Show on map | Gerudo Canyon Pass Map |
| 91 | Take the Korok to its friend (2 seeds) | Mount Nabooru | Gerudo | Show on map | Mount Nabooru Map |
| 92 | Touch a sparkle that stays put | Risoka Snowfield | Gerudo | Show on map | |
| 93 | Touch a sparkle that stays put | Vatorsa Snowfield | Gerudo | Show on map | |
| 94 | Touch a sparkle that stays put | Gerudo Town | Gerudo | Show on map | |
| 95 | Touch a sparkle that stays put | Kara Kara Bazaar | Gerudo | Show on map | |
| 96 | Touch a sparkle that stays put | Laparoh Mesa | Gerudo | Show on map | |
| 97 | Touch a sparkle that stays put | Gerudo Canyon Stable | Gerudo | Show on map |
Tabantha (72)
Click “Show on map” to move the map above to that spot.
| # | Puzzle | Nearest landmark | Region | Location | Where the friend waits |
|---|---|---|---|---|---|
| 1 | Ascend through the rock | Dragon Bone Mire | Tabantha | Show on map | |
| 2 | Ascend through the rock | Nero Hill | Tabantha | Show on map | |
| 3 | Ascend through the rock | Tanagar Canyon | Tabantha | Show on map | |
| 4 | Ascend through the rock | Piper Ridge | Tabantha | Show on map | |
| 5 | Build the Korok a shelter | Lake Kilsie | Tabantha | Show on map | |
| 6 | Build the Korok a shelter | Mystathi's Shelf | Tabantha | Show on map | |
| 7 | Build the Korok a shelter | Tabantha Village Ruins | Tabantha | Show on map | |
| 8 | Build the shape from the blocks | Lake Kilsie | Tabantha | Show on map | |
| 9 | Build the shape from the blocks | Lake Totori | Tabantha | Show on map | |
| 10 | Build the shape from the blocks | Tabantha Frontier | Tabantha | Show on map | |
| 11 | Build the shape from the blocks | Ancient Columns | Tabantha | Show on map | |
| 12 | Build the shape from the blocks | Tanagar Canyon | Tabantha | Show on map | |
| 13 | Build the shape from the blocks | Kopeeki Drifts | Tabantha | Show on map | |
| 14 | Build the shape from the blocks | Hebra Plunge | Tabantha | Show on map | |
| 15 | Build the shape from the blocks | Tama Pond | Tabantha | Show on map | |
| 16 | Build the shape from the blocks | Mount Drena | Tabantha | Show on map | |
| 17 | Catch a falling light | Courage Island | Tabantha | Show on map | |
| 18 | Catch a falling light | Lightcast Island | Tabantha | Show on map | |
| 19 | Catch a falling seed | Piper Ridge | Tabantha | Show on map | |
| 20 | Chase a moving sparkle | Piper Ridge | Tabantha | Show on map | |
| 21 | Complete a rock pattern | Lake Kilsie | Tabantha | Show on map | |
| 22 | Complete a rock pattern | Passer Hill | Tabantha | Show on map | |
| 23 | Complete a rock pattern | Cliffs of Ruvara | Tabantha | Show on map | |
| 24 | Complete a rock pattern | Hebra Plunge | Tabantha | Show on map | |
| 25 | Follow a flower trail | Dragon Bone Mire | Tabantha | Show on map | |
| 26 | Follow a flower trail | Dragon Bone Mire | Tabantha | Show on map | |
| 27 | Follow a flower trail | Flight Range | Tabantha | Show on map | |
| 28 | Follow a flower trail | Lake Totori | Tabantha | Show on map | |
| 29 | Follow a flower trail | Ancient Columns | Tabantha | Show on map | |
| 30 | Land on the target | Cuho Mountain | Tabantha | Show on map | |
| 31 | Land on the target | Rayne Highlands | Tabantha | Show on map | |
| 32 | Land on the target | Tamio River | Tabantha | Show on map | |
| 33 | Land on the target | Lightcast Island | Tabantha | Show on map | |
| 34 | Land on the target | Lightcast Island | Tabantha | Show on map | |
| 35 | Land on the target | Starview Island | Tabantha | Show on map | |
| 36 | Lift a rock | Dragon Bone Mire | Tabantha | Show on map | |
| 37 | Lift a rock | Dronoc's Pass | Tabantha | Show on map | |
| 38 | Lift a rock | Strock Lake | Tabantha | Show on map | |
| 39 | Lift a rock | Lake Totori | Tabantha | Show on map | |
| 40 | Lift a rock | Lake Totori | Tabantha | Show on map | |
| 41 | Lift a rock | Rito Village | Tabantha | Show on map | |
| 42 | Lift a rock | Kolami Bridge | Tabantha | Show on map | |
| 43 | Lift a rock | Passer Hill | Tabantha | Show on map | |
| 44 | Lift a rock | Lake Totori | Tabantha | Show on map | |
| 45 | Lift a rock | Piper Ridge | Tabantha | Show on map | |
| 46 | Lift a rock | Illumeni Plateau | Tabantha | Show on map | |
| 47 | Lift a rock | Rowan Plain | Tabantha | Show on map | |
| 48 | Lift a rock | Rowan Plain | Tabantha | Show on map | |
| 49 | Pull out the plug | Strock Lake | Tabantha | Show on map | |
| 50 | Put a boulder on its stand | Rayne Highlands | Tabantha | Show on map | |
| 51 | Put a boulder on its stand | Kopeeki Drifts | Tabantha | Show on map | |
| 52 | Put a boulder on its stand | Mount Drena | Tabantha | Show on map | |
| 53 | Put the missing fruit on the offering plate | Rayne Highlands | Tabantha | Show on map | |
| 54 | Put the roof back together | Lake Illumeni | Tabantha | Show on map | |
| 55 | Put the roof back together | Lake Totori | Tabantha | Show on map | |
| 56 | Reach the goal before time runs out | Lake Illumeni | Tabantha | Show on map | |
| 57 | Shoot a balloon | Piper Ridge | Tabantha | Show on map | |
| 58 | Shoot a hanging acorn | South Tabantha Snowfield | Tabantha | Show on map | |
| 59 | Shoot a hanging acorn | Kolami Bridge | Tabantha | Show on map | |
| 60 | Shoot a hanging acorn | Hebra Falls | Tabantha | Show on map | |
| 61 | Shoot a hanging acorn | Tabantha Hills | Tabantha | Show on map | |
| 62 | Shoot a hanging acorn | Lightcast Island | Tabantha | Show on map | |
| 63 | Shoot the acorn in a hole | Tabantha Village Ruins | Tabantha | Show on map | |
| 64 | Shoot the balloons by a pinwheel | Rito Village | Tabantha | Show on map | |
| 65 | Shoot the balloons by a pinwheel | Tabantha Village Ruins | Tabantha | Show on map | |
| 66 | Take the Korok to its friend (2 seeds) | Lake Kilsie | Tabantha | Show on map | Lake Kilsie Map |
| 67 | Take the Korok to its friend (2 seeds) | Nero Hill | Tabantha | Show on map | Piper Ridge Map |
| 68 | Take the Korok to its friend (2 seeds) | Lake Illumeni | Tabantha | Show on map | Tanagar Canyon Map |
| 69 | Take the Korok to its friend (2 seeds) | Hebra Falls | Tabantha | Show on map | Hebra Falls Map |
| 70 | Touch a sparkle that stays put | Dragon Bone Mire | Tabantha | Show on map | |
| 71 | Touch a sparkle that stays put | Gisa Crater | Tabantha | Show on map | |
| 72 | Touch a sparkle that stays put | Tabantha Hills | Tabantha | Show on map |
Eldin (67)
Click “Show on map” to move the map above to that spot.
| # | Puzzle | Nearest landmark | Region | Location | Where the friend waits |
|---|---|---|---|---|---|
| 1 | Ascend through the rock | Goronbi River | Eldin | Show on map | |
| 2 | Ascend through the rock | Gut Check Rock | Eldin | Show on map | |
| 3 | Ascend through the rock | Lake Ferona | Eldin | Show on map | |
| 4 | Build the shape from the blocks | Bridge of Eldin | Eldin | Show on map | |
| 5 | Build the shape from the blocks | Death Mountain West Site | Eldin | Show on map | |
| 6 | Build the shape from the blocks | Thyphlo Ruins | Eldin | Show on map | |
| 7 | Build the shape from the blocks | Goron Hot Springs | Eldin | Show on map | |
| 8 | Build the shape from the blocks | Eldin's Flank | Eldin | Show on map | |
| 9 | Build the shape from the blocks | Foothill Stable | Eldin | Show on map | |
| 10 | Catch a falling seed | Lake Darman | Eldin | Show on map | |
| 11 | Catch a falling seed | Maw of Death Mountain | Eldin | Show on map | |
| 12 | Chase a moving sparkle | Death Mountain | Eldin | Show on map | |
| 13 | Chase a moving sparkle | Foothill Stable | Eldin | Show on map | |
| 14 | Complete a rock pattern | Golow River | Eldin | Show on map | |
| 15 | Complete a rock pattern | Darunia Lake | Eldin | Show on map | |
| 16 | Complete a rock pattern | Broca Island | Eldin | Show on map | |
| 17 | Complete a rock pattern | Trilby Valley | Eldin | Show on map | |
| 18 | Dive into the ring of lily pads | Stolock Bridge | Eldin | Show on map | |
| 19 | Dive into the ring of lily pads | Goron City | Eldin | Show on map | |
| 20 | Follow a flower trail | Bridge of Eldin | Eldin | Show on map | |
| 21 | Follow a flower trail | Medingo Pool | Eldin | Show on map | |
| 22 | Land on the target | Thyphlo Ruins | Eldin | Show on map | |
| 23 | Land on the target | Goron Hot Springs | Eldin | Show on map | |
| 24 | Lift a rock | Thyphlo Ruins | Eldin | Show on map | |
| 25 | Lift a rock | Thyphlo Ruins | Eldin | Show on map | |
| 26 | Lift a rock | Lake Mekar | Eldin | Show on map | |
| 27 | Lift a rock | East Deplian Badlands | Eldin | Show on map | |
| 28 | Lift a rock | Stolock Bridge | Eldin | Show on map | |
| 29 | Lift a rock | Southern Mine | Eldin | Show on map | |
| 30 | Lift a rock | Eldin Canyon | Eldin | Show on map | |
| 31 | Lift a rock | South Akkala Stable | Eldin | Show on map | |
| 32 | Pull out the plug | Gero Pond | Eldin | Show on map | |
| 33 | Put a boulder on its stand | Gorko Lake | Eldin | Show on map | |
| 34 | Put a boulder on its stand | Goronbi River | Eldin | Show on map | |
| 35 | Put a boulder on its stand | Goronbi River | Eldin | Show on map | |
| 36 | Put the missing fruit on the offering plate | Goro Cove | Eldin | Show on map | |
| 37 | Put the roof back together | Shadow Hamlet Ruins | Eldin | Show on map | |
| 38 | Reach the goal before time runs out | Lake Darman | Eldin | Show on map | |
| 39 | Reach the goal before time runs out | Cephla Lake | Eldin | Show on map | |
| 40 | Shoot a balloon | Stolock Bridge | Eldin | Show on map | |
| 41 | Shoot a balloon | Goron City | Eldin | Show on map | |
| 42 | Shoot a balloon | Death Mountain | Eldin | Show on map | |
| 43 | Shoot a hanging acorn | YunoboCo HQ | Eldin | Show on map | |
| 44 | Shoot a hanging acorn | Lake Darman | Eldin | Show on map | |
| 45 | Shoot a hanging acorn | South Eldin Sky Archipelago | Eldin | Show on map | |
| 46 | Shoot the balloons by a pinwheel | Skull Lake | Eldin | Show on map | |
| 47 | Take the Korok to its friend (2 seeds) | Thyphlo Ruins | Eldin | Show on map | Thyphlo Ruins Map |
| 48 | Take the Korok to its friend (2 seeds) | Deplian Badlands | Eldin | Show on map | West Deplian Badlands Map |
| 49 | Take the Korok to its friend (2 seeds) | East Deplian Badlands | Eldin | Show on map | Deplian Badlands Map |
| 50 | Take the Korok to its friend (2 seeds) | Stolock Bridge | Eldin | Show on map | Isle of Rabac Map |
| 51 | Take the Korok to its friend (2 seeds) | Gorko Tunnel | Eldin | Show on map | Gortram Cliff Map |
| 52 | Take the Korok to its friend (2 seeds) | Goro Cove | Eldin | Show on map | Goro Cove Map |
| 53 | Take the Korok to its friend (2 seeds) | Darunia Lake | Eldin | Show on map | Lake Mekar Map |
| 54 | Take the Korok to its friend (2 seeds) | Goronbi River | Eldin | Show on map | Goronbi River Map |
| 55 | Take the Korok to its friend (2 seeds) | Bedrock Bistro | Eldin | Show on map | Bedrock Bistro Map |
| 56 | Take the Korok to its friend (2 seeds) | Death Mountain West Site | Eldin | Show on map | Death Caldera Map |
| 57 | Take the Korok to its friend (2 seeds) | Lake Intenoch | Eldin | Show on map | Lake Ferona Map |
| 58 | Take the Korok to its friend (2 seeds) | Foothill Stable | Eldin | Show on map | Ternio Trail Map |
| 59 | Take the Korok to its friend (2 seeds) | South Akkala Stable | Eldin | Show on map | Shadow Pass Map |
| 60 | Touch a sparkle that stays put | Eldin Great Skeleton | Eldin | Show on map | |
| 61 | Touch a sparkle that stays put | YunoboCo HQ | Eldin | Show on map | |
| 62 | Touch a sparkle that stays put | Bedrock Bistro | Eldin | Show on map | |
| 63 | Touch a sparkle that stays put | Bedrock Bistro | Eldin | Show on map | |
| 64 | Touch a sparkle that stays put | Gut Check Rock | Eldin | Show on map | |
| 65 | Touch a sparkle that stays put | Shadow Pass | Eldin | Show on map | |
| 66 | Touch the target | South Eldin Sky Archipelago | Eldin | Show on map | |
| 67 | Touch the target | North Hyrule Sky Archipelago | Eldin | Show on map |
Hebra (64)
Click “Show on map” to move the map above to that spot.
| # | Puzzle | Nearest landmark | Region | Location | Where the friend waits |
|---|---|---|---|---|---|
| 1 | Ascend through the rock | Biron Snowshelf | Hebra | Show on map | |
| 2 | Ascend through the rock | Selmie's Spot | Hebra | Show on map | |
| 3 | Ascend through the rock | Lake Totori | Hebra | Show on map | |
| 4 | Ascend through the rock | Mount Drena | Hebra | Show on map | |
| 5 | Ascend through the rock | Snowfield Stable | Hebra | Show on map | |
| 6 | Build the Korok a shelter | Sherfin's Secret Hot Spring | Hebra | Show on map | |
| 7 | Build the Korok a shelter | Biron Snowshelf | Hebra | Show on map | |
| 8 | Build the shape from the blocks | Mount Drena | Hebra | Show on map | |
| 9 | Build the shape from the blocks | Sherfin's Secret Hot Spring | Hebra | Show on map | |
| 10 | Build the shape from the blocks | Biron Snowshelf | Hebra | Show on map | |
| 11 | Build the shape from the blocks | Corvash Peak | Hebra | Show on map | |
| 12 | Catch a falling light | North Lomei Castle Top Floor | Hebra | Show on map | |
| 13 | Catch a falling seed | Sherfin's Secret Hot Spring | Hebra | Show on map | |
| 14 | Chase a moving sparkle | Hebra North Crest | Hebra | Show on map | |
| 15 | Chase a moving sparkle | North Tabantha Snowfield | Hebra | Show on map | |
| 16 | Complete a rock pattern | Corvash Peak | Hebra | Show on map | |
| 17 | Complete a rock pattern | Coldsnap Hollow | Hebra | Show on map | |
| 18 | Complete a rock pattern | Hebra East Summit | Hebra | Show on map | |
| 19 | Complete a rock pattern | South Tabantha Snowfield | Hebra | Show on map | |
| 20 | Complete a rock pattern | Mount Drena | Hebra | Show on map | |
| 21 | Follow a flower trail | East Hebra Sky Archipelago | Hebra | Show on map | |
| 22 | Follow a flower trail | Biron Snowshelf | Hebra | Show on map | |
| 23 | Land on the target | Icefall Foothills | Hebra | Show on map | |
| 24 | Land on the target | South Tabantha Snowfield | Hebra | Show on map | |
| 25 | Land on the target | South Hebra Sky Archipelago | Hebra | Show on map | |
| 26 | Lift a rock | Hebra North Summit | Hebra | Show on map | |
| 27 | Lift a rock | Icefall Foothills | Hebra | Show on map | |
| 28 | Lift a rock | Lake Kilsie | Hebra | Show on map | |
| 29 | Lift a rock | Biron Snowshelf | Hebra | Show on map | |
| 30 | Lift a rock | Hebra Tundra | Hebra | Show on map | |
| 31 | Lift a rock | Hebra Plunge | Hebra | Show on map | |
| 32 | Lift a rock | Lake Kilsie | Hebra | Show on map | |
| 33 | Lift a rock | Hebra Tundra | Hebra | Show on map | |
| 34 | Lift a rock | Rospro Pass | Hebra | Show on map | |
| 35 | Lift a rock | North Tabantha Snowfield | Hebra | Show on map | |
| 36 | Lift a rock | North Tabantha Snowfield | Hebra | Show on map | |
| 37 | Lift a rock | South Tabantha Snowfield | Hebra | Show on map | |
| 38 | Lift a rock | Rising Island Chain | Hebra | Show on map | |
| 39 | Pull out the plug | Hebra West Summit | Hebra | Show on map | |
| 40 | Put a boulder on its stand | Forgotten Temple | Hebra | Show on map | |
| 41 | Put the missing fruit on the offering plate | Snowfield Stable | Hebra | Show on map | |
| 42 | Reach the goal before time runs out | Rising Island Chain | Hebra | Show on map | |
| 43 | Reach the goal before time runs out | Hebra West Summit | Hebra | Show on map | |
| 44 | Reach the goal before time runs out | Hebra North Crest | Hebra | Show on map | |
| 45 | Reach the goal before time runs out | Corvash Peak | Hebra | Show on map | |
| 46 | Shoot a balloon | Hebra North Summit | Hebra | Show on map | |
| 47 | Shoot a balloon | Hebra North Summit | Hebra | Show on map | |
| 48 | Shoot the acorn in a hole | North Lomei Labyrinth | Hebra | Show on map | |
| 49 | Shoot the balloons by a pinwheel | Hebra West Summit | Hebra | Show on map | |
| 50 | Shoot the balloons by a pinwheel | Goflam's Secret Hot Spring | Hebra | Show on map | |
| 51 | Shoot the balloons by a pinwheel | Pikida Stonegrove | Hebra | Show on map | |
| 52 | Shoot the balloons by a pinwheel | North Lomei Labyrinth | Hebra | Show on map | |
| 53 | Take the Korok to its friend (2 seeds) | Biron Snowshelf | Hebra | Show on map | Sherfin's Secret Hot Spring Map |
| 54 | Take the Korok to its friend (2 seeds) | Pikida Stonegrove | Hebra | Show on map | Pikida Stonegrove Map |
| 55 | Take the Korok to its friend (2 seeds) | Selmie's Spot | Hebra | Show on map | Goflam's Secret Hot Spring Map |
| 56 | Take the Korok to its friend (2 seeds) | Hebra Peak | Hebra | Show on map | Hebra Peak Map |
| 57 | Take the Korok to its friend (2 seeds) | Mount Drena | Hebra | Show on map | North Lomei Labyrinth Map |
| 58 | Take the Korok to its friend (2 seeds) | South Tabantha Snowfield | Hebra | Show on map | South Tabantha Snowfield Map |
| 59 | Touch a sparkle that stays put | Hebra West Summit | Hebra | Show on map | |
| 60 | Touch a sparkle that stays put | Goflam's Secret Hot Spring | Hebra | Show on map | |
| 61 | Touch a sparkle that stays put | Talonto Peak | Hebra | Show on map | |
| 62 | Touch a sparkle that stays put | Hebra Trailhead Lodge | Hebra | Show on map | |
| 63 | Touch the target | East Hebra Sky Archipelago | Hebra | Show on map | |
| 64 | Touch the target | West Hebra Sky Archipelago | Hebra | Show on map |
Akkala (57)
Click “Show on map” to move the map above to that spot.
| # | Puzzle | Nearest landmark | Region | Location | Where the friend waits |
|---|---|---|---|---|---|
| 1 | Build the shape from the blocks | Rok Woods | Akkala | Show on map | |
| 2 | Build the shape from the blocks | Ordorac Quarry | Akkala | Show on map | |
| 3 | Build the shape from the blocks | Akkala Parade Ground Ruins | Akkala | Show on map | |
| 4 | Build the shape from the blocks | East Akkala Stable | Akkala | Show on map | |
| 5 | Catch a falling light | Sokkala Sky Archipelago | Akkala | Show on map | |
| 6 | Catch a falling light | Lomei Sky Labyrinth | Akkala | Show on map | |
| 7 | Chase a moving sparkle | Akkala Span | Akkala | Show on map | |
| 8 | Chase a moving sparkle | Link's House | Akkala | Show on map | |
| 9 | Chase a moving sparkle | Spring of Power | Akkala | Show on map | |
| 10 | Complete a rock pattern | West Sokkala Bridge | Akkala | Show on map | |
| 11 | Complete a rock pattern | Davdi Island | Akkala | Show on map | |
| 12 | Dive into the ring of lily pads | Bloodleaf Lake | Akkala | Show on map | |
| 13 | Follow a flower trail | Hudson Construction Site | Akkala | Show on map | |
| 14 | Follow a flower trail | Lake Akkala | Akkala | Show on map | |
| 15 | Follow a flower trail | Malanya Spring | Akkala | Show on map | |
| 16 | Land on the target | Skull Lake | Akkala | Show on map | |
| 17 | Land on the target | Deep Akkala | Akkala | Show on map | |
| 18 | Land on the target | Davdi Island | Akkala | Show on map | |
| 19 | Land on the target | Sky Mine | Akkala | Show on map | |
| 20 | Lift a rock | Skull Lake | Akkala | Show on map | |
| 21 | Lift a rock | Tarrey Town | Akkala | Show on map | |
| 22 | Lift a rock | Tarrey Town Race | Akkala | Show on map | |
| 23 | Lift a rock | Akkala Bridge Ruins | Akkala | Show on map | |
| 24 | Lift a rock | South Akkala Plains | Akkala | Show on map | |
| 25 | Lift a rock | Tumlea Heights | Akkala | Show on map | |
| 26 | Lift a rock | Octorok Lake | Akkala | Show on map | |
| 27 | Lift a rock | Malin Bay | Akkala | Show on map | |
| 28 | Lift a rock | East Akkala Stable | Akkala | Show on map | |
| 29 | Lift a rock | Malin Bay | Akkala | Show on map | |
| 30 | Pull out the plug | East Sokkala Bridge | Akkala | Show on map | |
| 31 | Pull out the plug | Akkala Span | Akkala | Show on map | |
| 32 | Pull out the plug | Ulria Grotto | Akkala | Show on map | |
| 33 | Put a boulder on its stand | Akkala Wilds | Akkala | Show on map | |
| 34 | Put the missing fruit on the offering plate | Rok Woods | Akkala | Show on map | |
| 35 | Put the missing fruit on the offering plate | Malanya Spring | Akkala | Show on map | |
| 36 | Put the roof back together | Link's House | Akkala | Show on map | |
| 37 | Reach the goal before time runs out | Ankel Island | Akkala | Show on map | |
| 38 | Ring the bell | Tarrey Town | Akkala | Show on map | |
| 39 | Shoot a hanging acorn | Tumlea Heights | Akkala | Show on map | |
| 40 | Shoot the balloons by a pinwheel | Akkala Wilds | Akkala | Show on map | |
| 41 | Shoot the balloons by a pinwheel | Lomei Labyrinth Island | Akkala | Show on map | |
| 42 | Shoot the balloons by a pinwheel | Tal Tal Peak | Akkala | Show on map | |
| 43 | Take the Korok to its friend (2 seeds) | Tumlea Heights | Akkala | Show on map | Tempest Gulch Map |
| 44 | Take the Korok to its friend (2 seeds) | Akkala Wilds | Akkala | Show on map | Gut Check Rock Map |
| 45 | Take the Korok to its friend (2 seeds) | Ordorac Quarry | Akkala | Show on map | East Akkala Beach Map |
| 46 | Take the Korok to its friend (2 seeds) | Malanya Spring | Akkala | Show on map | Malanya Spring Map |
| 47 | Take the Korok to its friend (2 seeds) | East Akkala Stable | Akkala | Show on map | Spring of Power Map |
| 48 | Take the Korok to its friend (2 seeds) | East Akkala Beach | Akkala | Show on map | North Akkala Beach Map |
| 49 | Take the Korok to its friend (2 seeds) | Link's House | Akkala | Show on map | Rist Peninsula Map |
| 50 | Take the Korok to its friend (2 seeds) | Ukuku Plains | Akkala | Show on map | Ulria Grotto Map |
| 51 | Touch a sparkle that stays put | Akkala Citadel Ruins | Akkala | Show on map | |
| 52 | Touch a sparkle that stays put | Akkala Span | Akkala | Show on map | |
| 53 | Touch a sparkle that stays put | Malanya Spring | Akkala | Show on map | |
| 54 | Touch a sparkle that stays put | East Akkala Beach | Akkala | Show on map | |
| 55 | Touch a sparkle that stays put | Kaepora Pass | Akkala | Show on map | |
| 56 | Touch a sparkle that stays put | Tingel Island | Akkala | Show on map | |
| 57 | Touch a sparkle that stays put | Davdi Island | Akkala | Show on map |
Faron (31)
Click “Show on map” to move the map above to that spot.
| # | Puzzle | Nearest landmark | Region | Location | Where the friend waits |
|---|---|---|---|---|---|
| 1 | Build the shape from the blocks | Lake Hylia | Faron | Show on map | |
| 2 | Build the shape from the blocks | Horse God Bridge | Faron | Show on map | |
| 3 | Build the shape from the blocks | Pagos Woods | Faron | Show on map | |
| 4 | Chase a moving sparkle | Parache Plains | Faron | Show on map | |
| 5 | Dive into the ring of lily pads | Harfin Valley | Faron | Show on map | |
| 6 | Dive into the ring of lily pads | Horse God Bridge | Faron | Show on map | |
| 7 | Dive into the ring of lily pads | Dragonhead Island | Faron | Show on map | |
| 8 | Follow a flower trail | Oseira Plains | Faron | Show on map | |
| 9 | Follow a flower trail | Ibara Butte | Faron | Show on map | |
| 10 | Lift a rock | Parache Plains | Faron | Show on map | |
| 11 | Lift a rock | Farosh Hills | Faron | Show on map | |
| 12 | Lift a rock | Harfin Valley | Faron | Show on map | |
| 13 | Lift a rock | Thunderhead Isles | Faron | Show on map | |
| 14 | Pull out the plug | Puffer Beach | Faron | Show on map | |
| 15 | Put a boulder on its stand | Popla Foothills | Faron | Show on map | |
| 16 | Put a boulder on its stand | Horse God Bridge | Faron | Show on map | |
| 17 | Put a boulder on its stand | Haran Lake | Faron | Show on map | |
| 18 | Put the missing fruit on the offering plate | Deya Lake | Faron | Show on map | |
| 19 | Reach the goal before time runs out | Spring of Courage | Faron | Show on map | |
| 20 | Shoot a balloon | Sarjon Bridge | Faron | Show on map | |
| 21 | Shoot a hanging acorn | Oseira Plains | Faron | Show on map | |
| 22 | Shoot a hanging acorn | Puffer Beach | Faron | Show on map | |
| 23 | Shoot the balloons by a pinwheel | Guchini Plain | Faron | Show on map | |
| 24 | Take the Korok to its friend (2 seeds) | Parache Plains | Faron | Show on map | Zokassa Ridge Map |
| 25 | Take the Korok to its friend (2 seeds) | Popla Foothills | Faron | Show on map | Dueling Peaks Map |
| 26 | Take the Korok to its friend (2 seeds) | Nette Plateau | Faron | Show on map | Harfin Valley Map |
| 27 | Take the Korok to its friend (2 seeds) | Highland Stable | Faron | Show on map | Highland Stable Map |
| 28 | Take the Korok to its friend (2 seeds) | Nette Plateau | Faron | Show on map | Puffer Beach Map |
| 29 | Touch a sparkle that stays put | Daval Peak | Faron | Show on map | |
| 30 | Touch a sparkle that stays put | Laverra Beach | Faron | Show on map | |
| 31 | Touch a sparkle that stays put | Guchini Plain Barrows | Faron | Show on map |
Great Hyrule Forest (15)
Click “Show on map” to move the map above to that spot.
| # | Puzzle | Nearest landmark | Region | Location | Where the friend waits |
|---|---|---|---|---|---|
| 1 | Catch a falling light | Bravery Island | Great Hyrule Forest | Show on map | |
| 2 | Complete a rock pattern | Drenan Highlands | Great Hyrule Forest | Show on map | |
| 3 | Dive into the ring of lily pads | Lake Saria | Great Hyrule Forest | Show on map | |
| 4 | Lift a rock | Military Training Camp | Great Hyrule Forest | Show on map | |
| 5 | Lift a rock | Woodland Stable | Great Hyrule Forest | Show on map | |
| 6 | Pull out the plug | Mount Drena | Great Hyrule Forest | Show on map | |
| 7 | Reach the goal before time runs out | Military Training Camp | Great Hyrule Forest | Show on map | |
| 8 | Shoot a hanging acorn | Rauru Settlement Ruins | Great Hyrule Forest | Show on map | |
| 9 | Shoot a hanging acorn | Minshi Woods | Great Hyrule Forest | Show on map | |
| 10 | Shoot the acorn in a hole | Pico Pond | Great Hyrule Forest | Show on map | |
| 11 | Shoot the balloons by a pinwheel | Forgotten Temple | Great Hyrule Forest | Show on map | |
| 12 | Shoot the balloons by a pinwheel | Minshi Woods | Great Hyrule Forest | Show on map | |
| 13 | Take the Korok to its friend (2 seeds) | Drenan Highlands | Great Hyrule Forest | Show on map | Thyphlo Ruins Map |
| 14 | Take the Korok to its friend (2 seeds) | Mount Drena | Great Hyrule Forest | Show on map | Rowan Plain Map |
| 15 | Touch a sparkle that stays put | Salari Hill | Great Hyrule Forest | Show on map |
Great Sky Island (14)
Click “Show on map” to move the map above to that spot.
| # | Puzzle | Sky island | Region | Location | Where the friend waits |
|---|---|---|---|---|---|
| 1 | Build the shape from the blocks | Great Sky Island | Great Sky Island | Show on map | |
| 2 | Build the shape from the blocks | Great Sky Island | Great Sky Island | Show on map | |
| 3 | Catch a falling seed | Great Sky Island | Great Sky Island | Show on map | |
| 4 | Chase a moving sparkle | Temple of Time | Great Sky Island | Show on map | |
| 5 | Complete a rock pattern | Great Sky Island | Great Sky Island | Show on map | |
| 6 | Complete a rock pattern | Great Sky Island | Great Sky Island | Show on map | |
| 7 | Dive into the ring of lily pads | Great Sky Island | Great Sky Island | Show on map | |
| 8 | Follow a flower trail | Great Sky Island | Great Sky Island | Show on map | |
| 9 | Lift a rock | Great Sky Island | Great Sky Island | Show on map | |
| 10 | Lift a rock | Great Sky Island | Great Sky Island | Show on map | |
| 11 | Shoot a balloon | Great Sky Island | Great Sky Island | Show on map | |
| 12 | Take the Korok to its friend (2 seeds) | Great Sky Island | Great Sky Island | Show on map | Great Sky Island Map |
| 13 | Touch a sparkle that stays put | Great Sky Island | Great Sky Island | Show on map | |
| 14 | Touch a sparkle that stays put | Great Sky Island | Great Sky Island | Show on map |
What do you get for all 1,000?
Hestu’s Gift, an item with no practical effect, and Hestu’s dance. Finding all 900 locations raises your map completion rate by 36%, which is the real reason completionists do it. Everything else the percentage counts is in the 100% completion guide. On the Switch 2 Edition, Zelda Notes Navigation will voice-guide you to remaining Koroks and show the region-by-region percentage — see the Zelda Notes guide.
Related
- All 152 shrine locations — the other 100% checklist
- Armor upgrade materials — what to do with the inventory you just expanded
- Tears of the Kingdom vs Breath of the Wild — Breath of the Wild had 900 seeds; here is how the games compare
- Dragon’s Tears, Sage’s Wills, caves, wells, chasms and schematics — the other collectibles, with every location
FAQ
How many Korok Seeds are in Tears of the Kingdom?
How many Korok Seeds do I need for all inventory upgrades?
Where is Hestu?
What do you get for all 1,000 Korok Seeds?
Related Articles
guides
BotW Akkala Korok Seeds: 61 Seeds, Map & Puzzles
Find all 61 Korok Seeds at 61 locations in Akkala in Breath of the Wild. Browse puzzle solutions and show each spot on the map.
guides
BotW Central Korok Seeds: 118 Seeds, Map & Puzzles
Find all 118 Korok Seeds at 118 locations in Central in Breath of the Wild. Browse puzzle solutions and show each spot on the map.
guides
BotW Dueling Peaks Korok Seeds: 68 Seeds, Map & Puzzles
Find all 68 Korok Seeds at 68 locations in Dueling Peaks in Breath of the Wild. Browse puzzle solutions and show each spot on the map.
Was this helpful?
Thanks for the feedback!