

TotK Shrine Locations: All 152 Shrines, Map Links, Checklist
Every Tears of the Kingdom shrine by region with map locations and trial names: 120 surface and 32 sky shrines, plus a checklist that saves in your browser.
There are 152 Shrines of Light in Tears of the Kingdom. This page lists every one of them by region with its map location and trial name, plus a checklist that remembers what you have cleared — no account, saved in this browser. Prefer a map? The same 152 shrines are plotted on the interactive shrine map, which shares its progress with the checklist below. Shrine names that are links lead to our full solution pages — every one of them.
How many shrines are there, and where?
| Layer | Shrines | Notes |
|---|---|---|
| Surface | 120 | Hyrule Field, Tabantha, Hebra, Great Hyrule Forest, Akkala, Eldin, Lanayru, Necluda, Faron and Gerudo |
| Sky | 32 | Including the four tutorial shrines on the Great Sky Island |
| Depths | 0 | The Depths have 120 Lightroots instead — each sits directly below a surface shrine |
| Total | 152 |
Each shrine gives one Light of Blessing. Four Lights buy one heart container or one stamina vessel at any Goddess Statue.
What do you get for all 152?
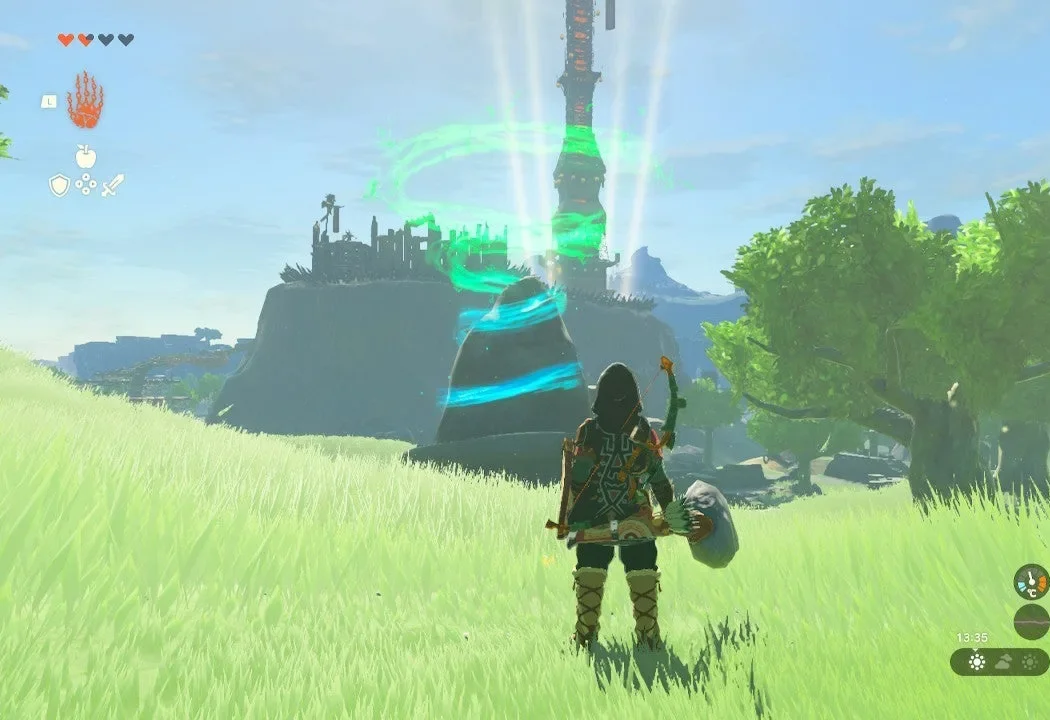
Completing every shrine awards the Ancient Hero’s Aspect, a single-piece armor. All 152 together add 6% to map completion. Cleared shrines turn blue on the map; uncleared shrines stay orange, which is the fastest way to spot a gap.
0 / 0 shrines cleared
Saved in this browser only. No account needed.
Great Sky Island (4 shrines)
The tutorial island. Each of the four tutorial shrines grants one of Link’s core abilities.
| Shrine | Trial | Map | Layer |
|---|---|---|---|
| Gutanbac Shrine | The Ability to Rise | Show on map | Sky |
| In-isa Shrine | The Ability to Combine | Show on map | Sky |
| Nachoyah Shrine | The Ability to Rewind | Show on map | Sky |
| Ukouh Shrine | The Ability to Create | Show on map | Sky |
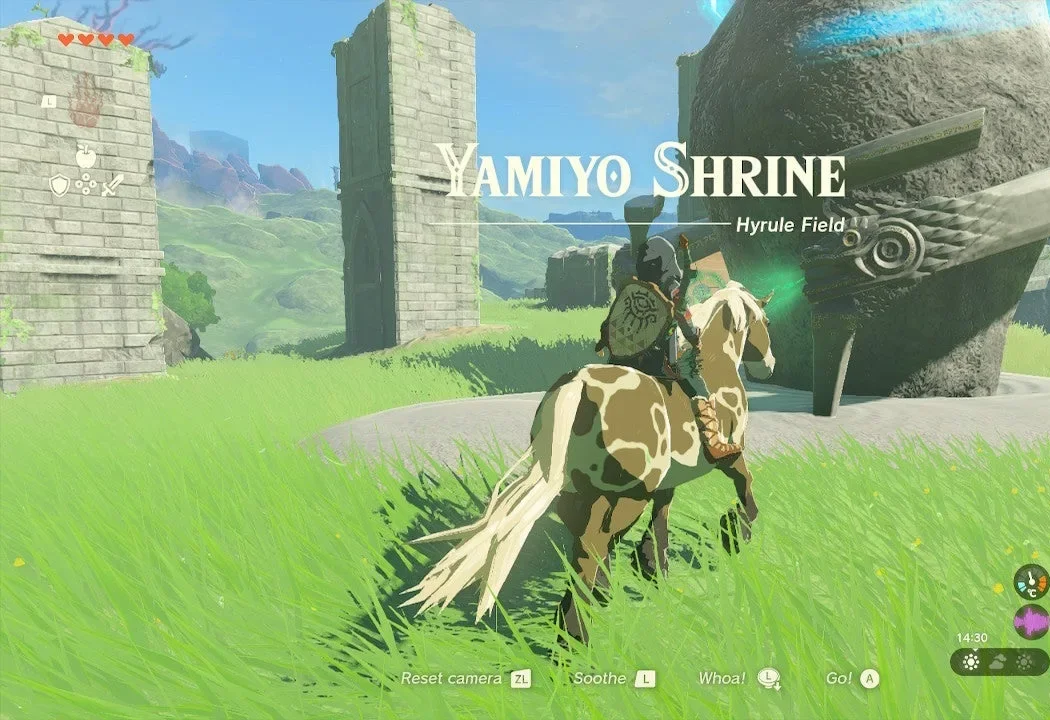
Hyrule Field (26 shrines)
Tabantha (12 shrines)
| Shrine | Trial | Map | Layer |
|---|---|---|---|
| Ga-ahisas Shrine | Rauru’s Blessing | Show on map | Sky |
| Ganos Shrine | Rauru’s Blessing | Show on map | Sky |
| Gasas Shrine | Well-Timed Cuts | Show on map | Surface |
| Gatakis Shrine | Ride the Winds | Show on map | Surface |
| Ikatak Shrine | Rauru’s Blessing | Show on map | Surface |
| Iun-orok Shrine | The Right Roll | Show on map | Surface |
| Mayausiy Shrine | Building Blocks | Show on map | Surface |
| Nouda Shrine | Proving Grounds: Intermediate | Show on map | Surface |
| Oromuwak Shrine | A Launching Device | Show on map | Surface |
| Taunhiy Shrine | Combat Training: Archery | Show on map | Sky |
| Turakawak Shrine | Stacking a Path | Show on map | Surface |
| Wao-os Shrine | Lever Power | Show on map | Surface |
Hebra (14 shrines)
| Shrine | Trial | Map | Layer |
|---|---|---|---|
| Eutoum Shrine | Proving Grounds: Infiltration | Show on map | Surface |
| Ijo-o Shrine | More Than Defense | Show on map | Sky |
| Kahatanaum Shrine | Rauru’s Blessing | Show on map | Sky |
| Mayaotaki Shrine | Rauru’s Blessing | Show on map | Surface |
| Mayaumekis Shrine | Downward Force | Show on map | Sky |
| Orochium Shrine | Courage to Fall | Show on map | Surface |
| Oshozan-u Shrine | Mallet Smash | Show on map | Surface |
| Otak Shrine | Proving Grounds: Traps | Show on map | Surface |
| Rutafu-um Shrine | Rauru’s Blessing | Show on map | Surface |
| Sahirow Shrine | Aid From Above | Show on map | Surface |
| Sisuran Shrine | Rauru’s Blessing | Show on map | Surface |
| Taninoud Shrine | Rauru’s Blessing | Show on map | Sky |
| Tauyosipun Shrine | Forward or Backward? | Show on map | Surface |
| Tenbez Shrine | Gravity and Velocity | Show on map | Sky |
Great Hyrule Forest (9 shrines)
| Shrine | Trial | Map | Layer |
|---|---|---|---|
| Ekochiu Shrine | Rise and Fall | Show on map | Surface |
| Kikakin Shrine | Shining in Darkness | Show on map | Surface |
| Kiuyoyou Shrine | Fire and Ice | Show on map | Surface |
| Mayam Shrine | Rauru’s Blessing | Show on map | Sky |
| Musanokir Shrine | Swing to Hit | Show on map | Surface |
| Ninjis Shrine | Rauru’s Blessing | Show on map | Surface |
| Pupunke Shrine | Rauru’s Blessing | Show on map | Surface |
| Sakunbomar Shrine | Rauru’s Blessing | Show on map | Surface |
| Simosiwak Shrine | Proving Grounds: Lights Out | Show on map | Sky |
Akkala (13 shrines)
| Shrine | Trial | Map | Layer |
|---|---|---|---|
| Domizuin Shrine | A Prone Pathway | Show on map | Surface |
| Gatanisis Shrine | A Well-Timed Bounce | Show on map | Surface |
| Gemimik Shrine | Turbine Power | Show on map | Surface |
| Gikaku Shrine | Rauru’s Blessing | Show on map | Sky |
| Igashuk Shrine | Rauru’s Blessing | Show on map | Surface |
| Jochi-ihiga Shrine | Rauru’s Blessing | Show on map | Surface |
| Jochi-iu Shrine | Courage to Pluck | Show on map | Surface |
| Kamatukis Shrine | A Precise Strike | Show on map | Surface |
| Mogisari Shrine | Courage to Jump | Show on map | Sky |
| Natak Shrine | Rauru’s Blessing | Show on map | Sky |
| Rasitakiwak Shrine | Proving Grounds: Vehicles | Show on map | Surface |
| Rasiwak Shrine | Flotational Brilliance | Show on map | Surface |
| Sinatanika Shrine | Combat Training: Sneakstrike | Show on map | Surface |
Eldin (15 shrines)
| Shrine | Trial | Map | Layer |
|---|---|---|---|
| Isisim Shrine | Proving Grounds: In Reverse | Show on map | Surface |
| Jiotak Shrine | Rauru’s Blessing | Show on map | Surface |
| Kadaunar Shrine | Water Makes A Way | Show on map | Sky |
| Kimayat Shrine | Proving Grounds: Smash | Show on map | Surface |
| Kisinona Shrine | Wind Power | Show on map | Surface |
| Marakuguc Shrine | Wheeled Wonders | Show on map | Surface |
| Mayachideg Shrine | Proving Grounds: The Hunt | Show on map | Surface |
| Mayak Shrine | Timely Catches | Show on map | Surface |
| Minetak Shrine | Rauru’s Blessing | Show on map | Surface |
| Momosik Shrine | Rauru’s Blessing | Show on map | Surface |
| Moshapin Shrine | Rauru’s Blessing | Show on map | Surface |
| Sibajitak Shrine | Alignment | Show on map | Surface |
| Sikukuu Shrine | Spinning Gears | Show on map | Surface |
| Sitsum Shrine | A Controlling Device | Show on map | Surface |
| Timawak Shrine | Against the Flow | Show on map | Surface |
Lanayru (17 shrines)
| Shrine | Trial | Map | Layer |
|---|---|---|---|
| Apogek Shrine | Wings on the Wind | Show on map | Surface |
| Igoshon Shrine | Orbs of Water | Show on map | Sky |
| Ihen-a Shrine | Midair Perch | Show on map | Surface |
| Jikais Shrine | Jailbreak | Show on map | Surface |
| Jirutagumac Shrine | A Flying Device | Show on map | Sky |
| Joniu Shrine | Rauru’s Blessing | Show on map | Surface |
| Jonsau Shrine | Deep Force | Show on map | Surface |
| Kurakat Shrine | Rauru’s Blessing | Show on map | Surface |
| Maoikes Shrine | Rauru’s Blessing | Show on map | Surface |
| Mayanas Shrine | The Ice Guides You | Show on map | Sky |
| Mogawak Shrine | The Power of Water | Show on map | Surface |
| Morok Shrine | A Bouncy Device | Show on map | Surface |
| O-ogim Shrine | Rauru’s Blessing | Show on map | Surface |
| Sihajog Shrine | Rauru’s Blessing | Show on map | Sky |
| Tukarok Shrine | Forward Force | Show on map | Surface |
| Yomizuk Shrine | Rauru’s Blessing | Show on map | Surface |
| Zakusu Shrine | Proving Grounds: Ascension | Show on map | Surface |
Necluda (18 shrines)
| Shrine | Trial | Map | Layer |
|---|---|---|---|
| Anedamimik Shrine | A Retraced Path | Show on map | Surface |
| Bamitok Shrine | Rauru’s Blessing | Show on map | Surface |
| Eshos Shrine | Combat Training: Shields | Show on map | Surface |
| Jochisiu Shrine | Rauru’s Blessing | Show on map | Surface |
| Jogou Shrine | Rauru’s Blessing | Show on map | Surface |
| Joju-u-u Shrine | Building Bridges | Show on map | Surface |
| Josiu Shrine | Rauru’s Blessing | Show on map | Sky |
| Kumamayn Shrine | Rauru’s Blessing | Show on map | Sky |
| Makasura Shrine | An Upright Device | Show on map | Surface |
| Marari-in Shrine | Rauru’s Blessing | Show on map | Surface |
| Mayahisik Shrine | Rauru’s Blessing | Show on map | Surface |
| Sifumim Shrine | Proving Grounds: Flow | Show on map | Surface |
| Susub Shrine | Rauru’s Blessing | Show on map | Surface |
| Tokiy Shrine | Rauru’s Blessing | Show on map | Surface |
| Ukoojisi Shrine | Rauru’s Blessing | Show on map | Sky |
| Utojis Shrine | Rauru’s Blessing | Show on map | Surface |
| Yansamin Shrine | Proving Grounds: Low Gravity | Show on map | Sky |
| Zanmik Shrine | Scoop It Out | Show on map | Surface |
Faron (5 shrines)
| Shrine | Trial | Map | Layer |
|---|---|---|---|
| Ishokin Shrine | Rauru’s Blessing | Show on map | Surface |
| Jiukoum Shrine | Built For Rails | Show on map | Surface |
| Joku-u Shrine | Rauru’s Blessing | Show on map | Sky |
| Joku-usin Shrine | Proving Grounds: Short Circuit | Show on map | Sky |
| Utsushok Shrine | Long or Wide | Show on map | Surface |
Gerudo (19 shrines)
| Shrine | Trial | Map | Layer |
|---|---|---|---|
| Chichim Shrine | Rauru’s Blessing | Show on map | Surface |
| Irasak Shrine | Rauru’s Blessing | Show on map | Surface |
| Karahatag Shrine | Drifting Flame | Show on map | Surface |
| Kitawak Shrine | Upward and Forward | Show on map | Surface |
| Kudanisar Shrine | Bridging the Sands | Show on map | Surface |
| Mayamats Shrine | A Route For a Ball | Show on map | Surface |
| Mayasiar Shrine | Rauru’s Blessing | Show on map | Sky |
| Mayatat Shrine | A Sliding Device | Show on map | Surface |
| Miryotanog Shrine | Proving Grounds: Lure | Show on map | Surface |
| Motsusis Shrine | Rauru’s Blessing | Show on map | Surface |
| Otutsum Shrine | Rauru’s Blessing | Show on map | Surface |
| Rakakudaj Shrine | Rauru’s Blessing | Show on map | Surface |
| Rakashog Shrine | A Reflective Device | Show on map | Sky |
| Rotsumamu Shrine | A Balanced Plan | Show on map | Surface |
| Siwakama Shrine | Moving the Spheres | Show on map | Surface |
| Siyamotsus Shrine | Unlit Blessing | Show on map | Sky |
| Soryotanog Shrine | Buried Light | Show on map | Surface |
| Suariwak Shrine | Rauru’s Blessing | Show on map | Surface |
| Turakamik Shrine | Hidden Metal | Show on map | Surface |
How were these locations checked?
The horizontal position of every shrine was checked against the game’s own map data and cross-checked against independent shrine tables; all 152 agree to within three meters. Height varies much more depending on which spot was measured, so the map marks horizontal position only.
Related
- Interactive shrine map — explore the same shrine data on a zoomable terrain map
- Korok seed guide: all 20 puzzle types — the other big collectible
- Armor upgrade materials — spend those chest rewards well
- Switch 2 Edition differences — the second save slot for a fresh 152-shrine run
FAQ
How many shrines are in Tears of the Kingdom?
What do you get for completing all 152 shrines?
How do I find the shrine I am missing?
Where do the shrine locations come from?
Related Articles
guides
Ocarina of Time Remake Big Poes: All 10 Locations and Ghost Shop Rewards
All ten Big Poe locations in the Ocarina of Time remake, how to make them appear on Epona, and Ghost Shop rewards: 30 rupees each, a bottle at 500 points.
guides
Ocarina of Time Remake Map: Heart Pieces, Gold Skulltulas and Area Maps
Ocarina of Time Switch 2 remake map: all 36 Pieces of Heart, 100 Gold Skulltulas, beans, songs, bottles, minigames and Great Fairies, with in-game maps of 21 areas.
guides
Ocarina of Time Remake Bottles: All 5 Locations
Find all five bottles in Ocarina of Time Remake: the new Potion Shop errand, Cuccos, ranch milk, Ruto’s Letter and the 500-point Big Poe reward.
Was this helpful?
Thanks for the feedback!