Where is Rasiwak Shrine?
◈ Surface ◇ Sky ⊞ All
⌕ Explore shrines All regions Great Sky Island Hyrule Field Tabantha Hebra Great Hyrule Forest Akkala Eldin Lanayru Necluda Faron Gerudo
Gutanbac Shrine Great Sky Island · 0709, -1383, 1582 ↗ In-isa Shrine Great Sky Island · 0026, -1504, 1409 ↗ Nachoyah Shrine Great Sky Island · 0390, -1661, 2284 ↗ Ukouh Shrine Great Sky Island · 0275, -0913, 1460 ↗ En-oma Shrine Hyrule Field · 0103, -2518, -0061 ↗ Ishodag Shrine Hyrule Field · -0879, 0423, 0074 ↗ Jinodok Shrine Hyrule Field · -1257, -1487, 1016 ↗ Jiosin Shrine Hyrule Field · -0241, -0371, 0052 ↗ Jojon Shrine Hyrule Field · 1202, 0330, 0052 ↗ Kamizun Shrine Hyrule Field · -0178, -1558, 0048 ↗ Kyokugon Shrine Hyrule Field · -0709, -1551, 0032 ↗ Kyononis Shrine Hyrule Field · -0205, 0451, 0046 ↗ Makurukis Shrine Hyrule Field · -2847, 0630, 0255 ↗ Mayachin Shrine Hyrule Field · -0706, -0869, 0057 ↗ Ren-iz Shrine Hyrule Field · 0756, 0824, 0106 ↗ Riogok Shrine Hyrule Field · -1441, -1616, 0113 ↗ Runakit Shrine Hyrule Field · -2530, 1170, 0200 ↗ Sepapa Shrine Hyrule Field · 0222, 1085, 0053 ↗ Serutabomac Shrine Hyrule Field · -0179, 1170, 0301 ↗ Sinakawak Shrine Hyrule Field · -1415, 0757, 0113 ↗ Sonapan Shrine Hyrule Field · -1922, -0359, 0250 ↗ Susuyai Shrine Hyrule Field · -0785, -0434, 0044 ↗ Tadarok Shrine Hyrule Field · -1082, -2187, 0152 ↗ Tajikats Shrine Hyrule Field · 0344, -1009, 0042 ↗ Taki-ihaban Shrine Hyrule Field · -1830, 1195, 0171 ↗ Teniten Shrine Hyrule Field · -0075, -1116, 0046 ↗ Tenmaten Shrine Hyrule Field · -0595, 1551, 0011 ↗ Tsutsu-um Shrine Hyrule Field · -1423, -1351, 0092 ↗ Usazum Shrine Hyrule Field · -2139, -0874, 0118 ↗ Yamiyo Shrine Hyrule Field · 0333, 0470, 0054 ↗ Ga-ahisas Shrine Tabantha · -3596, 0961, 1694 ↗ Ganos Shrine Tabantha · -3370, 0467, 1691 ↗ Gasas Shrine Tabantha · -4153, 0098, 0066 ↗ Gatakis Shrine Tabantha · -3652, 1806, 0191 ↗ Ikatak Shrine Tabantha · -3951, 1139, 0135 ↗ Iun-orok Shrine Tabantha · -3539, 0851, -0105 ↗ Mayausiy Shrine Tabantha · -1167, 2602, -0057 ↗ Nouda Shrine Tabantha · -2318, 2201, 0196 ↗ Oromuwak Shrine Tabantha · -3079, 1617, 0264 ↗ Taunhiy Shrine Tabantha · -2402, 0825, 0630 ↗ Turakawak Shrine Tabantha · -3498, -0197, 0090 ↗ Wao-os Shrine Tabantha · -4058, 1990, 0206 ↗ Eutoum Shrine Hebra · -3507, 3570, 0406 ↗ Ijo-o Shrine Hebra · -3861, 2682, 0716 ↗ Kahatanaum Shrine Hebra · -3296, 3432, 1349 ↗ Mayaotaki Shrine Hebra · -0825, 3535, 0256 ↗ Mayaumekis Shrine Hebra · -2948, 3051, 0907 ↗ Orochium Shrine Hebra · -1637, 2642, 0261 ↗ Oshozan-u Shrine Hebra · -1404, 3678, 0308 ↗ Otak Shrine Hebra · -4391, 3714, 0234 ↗ Rutafu-um Shrine Hebra · -2998, 3102, 0531 ↗ Sahirow Shrine Hebra · -3354, 2386, 0380 ↗ Sisuran Shrine Hebra · -2559, 3354, 0266 ↗ Taninoud Shrine Hebra · -1802, 3407, 0958 ↗ Tauyosipun Shrine Hebra · -4539, 2880, 0283 ↗ Tenbez Shrine Hebra · -0970, 3535, 1019 ↗ Ekochiu Shrine Great Hyrule Forest · 1063, 1280, 0071 ↗ Kikakin Shrine Great Hyrule Forest · -0396, 2736, 0308 ↗ Kiuyoyou Shrine Great Hyrule Forest · -1107, 2088, 0128 ↗ Mayam Shrine Great Hyrule Forest · 0340, 2815, 1814 ↗ Musanokir Shrine Great Hyrule Forest · 0408, 2134, 0167 ↗ Ninjis Shrine Great Hyrule Forest · 0355, 1892, 0201 ↗ Pupunke Shrine Great Hyrule Forest · 0621, 2211, 0187 ↗ Sakunbomar Shrine Great Hyrule Forest · 0167, 2320, 0202 ↗ Simosiwak Shrine Great Hyrule Forest · 0162, 1972, 0771 ↗ Domizuin Shrine Akkala · 3305, 1443, 0444 ↗ Gatanisis Shrine Akkala · 4498, 0826, 0119 ↗ Gemimik Shrine Akkala · 4513, 2116, 0027 ↗ Gikaku Shrine Akkala · 4506, 2166, 1160 ↗ Igashuk Shrine Akkala · 4655, 3714, 0154 ↗ Jochi-ihiga Shrine Akkala · 3811, 1219, 0115 ↗ Jochi-iu Shrine Akkala · 4347, 2876, 0188 ↗ Kamatukis Shrine Akkala · 3431, 3357, 0095 ↗ Mogisari Shrine Akkala · 4655, 3500, 1018 ↗ Natak Shrine Akkala · 3671, 1484, 1163 ↗ Rasitakiwak Shrine Akkala · 4167, 1323, 0251 ↗ Rasiwak Shrine Akkala · 4664, 3263, 0027 ↗ Sinatanika Shrine Akkala · 3842, 2300, 0073 ↗ Isisim Shrine Eldin · 1842, 2842, 0383 ↗ Jiotak Shrine Eldin · 1834, 3180, 0279 ↗ Kadaunar Shrine Eldin · 1882, 1203, 1255 ↗ Kimayat Shrine Eldin · 2864, 3638, 0262 ↗ Kisinona Shrine Eldin · 2568, 1246, 0196 ↗ Marakuguc Shrine Eldin · 1762, 2510, 0455 ↗ Mayachideg Shrine Eldin · 3061, 1824, 0238 ↗ Mayak Shrine Eldin · 1270, 3733, 0130 ↗ Minetak Shrine Eldin · 0394, 3485, 0093 ↗ Momosik Shrine Eldin · 2960, 2758, 0541 ↗ Moshapin Shrine Eldin · 2679, 1904, 0154 ↗ Sibajitak Shrine Eldin · 2400, 3275, 0421 ↗ Sikukuu Shrine Eldin · 0699, 2793, 0248 ↗ Sitsum Shrine Eldin · 2369, 2596, 0802 ↗ Timawak Shrine Eldin · 1800, 1640, 0332 ↗ Apogek Shrine Lanayru · 3887, -0217, 0187 ↗ Igoshon Shrine Lanayru · 3481, 0666, 1328 ↗ Ihen-a Shrine Lanayru · 3786, 0578, 0503 ↗ Jikais Shrine Lanayru · 4267, -1673, 0204 ↗ Jirutagumac Shrine Lanayru · 2916, 0534, 0960 ↗ Joniu Shrine Lanayru · 2918, 0507, 0178 ↗ Jonsau Shrine Lanayru · 1744, 0018, 0051 ↗ Kurakat Shrine Lanayru · 2361, -0511, 0179 ↗ Maoikes Shrine Lanayru · 2276, 0147, 0103 ↗ Mayanas Shrine Lanayru · 4613, -0947, 1784 ↗ Mogawak Shrine Lanayru · 3300, 0424, 0136 ↗ Morok Shrine Lanayru · 1182, -0779, 0157 ↗ O-ogim Shrine Lanayru · 2756, -1089, 0124 ↗ Sihajog Shrine Lanayru · 4546, -0846, 1127 ↗ Tukarok Shrine Lanayru · 0915, -0251, 0059 ↗ Yomizuk Shrine Lanayru · 4413, -0613, 0060 ↗ Zakusu Shrine Lanayru · 3526, -1482, 0190 ↗ Anedamimik Shrine Necluda · 4232, -2178, 0013 ↗ Bamitok Shrine Necluda · 3094, -3210, 0106 ↗ Eshos Shrine Necluda · 1566, -1945, 0180 ↗ Jochisiu Shrine Necluda · 0931, -1903, 0055 ↗ Jogou Shrine Necluda · 3346, -1187, 0082 ↗ Joju-u-u Shrine Necluda · 1515, -3577, 0165 ↗ Josiu Shrine Necluda · 1758, -1208, 0933 ↗ Kumamayn Shrine Necluda · 2857, -2856, 1216 ↗ Makasura Shrine Necluda · 1770, -1052, 0189 ↗ Marari-in Shrine Necluda · 4631, -3712, 0044 ↗ Mayahisik Shrine Necluda · 3729, -2059, 0211 ↗ Sifumim Shrine Necluda · 2826, -3270, 0102 ↗ Susub Shrine Necluda · 0349, -2052, -0001 ↗ Tokiy Shrine Necluda · 2304, -2378, -0003 ↗ Ukoojisi Shrine Necluda · 1469, -2169, 0601 ↗ Utojis Shrine Necluda · 1218, -2543, 0121 ↗ Yansamin Shrine Necluda · 2351, -1783, 1475 ↗ Zanmik Shrine Necluda · 3470, -2181, 0171 ↗ Ishokin Shrine Faron · -0565, -3524, 0152 ↗ Jiukoum Shrine Faron · 0868, -2278, 0165 ↗ Joku-u Shrine Faron · 1376, -3340, 0447 ↗ Joku-usin Shrine Faron · 1075, -3348, 0798 ↗ Utsushok Shrine Faron · 0670, -3358, 0096 ↗ Chichim Shrine Gerudo · -3211, -3007, -0024 ↗ Irasak Shrine Gerudo · -4159, -3825, 0053 ↗ Karahatag Shrine Gerudo · -3728, -3625, 0068 ↗ Kitawak Shrine Gerudo · -1530, -2929, 0341 ↗ Kudanisar Shrine Gerudo · -4167, -2143, 0075 ↗ Mayamats Shrine Gerudo · -4638, -1513, 0470 ↗ Mayasiar Shrine Gerudo · -3547, -0321, 1956 ↗ Mayatat Shrine Gerudo · -3291, -2512, 0050 ↗ Miryotanog Shrine Gerudo · -4680, -3086, 0079 ↗ Motsusis Shrine Gerudo · -1795, -3487, 0070 ↗ Otutsum Shrine Gerudo · -4469, -0671, 0526 ↗ Rakakudaj Shrine Gerudo · -2037, -1853, 0089 ↗ Rakashog Shrine Gerudo · -1715, -2119, 1155 ↗ Rotsumamu Shrine Gerudo · -3407, -1363, 0355 ↗ Siwakama Shrine Gerudo · -2446, -3344, 0067 ↗ Siyamotsus Shrine Gerudo · -1795, -3295, 1019 ↗ Soryotanog Shrine Gerudo · -3882, -2963, 0147 ↗ Suariwak Shrine Gerudo · -2524, -1770, 0155 ↗ Turakamik Shrine Gerudo · -2657, -2237, 0092 ↗ No shrine matches those filters.
↑N + − ⛶
Terrain Coordinate grid
◈ Select a shrine to explore its location.
Height is a reference value; it may differ from the map marker height.
In a cave — the marker is not the cave entrance.
Some terrain tiles could not load. Switch to the coordinate grid or retry. Retry terrain
Northeast of the Akkala Ancient Tech Lab , on the sand of North Akkala Beach . Glide northeast from Ulri Mountain Skyview Tower . Coordinates match our 152-shrine table .
Item Detail Trial Flotational Brilliance Region Akkala (surface, Akkala Sea) Coordinates 4664, 3263, 0027 Type Puzzle — buoyancy and Recall Chests 1 (Magic Scepter) Names 拉希瓦卡神廟 (zh-TW) · 拉希瓦卡神庙 (zh-CN)
Video walkthrough
Step-by-step solution
Rasiwak Shrine is a boat-building exercise on the Akkala coast: buoyancy balls lift what water should sink, and one rope stands between you and the chest.
1. Cross the First Pool
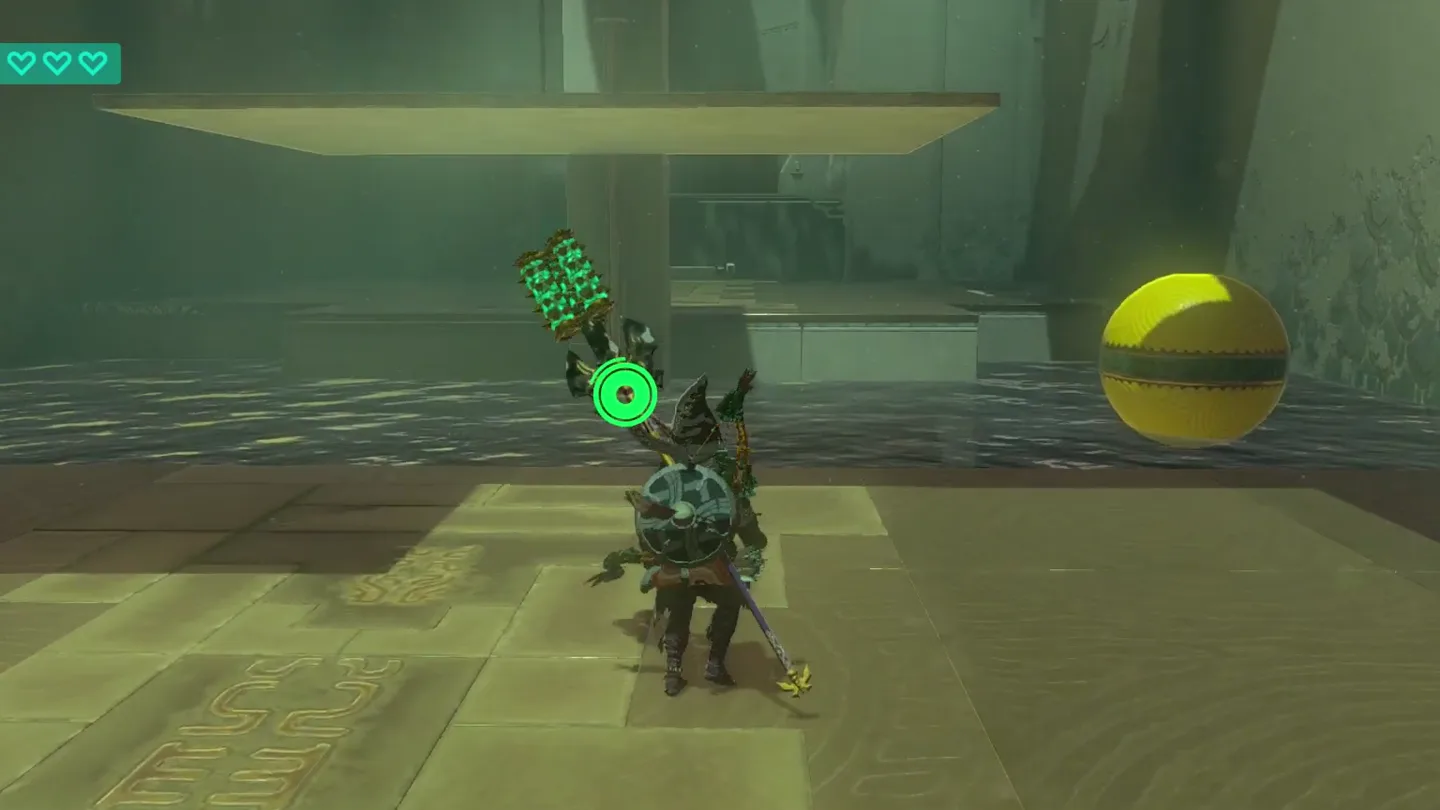
A platform hangs from a rope ahead — shoot the rope so it drops into the pool.
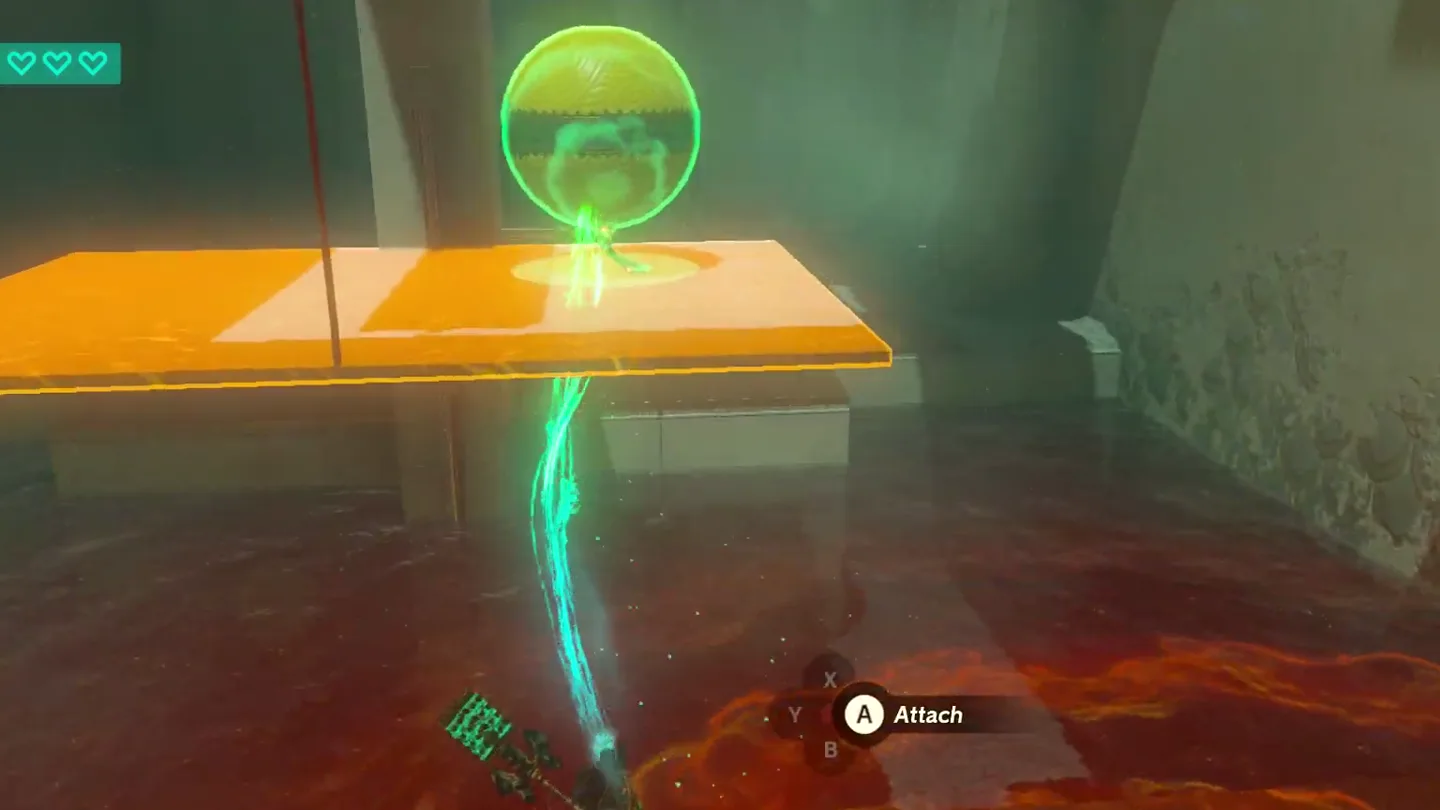
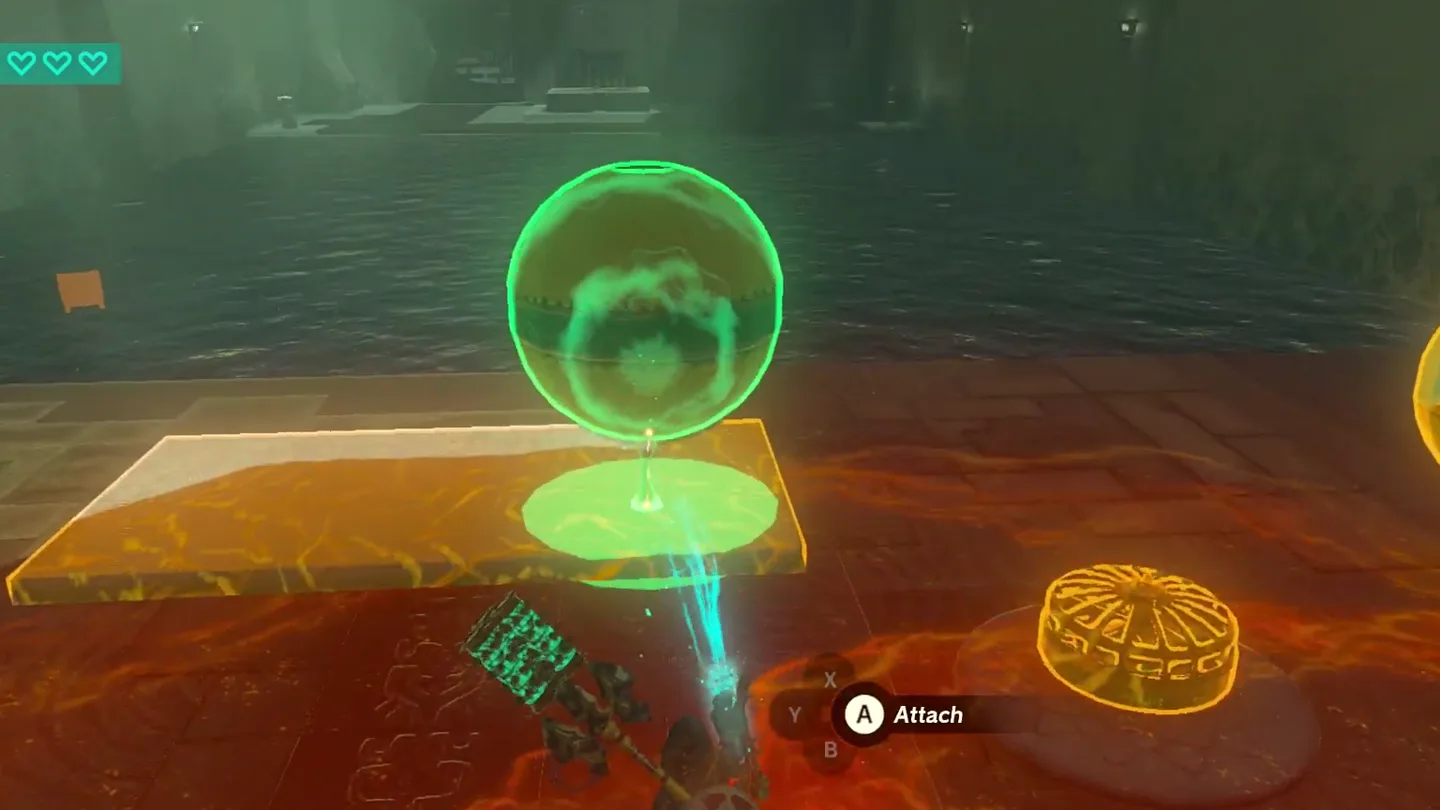
Stick a floaty ball to the sunken platform with Ultrahand; it rises, and you cross on it.
1 Shoot the rope holding the platform ① so it drops into the pool. Screenshot (cropped) from SweetJohnnyCage - Narrated Guides & Walkthroughs
· used with permission
1 2 Stick a floaty ball ① to the sunken platform ② with Ultrahand; it rises and you cross on it. Screenshot (cropped) from SweetJohnnyCage - Narrated Guides & Walkthroughs
· used with permission
2. Recall the Drawbridge
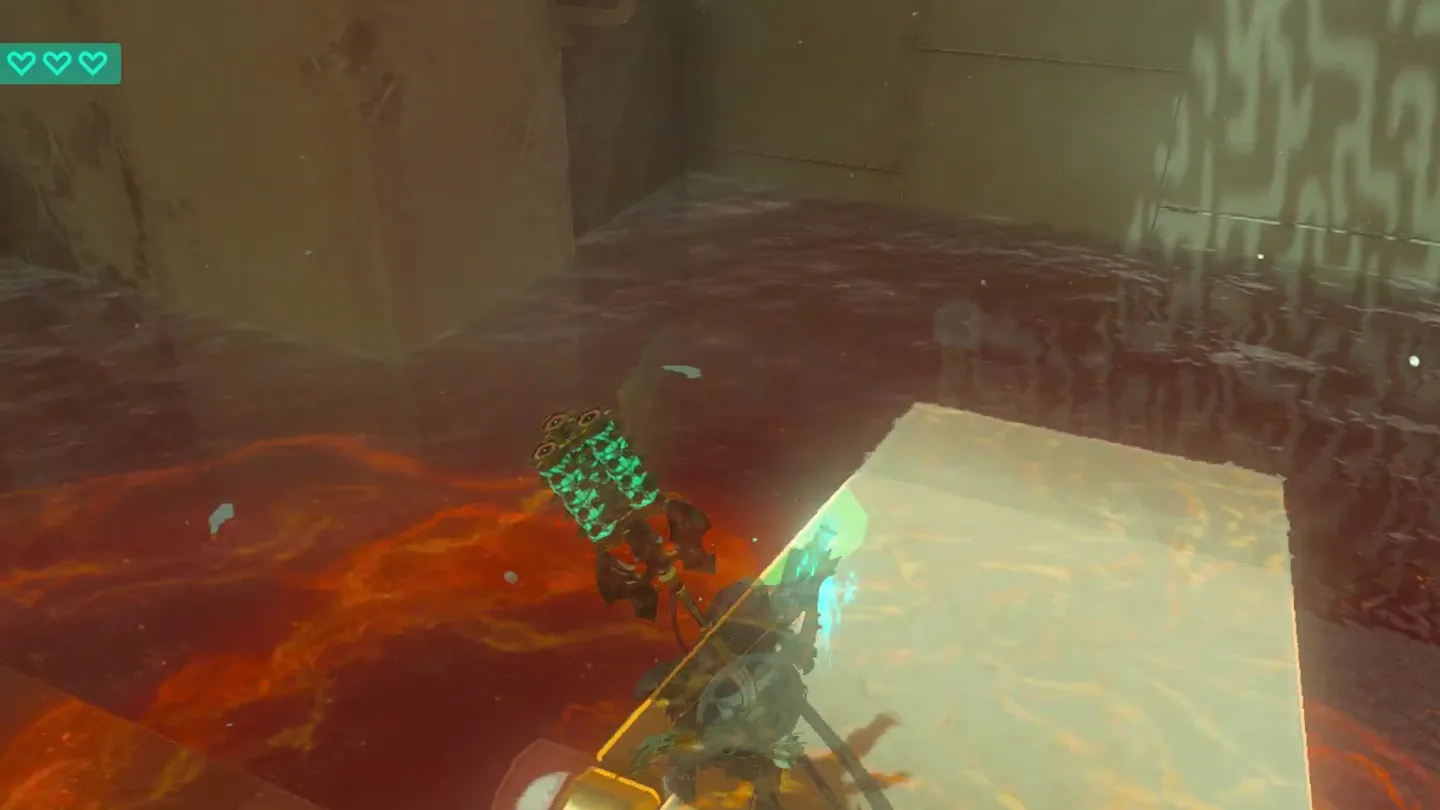
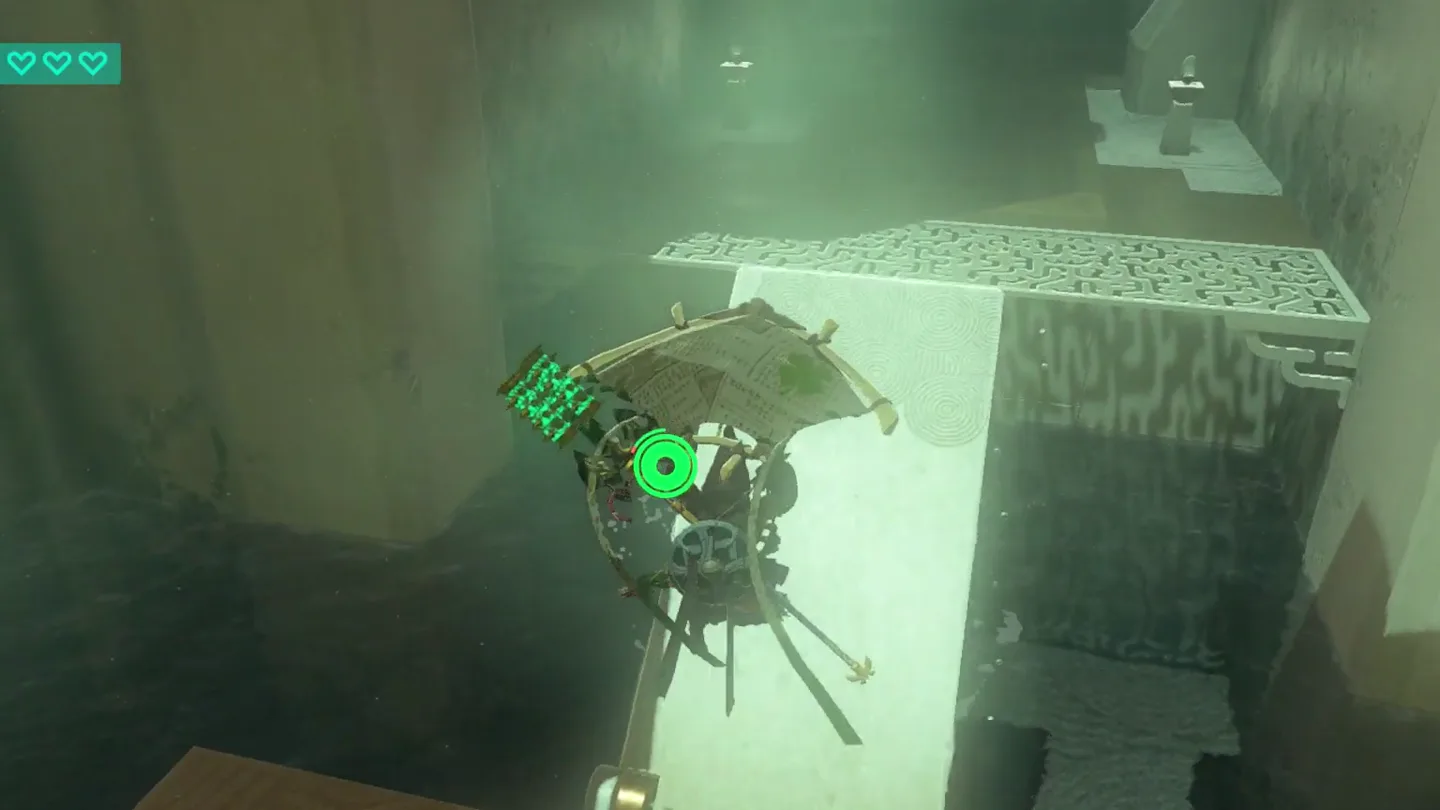
The drawbridge: lift the white drawbridge with Ultrahand, hold it up a few seconds, let it drop — then Recall it and walk across while it replays the lift.
1 Lift the white drawbridge ① with Ultrahand, hold it a few seconds, and let it drop. Screenshot (cropped) from SweetJohnnyCage - Narrated Guides & Walkthroughs
· used with permission
Recall it and walk across while it replays the lift. Screenshot (cropped) from SweetJohnnyCage - Narrated Guides & Walkthroughs
· used with permission
3. Build a Boat and Open the Gate
Build a boat: attach a floaty ball to the centre of a stone platform, add a Zonai fan at the back, and set it in the pool on the left.
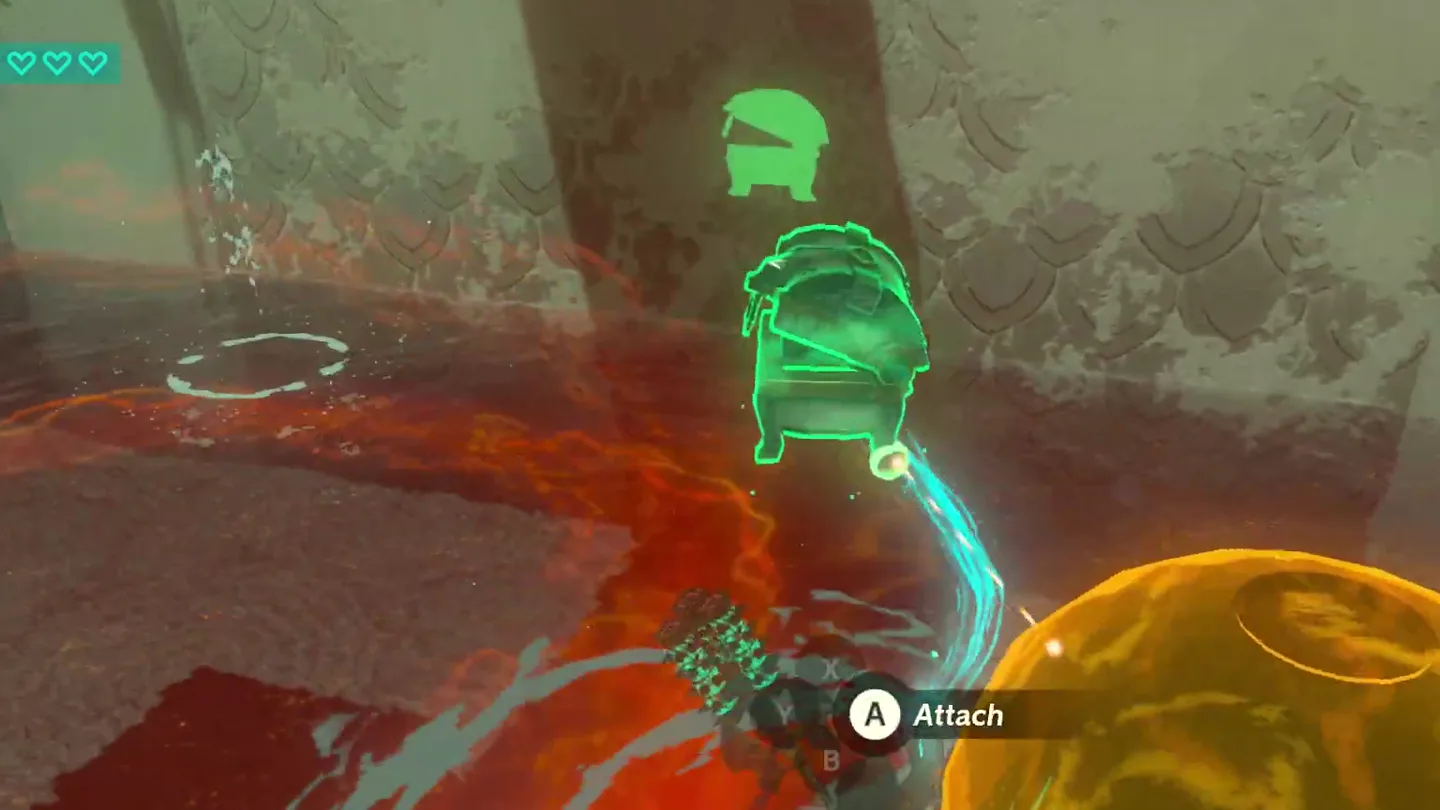
Chest: start the fan and steer under the chest hanging from a rope . Cut the rope with an arrow and lift the chest with Ultrahand: Magic Scepter .
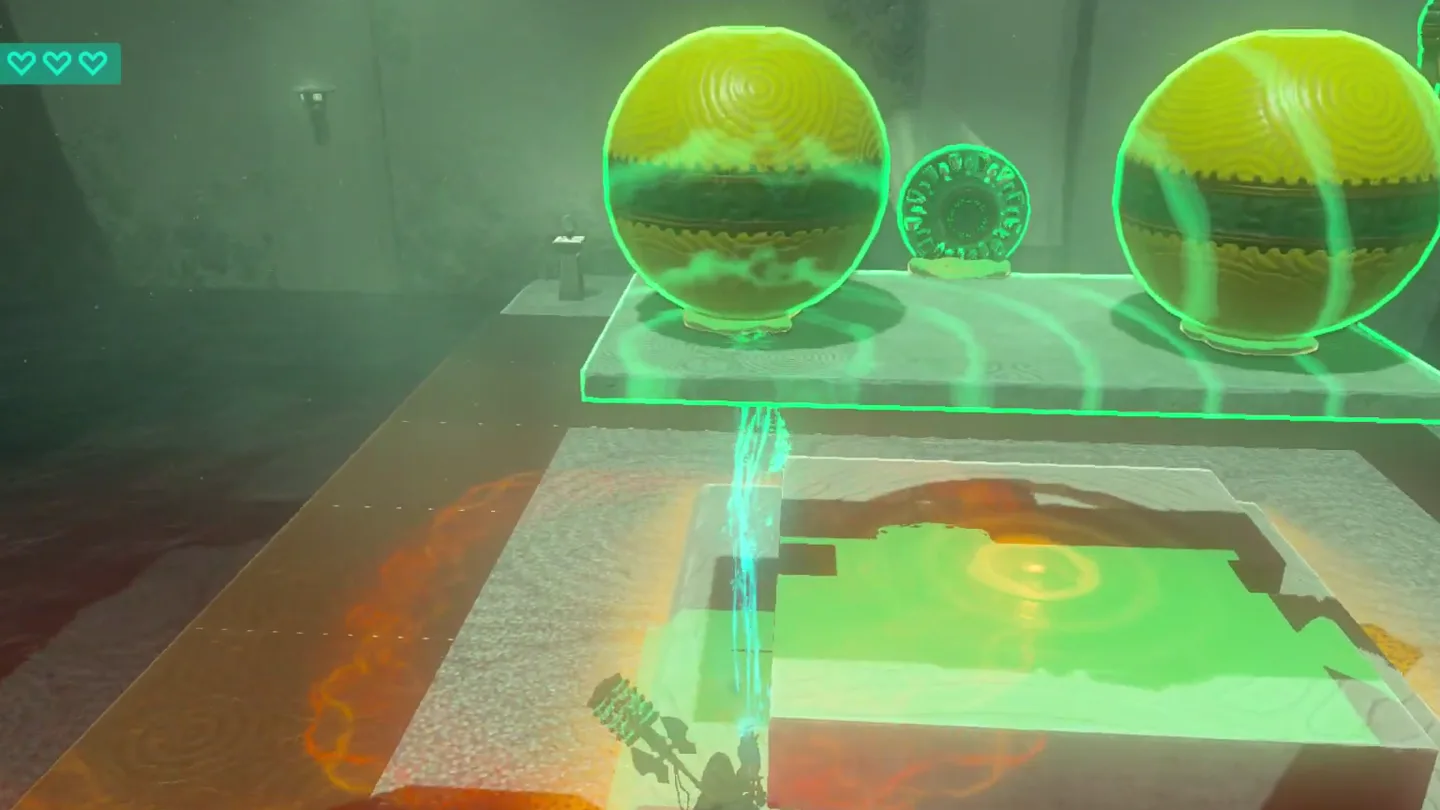
Sail on and land, detach the floaty ball from your boat, and drop it onto the trigger that opens the altar gate.
1 2 Boat: attach a floaty ball ① to the centre of a stone platform ② and a Zonai fan at the back; set it in the pool on the left. Screenshot (cropped) from SweetJohnnyCage - Narrated Guides & Walkthroughs
· used with permission
1 Chest: sail under the chest hanging from a rope, shoot the rope, and lift the chest ① with Ultrahand: Magic Scepter. Screenshot (cropped) from SweetJohnnyCage - Narrated Guides & Walkthroughs
· used with permission
1 2 Land, detach the floaty ball ① from the boat and drop it onto the trigger ② that opens the altar gate. Screenshot (cropped) from SweetJohnnyCage - Narrated Guides & Walkthroughs
· used with permission
4. Claim the Blessing
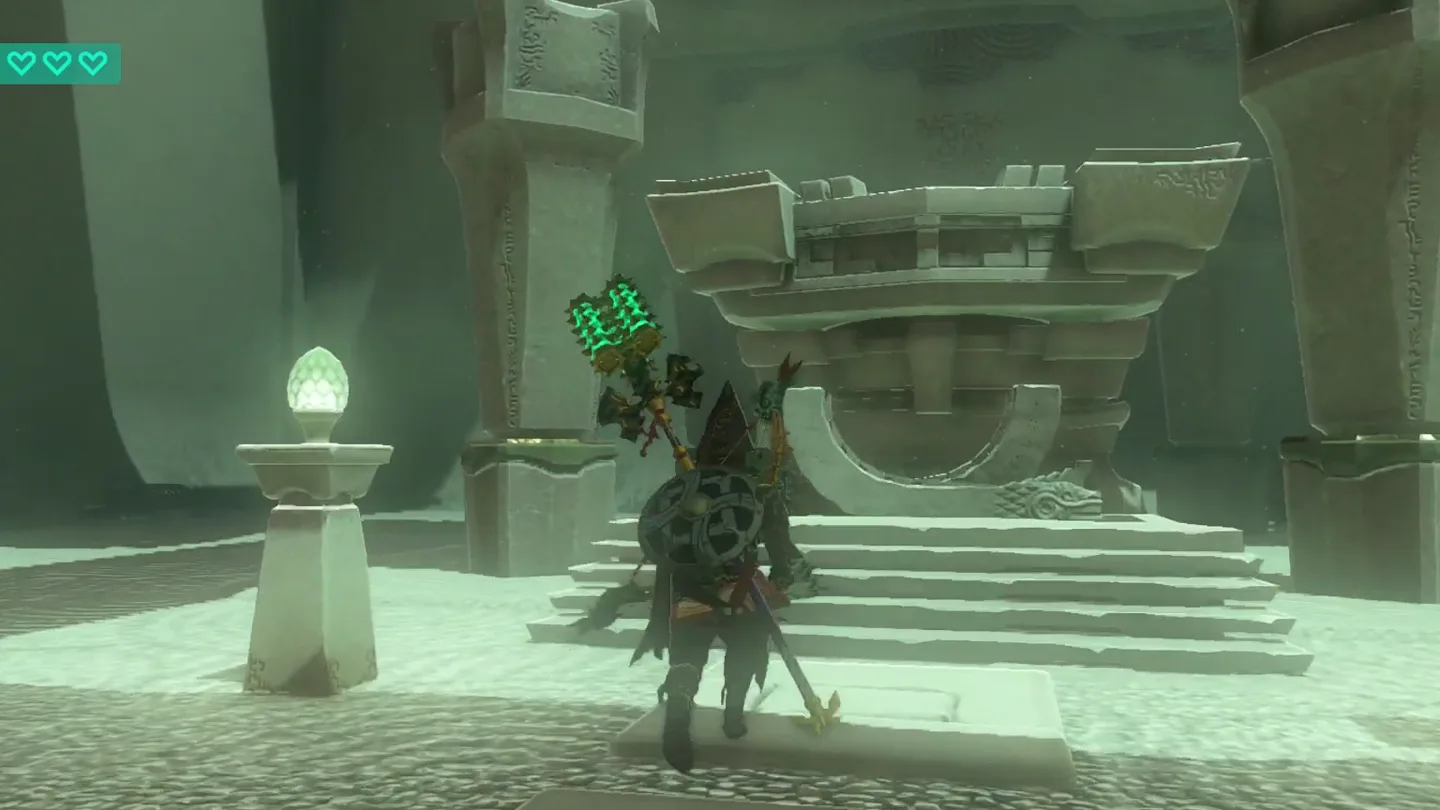
Take the Light of Blessing .
Take the Light of Blessing. Screenshot (cropped) from SweetJohnnyCage - Narrated Guides & Walkthroughs
· used with permission
Chests
Chest Contents How 1 Magic Scepter Sail the fan boat under the hanging chest, cut the rope