

TotK Hebra Korok Seeds: 70 Seeds, Map & Puzzles
Find all 70 Korok Seeds at 64 locations in Hebra in Tears of the Kingdom. Browse puzzle solutions and show each spot on the map.
Hebra has 64 Korok locations worth 70 seeds in Tears of the Kingdom. Use the map to choose a nearby spot, then check its puzzle group below. Return to the Korok Seeds overview for the full map and inventory costs.
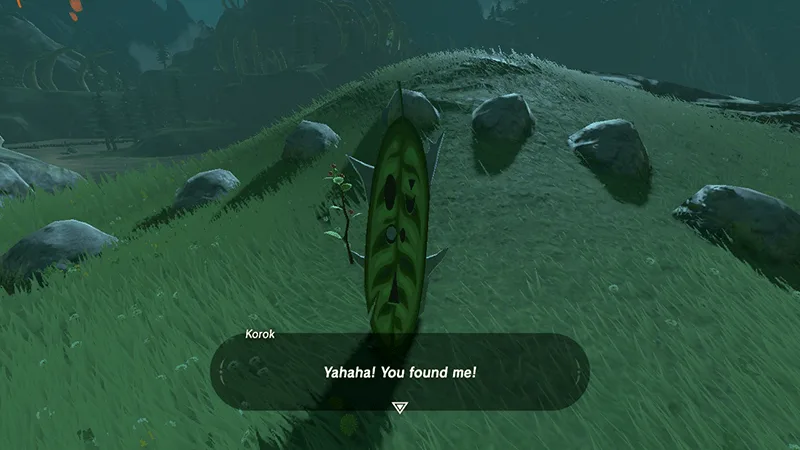
How many locations and seeds are in this region?
| Measure | Count |
|---|---|
| Locations | 64 |
| Seeds | 70 |
| Share of all 1,000 seeds | 7.0% |
| Surface locations | 57 |
| Sky locations | 7 |
| One-seed puzzles | 58 |
| Two-seed reunions | 6 |
The percentage counts seeds, not the map completion rate. Regions follow the nearest shrine’s region; the landmark is the nearest named place, so it is a starting reference rather than a route description.
Where are the Koroks on the regional map?
Loading the terrain map… slow connections can take a few seconds.
Some terrain tiles failed to load.
Drag to move and zoom in to tell the points apart; on a computer, click the map first and the mouse wheel zooms it. Ticks are saved in this browser only; no account is needed.
Progress cannot be saved in this browser session.
Use Show on map in the tables to focus a location. Check off completed spots in this browser. This regional checklist is saved separately from the overview map; its counter tracks locations, not seeds.
For reunions, the main map button opens the backpack Korok’s starting point. The friend column opens the destination. Both belong to one puzzle; collect two seeds after bringing them together.
Which puzzle types are here, and how do you solve them?
These are descriptive puzzle labels. Only types present in this region appear below.
| Puzzle | Locations | Seeds | Quick solution |
|---|---|---|---|
| Lift a rock | 13 | 13 | Lift the loose rock to reveal the Korok. |
| Take the Korok to its friend (2 seeds) | 6 | 12 | Take the backpack Korok from the starting point to its waiting friend for two seeds. |
| Ascend through the rock | 5 | 5 | Stand underneath the marked surface and use Ascend through it. |
| Complete a rock pattern | 5 | 5 | Find the nearby loose stones and fill the gaps in the pattern. |
| Build the shape from the blocks | 4 | 4 | Use Ultrahand to fit the loose blocks into the matching shape. |
| Reach the goal before time runs out | 4 | 4 | Activate the marked stump, then reach the goal before time runs out. |
| Shoot the balloons by a pinwheel | 4 | 4 | Stand by the pinwheel to reveal the balloons, then shoot them. |
| Touch a sparkle that stays put | 4 | 4 | Approach the sparkle and examine it. |
| Land on the target | 3 | 3 | Glide to the marked target and land on it. |
| Build the Korok a shelter | 2 | 2 | Use the nearby building pieces to cover the exposed spot. |
| Chase a moving sparkle | 2 | 2 | Follow the moving sparkle and examine it when you catch up. |
| Follow a flower trail | 2 | 2 | Touch the flower, follow its next appearance and continue to the last flower. |
| Shoot a balloon | 2 | 2 | Shoot the balloon with an arrow. |
| Touch the target | 2 | 2 | Move to and touch the marked target. |
| Catch a falling light | 1 | 1 | Follow the falling light and touch it before it gets away. |
| Catch a falling seed | 1 | 1 | Catch the falling seed before it reaches the ground. |
| Pull out the plug | 1 | 1 | Pull the plug out of its socket; use the attached object for leverage. |
| Put a boulder on its stand | 1 | 1 | Use Ultrahand to place the nearby boulder on the stand. |
| Put the missing fruit on the offering plate | 1 | 1 | Place the same fruit as the neighboring offerings on the empty plate. |
| Shoot the acorn in a hole | 1 | 1 | Look into the opening and shoot the acorn inside. |
Where is each puzzle location?
Lift a rock — 13 locations, 13 seeds
Click “Show on map” to move the map above to that spot.
| # | Puzzle | Nearest landmark | Region | Location |
|---|---|---|---|---|
| 1 | Lift a rock | Hebra North Summit | Hebra | Show on map |
| 2 | Lift a rock | Icefall Foothills | Hebra | Show on map |
| 3 | Lift a rock | Lake Kilsie | Hebra | Show on map |
| 4 | Lift a rock | Biron Snowshelf | Hebra | Show on map |
| 5 | Lift a rock | Hebra Tundra | Hebra | Show on map |
| 6 | Lift a rock | Hebra Plunge | Hebra | Show on map |
| 7 | Lift a rock | Lake Kilsie | Hebra | Show on map |
| 8 | Lift a rock | Hebra Tundra | Hebra | Show on map |
| 9 | Lift a rock | Rospro Pass | Hebra | Show on map |
| 10 | Lift a rock | North Tabantha Snowfield | Hebra | Show on map |
| 11 | Lift a rock | North Tabantha Snowfield | Hebra | Show on map |
| 12 | Lift a rock | South Tabantha Snowfield | Hebra | Show on map |
| 13 | Lift a rock | Rising Island Chain | Hebra | Show on map |
Take the Korok to its friend (2 seeds) — 6 locations, 12 seeds
Click “Show on map” to move the map above to that spot.
| # | Puzzle | Nearest landmark | Region | Location | Where the friend waits |
|---|---|---|---|---|---|
| 1 | Take the Korok to its friend (2 seeds) | Biron Snowshelf | Hebra | Show on map | Sherfin's Secret Hot Spring Map |
| 2 | Take the Korok to its friend (2 seeds) | Pikida Stonegrove | Hebra | Show on map | Pikida Stonegrove Map |
| 3 | Take the Korok to its friend (2 seeds) | Selmie's Spot | Hebra | Show on map | Goflam's Secret Hot Spring Map |
| 4 | Take the Korok to its friend (2 seeds) | Hebra Peak | Hebra | Show on map | Hebra Peak Map |
| 5 | Take the Korok to its friend (2 seeds) | Mount Drena | Hebra | Show on map | North Lomei Labyrinth Map |
| 6 | Take the Korok to its friend (2 seeds) | South Tabantha Snowfield | Hebra | Show on map | South Tabantha Snowfield Map |
Ascend through the rock — 5 locations, 5 seeds
Click “Show on map” to move the map above to that spot.
| # | Puzzle | Nearest landmark | Region | Location |
|---|---|---|---|---|
| 1 | Ascend through the rock | Biron Snowshelf | Hebra | Show on map |
| 2 | Ascend through the rock | Selmie's Spot | Hebra | Show on map |
| 3 | Ascend through the rock | Lake Totori | Hebra | Show on map |
| 4 | Ascend through the rock | Mount Drena | Hebra | Show on map |
| 5 | Ascend through the rock | Snowfield Stable | Hebra | Show on map |
Complete a rock pattern — 5 locations, 5 seeds
Click “Show on map” to move the map above to that spot.
| # | Puzzle | Nearest landmark | Region | Location |
|---|---|---|---|---|
| 1 | Complete a rock pattern | Corvash Peak | Hebra | Show on map |
| 2 | Complete a rock pattern | Coldsnap Hollow | Hebra | Show on map |
| 3 | Complete a rock pattern | Hebra East Summit | Hebra | Show on map |
| 4 | Complete a rock pattern | South Tabantha Snowfield | Hebra | Show on map |
| 5 | Complete a rock pattern | Mount Drena | Hebra | Show on map |
Build the shape from the blocks — 4 locations, 4 seeds
Click “Show on map” to move the map above to that spot.
| # | Puzzle | Nearest landmark | Region | Location |
|---|---|---|---|---|
| 1 | Build the shape from the blocks | Mount Drena | Hebra | Show on map |
| 2 | Build the shape from the blocks | Sherfin's Secret Hot Spring | Hebra | Show on map |
| 3 | Build the shape from the blocks | Biron Snowshelf | Hebra | Show on map |
| 4 | Build the shape from the blocks | Corvash Peak | Hebra | Show on map |
Reach the goal before time runs out — 4 locations, 4 seeds
Click “Show on map” to move the map above to that spot.
| # | Puzzle | Nearest landmark | Region | Location |
|---|---|---|---|---|
| 1 | Reach the goal before time runs out | Rising Island Chain | Hebra | Show on map |
| 2 | Reach the goal before time runs out | Hebra West Summit | Hebra | Show on map |
| 3 | Reach the goal before time runs out | Hebra North Crest | Hebra | Show on map |
| 4 | Reach the goal before time runs out | Corvash Peak | Hebra | Show on map |
Shoot the balloons by a pinwheel — 4 locations, 4 seeds
Click “Show on map” to move the map above to that spot.
| # | Puzzle | Nearest landmark | Region | Location |
|---|---|---|---|---|
| 1 | Shoot the balloons by a pinwheel | Hebra West Summit | Hebra | Show on map |
| 2 | Shoot the balloons by a pinwheel | Goflam's Secret Hot Spring | Hebra | Show on map |
| 3 | Shoot the balloons by a pinwheel | Pikida Stonegrove | Hebra | Show on map |
| 4 | Shoot the balloons by a pinwheel | North Lomei Labyrinth | Hebra | Show on map |
Touch a sparkle that stays put — 4 locations, 4 seeds
Click “Show on map” to move the map above to that spot.
| # | Puzzle | Nearest landmark | Region | Location |
|---|---|---|---|---|
| 1 | Touch a sparkle that stays put | Hebra West Summit | Hebra | Show on map |
| 2 | Touch a sparkle that stays put | Goflam's Secret Hot Spring | Hebra | Show on map |
| 3 | Touch a sparkle that stays put | Talonto Peak | Hebra | Show on map |
| 4 | Touch a sparkle that stays put | Hebra Trailhead Lodge | Hebra | Show on map |
Land on the target — 3 locations, 3 seeds
Click “Show on map” to move the map above to that spot.
| # | Puzzle | Nearest landmark | Region | Location |
|---|---|---|---|---|
| 1 | Land on the target | Icefall Foothills | Hebra | Show on map |
| 2 | Land on the target | South Tabantha Snowfield | Hebra | Show on map |
| 3 | Land on the target | South Hebra Sky Archipelago | Hebra | Show on map |
Build the Korok a shelter — 2 locations, 2 seeds
Click “Show on map” to move the map above to that spot.
| # | Puzzle | Nearest landmark | Region | Location |
|---|---|---|---|---|
| 1 | Build the Korok a shelter | Sherfin's Secret Hot Spring | Hebra | Show on map |
| 2 | Build the Korok a shelter | Biron Snowshelf | Hebra | Show on map |
Chase a moving sparkle — 2 locations, 2 seeds
Click “Show on map” to move the map above to that spot.
| # | Puzzle | Nearest landmark | Region | Location |
|---|---|---|---|---|
| 1 | Chase a moving sparkle | Hebra North Crest | Hebra | Show on map |
| 2 | Chase a moving sparkle | North Tabantha Snowfield | Hebra | Show on map |
Follow a flower trail — 2 locations, 2 seeds
Click “Show on map” to move the map above to that spot.
| # | Puzzle | Nearest landmark | Region | Location |
|---|---|---|---|---|
| 1 | Follow a flower trail | East Hebra Sky Archipelago | Hebra | Show on map |
| 2 | Follow a flower trail | Biron Snowshelf | Hebra | Show on map |
Shoot a balloon — 2 locations, 2 seeds
Click “Show on map” to move the map above to that spot.
| # | Puzzle | Nearest landmark | Region | Location |
|---|---|---|---|---|
| 1 | Shoot a balloon | Hebra North Summit | Hebra | Show on map |
| 2 | Shoot a balloon | Hebra North Summit | Hebra | Show on map |
Touch the target — 2 locations, 2 seeds
Click “Show on map” to move the map above to that spot.
| # | Puzzle | Sky island | Region | Location |
|---|---|---|---|---|
| 1 | Touch the target | East Hebra Sky Archipelago | Hebra | Show on map |
| 2 | Touch the target | West Hebra Sky Archipelago | Hebra | Show on map |
Catch a falling light — 1 location, 1 seed
Click “Show on map” to move the map above to that spot.
| # | Puzzle | Sky island | Region | Location |
|---|---|---|---|---|
| 1 | Catch a falling light | North Lomei Castle Top Floor | Hebra | Show on map |
Catch a falling seed — 1 location, 1 seed
Click “Show on map” to move the map above to that spot.
| # | Puzzle | Nearest landmark | Region | Location |
|---|---|---|---|---|
| 1 | Catch a falling seed | Sherfin's Secret Hot Spring | Hebra | Show on map |
Pull out the plug — 1 location, 1 seed
Click “Show on map” to move the map above to that spot.
| # | Puzzle | Nearest landmark | Region | Location |
|---|---|---|---|---|
| 1 | Pull out the plug | Hebra West Summit | Hebra | Show on map |
Put a boulder on its stand — 1 location, 1 seed
Click “Show on map” to move the map above to that spot.
| # | Puzzle | Nearest landmark | Region | Location |
|---|---|---|---|---|
| 1 | Put a boulder on its stand | Forgotten Temple | Hebra | Show on map |
Put the missing fruit on the offering plate — 1 location, 1 seed
Click “Show on map” to move the map above to that spot.
| # | Puzzle | Nearest landmark | Region | Location |
|---|---|---|---|---|
| 1 | Put the missing fruit on the offering plate | Snowfield Stable | Hebra | Show on map |
Shoot the acorn in a hole — 1 location, 1 seed
Click “Show on map” to move the map above to that spot.
| # | Puzzle | Nearest landmark | Region | Location |
|---|---|---|---|---|
| 1 | Shoot the acorn in a hole | North Lomei Labyrinth | Hebra | Show on map |
Where should you go next?
FAQ
How many Korok Seeds are in Hebra?
How are the region boundaries assigned?
Does every location give one seed?
How do I open a location on the map?
Related Articles
guides
BotW Akkala Korok Seeds: 61 Seeds, Map & Puzzles
Find all 61 Korok Seeds at 61 locations in Akkala in Breath of the Wild. Browse puzzle solutions and show each spot on the map.
guides
BotW Central Korok Seeds: 118 Seeds, Map & Puzzles
Find all 118 Korok Seeds at 118 locations in Central in Breath of the Wild. Browse puzzle solutions and show each spot on the map.
guides
BotW Dueling Peaks Korok Seeds: 68 Seeds, Map & Puzzles
Find all 68 Korok Seeds at 68 locations in Dueling Peaks in Breath of the Wild. Browse puzzle solutions and show each spot on the map.
Was this helpful?
Thanks for the feedback!