

Ocarina of Time Remake 100% Checklist: All Collectibles
A tickable 100% checklist for Ocarina of Time Remake on Switch 2: 36 Heart Pieces, 100 Gold Skulltulas, 13 songs, every item, upgrade, bottle and mask.
This is a single 100% checklist for the Nintendo Switch 2 remake of The Legend of Zelda: Ocarina of Time. Every row is something you keep: Pieces of Heart and Heart Containers, Gold Skulltula tokens, songs, Spiritual Stones and Medallions, items, equipment and capacity upgrades, bottles, Great Fairy gifts, masks, Big Poes and the owl statues from the Hall of Fallen Foes. Each section gives its total and links to the full guide with step-by-step directions; the numbers match those guides and the interactive map.
Does the remake track 100% completion?
Only in parts. The Collection tab of the pause menu counts your Gold Skulltula tokens and shows how much of your next heart you have pieced together, the Key Items tab shows the Spiritual Stones and Medallions, and the world map counts Pieces of Heart and Gold Skulltulas for each area. None of the pause menu screens checked for this page adds everything up into one completion percentage.
So this page sets its own target. This site’s checklist includes everything below:
| What | Count | Full guide |
|---|---|---|
| Pieces of Heart | 36 | Heart Piece locations |
| Heart Containers from bosses | 8 | Boss guide |
| Gold Skulltulas | 100 | Gold Skulltula locations |
| Songs | 13 | Songs and notes |
| Spiritual Stones and Medallions | 9 | Story |
| Items | 17 | Items and upgrades |
| Swords, shields, tunics and boots | 11 | Tunics, boots and shields |
| Capacity, strength and swimming upgrades | 16 | Items and upgrades |
| Bottles | 5 | Bottles |
| Great Fairy gifts | 6 | Great Fairy Fountains |
| Masks | 5 | Masks |
| Big Poes | 10 | Big Poe locations |
| Hall of Fallen Foes owl statues | 3 | Hall of Fallen Foes |
| Other rewards | 4 | This page |
| Total | 243 |
With 3 starting hearts, 8 Heart Containers and nine hearts from the 36 pieces, a complete file has 20 hearts.
How do you use this checklist?
Tick a row when you have it. Ticks are saved in this browser only, with no account, and the counter at the top counts all 243 rows; each section heading gives its own total. This page keeps its own list, so ticks from the Heart Piece and Gold Skulltula checklists and the interactive map do not carry over. Rows give the area and what you need; the “Show on map” link opens the spot, and each section links to the guide with the full steps.
A few things open up whole groups, so they are worth doing early:
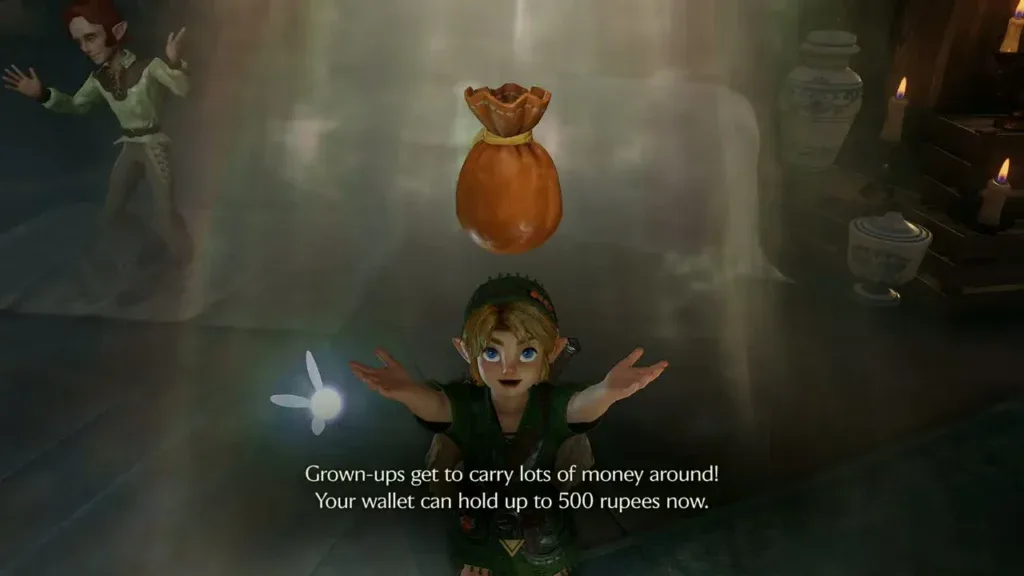
- Gold Skulltula rewards. At the House of Skulltula in Kakariko, 10 tokens give the 500-rupee Adult’s Wallet, 20 the Echo Gem that chimes near Gold Skulltulas, 30 the 1,000-rupee Giant’s Wallet, 40 twenty Bombchus, 50 a Piece of Heart and 100 a 200-rupee gold rupee. The bigger wallets are what let you pay the later Great Fairy offerings, which go up to 500 rupees.
- Magic Beans. Plant them as a child; five Pieces of Heart and several Gold Skulltulas are reached by riding the grown plants as an adult. The Magic Beans guide has the planting stops.
- Night and soft soil. Gold Skulltulas out in the open only appear at night, so carry the Sun’s Song. Bottled bugs released on soft soil bring out others.
- Scarecrow Song. Teach Bonooru your tune as a child and play it to him again as an adult; several Gold Skulltulas and a Piece of Heart need Pierre the scarecrow. See the songs guide.
- Both ages. Many rows need you to come back as the other age. The Master Sword pedestal in the Temple of Time switches you back and forth once you have it.
0 / 0 ticked
Saved in this browser only. No account needed. Separate from the Heart Piece and Gold Skulltula checklists.
Where are all 36 Pieces of Heart and 8 Heart Containers? (44)
Every four Pieces of Heart make one more heart. The numbers are the same as on the Heart Piece checklist, which has the full directions for each one.
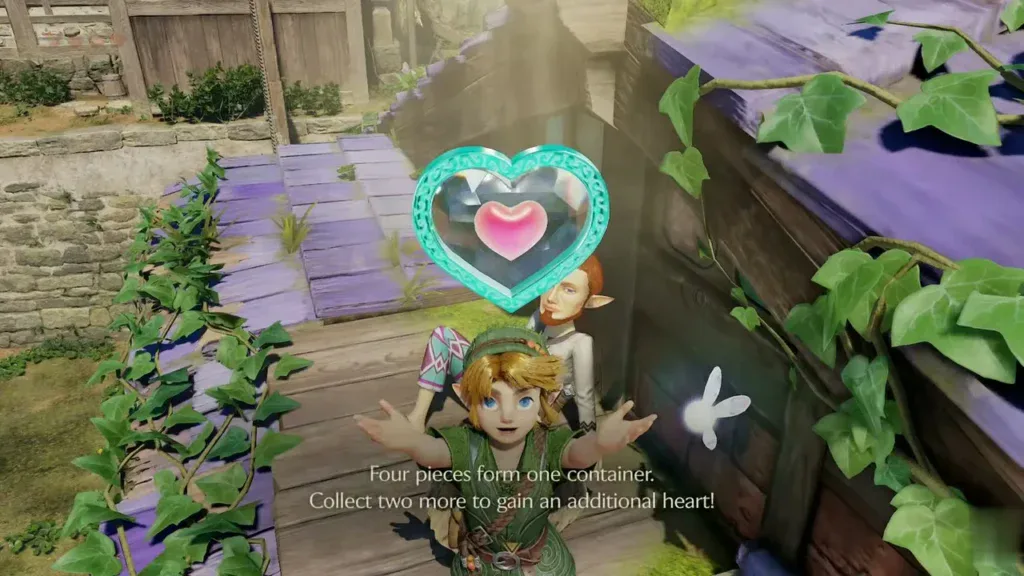
Kakariko Village and the Graveyard (8)
| Piece | Where | Needs | Map |
|---|---|---|---|
| Piece #1 | Graveyard | — | Show on map |
| Piece #2 | Graveyard | Child, night; rupees | Show on map |
| Piece #12 | Kakariko | Child; Kaepora Gaebora’s ride | Show on map |
| Piece #18 | Graveyard | Adult; Magic Bean | Show on map |
| Piece #19 | Kakariko windmill | Adult | Show on map |
| Piece #20 | Graveyard | Adult | Show on map |
| Piece #21 | Kakariko | Child; Cucco | Show on map |
| Piece #22 | Kakariko | 50 Gold Skulltula tokens | Show on map |
Castle Town, Hyrule Field and Lon Lon Ranch (6)
| Piece | Where | Needs | Map |
|---|---|---|---|
| Piece #3 | Lon Lon Ranch | Child | Show on map |
| Piece #9 | Castle Town | Child, night | Show on map |
| Piece #13 | Castle Town | Child; 10 rupees a play | Show on map |
| Piece #14 | Hyrule Field | Child; password; 100 rupees | Show on map |
| Piece #25 | Hyrule Field | Child, after a visit as an adult | Show on map |
| Piece #33 | Castle Town | Child, night; Lenses of Truth; rupees | Show on map |
Lost Woods (2)
| Piece | Where | Needs | Map |
|---|---|---|---|
| Piece #7 | Lost Woods | Child; ocarina | Show on map |
| Piece #8 | Lost Woods | Child; Saria’s Song | Show on map |
Death Mountain (5)
| Piece | Where | Needs | Map |
|---|---|---|---|
| Piece #10 | Goron City | Child; Bombs | Show on map |
| Piece #11 | Death Mountain Crater | Child | Show on map |
| Piece #26 | Death Mountain Trail | Adult; Magic Bean | Show on map |
| Piece #27 | Death Mountain Crater | Adult; Bolero of Fire, Magic Bean | Show on map |
| Piece #29 | Death Mountain Crater | Child; 100 rupees | Show on map |
Zora River, Zora Domain and Zora Fountain (7)
| Piece | Where | Needs | Map |
|---|---|---|---|
| Piece #15 | Zora River | Child; Cucco, an explosive | Show on map |
| Piece #16 | Zora River | Child; Cucco | Show on map |
| Piece #17 | Zora Domain | Child; Deku Stick | Show on map |
| Piece #28 | Zora Fountain | Adult | Show on map |
| Piece #30 | Zora Fountain | Adult; Zora Tunic | Show on map |
| Piece #31 | Zora River | Child; Song of Storms | Show on map |
| Piece #32 | Zora River | Child; ocarina songs | Show on map |
Lake Hylia (3)
| Piece | Where | Needs | Map |
|---|---|---|---|
| Piece #6 | Fishing Pond | Child; 10 rupees | Show on map |
| Piece #23 | Lake Hylia tower | Adult; Magic Bean | Show on map |
| Piece #24 | Lakeside Laboratory | Adult; Golden Scale | Show on map |
Gerudo Valley, Gerudo Fortress and the desert (5)
| Piece | Where | Needs | Map |
|---|---|---|---|
| Piece #4 | Gerudo Valley | Child; Cucco | Show on map |
| Piece #5 | Gerudo Valley | Child; Cucco | Show on map |
| Piece #34 | Gerudo Fortress | Adult; Scarecrow Song, Longshot | Show on map |
| Piece #35 | Horseback Archery Range | Adult; Epona, Fairy Bow, 30 rupees | Show on map |
| Piece #36 | Evil Desert Colossus | Adult; Requiem of Spirit, Magic Bean | Show on map |
Heart Containers (8)
Each of the eight dungeon bosses leaves one. Pick it up before you step into the blue light that ends the fight.
| Boss | Dungeon | Map |
|---|---|---|
| Gohma | Great Deku Tree | Show on map |
| King Dodongo | Dodongo Cavern | Show on map |
| Barinade | Lord Jabu-Jabu’s Belly | Show on map |
| Phantom Ganon | Forest Temple | Show on map |
| Volvagia | Fire Temple | Show on map |
| Morpha | Water Temple | Show on map |
| Bongo Bongo | Shadow Temple | Show on map |
| Twinrova | Spirit Temple | Show on map |
Where are all 100 Gold Skulltulas? (100)
The numbers follow the Gold Skulltula checklist, which describes every spot. “Bug” means releasing a bottled bug on soft soil; “night” means it only comes out after dark.
Child dungeons (16)
| Spider | Where | Needs | Map |
|---|---|---|---|
| Skulltula #1 | Great Deku Tree | Child | Show on map |
| Skulltula #2 | Great Deku Tree | Fairy Slingshot, child | Show on map |
| Skulltula #3 | Great Deku Tree | Fairy Slingshot, child | Show on map |
| Skulltula #4 | Great Deku Tree | Deku Stick, Fairy Slingshot, child | Show on map |
| Skulltula #20 | Dodongo Cavern | Bombs, or a Baby Dodongo’s blast | Show on map |
| Skulltula #21 | Dodongo Cavern | Goron Bracelet, Fairy Slingshot | Show on map |
| Skulltula #22 | Dodongo Cavern | Bombs | Show on map |
| Skulltula #23 | Dodongo Cavern | Bombs | Show on map |
| Skulltula #56 | Dodongo Cavern | Scarecrow Song, Hookshot, adult | Show on map |
| Skulltula #33 | Lord Jabu-Jabu’s Belly | Child | Show on map |
| Skulltula #34 | Lord Jabu-Jabu’s Belly | Boomerang, child | Show on map |
| Skulltula #35 | Lord Jabu-Jabu’s Belly | Boomerang, child | Show on map |
| Skulltula #36 | Lord Jabu-Jabu’s Belly | Boomerang or Fairy Slingshot, child | Show on map |
| Skulltula #79 | Bottom of the Well | Lenses of Truth, Boomerang, child | Show on map |
| Skulltula #80 | Bottom of the Well | Small Key, Lenses of Truth, child | Show on map |
| Skulltula #81 | Bottom of the Well | Small Key, child | Show on map |
Kakariko Village and the Graveyard (8)
| Spider | Where | Needs | Map |
|---|---|---|---|
| Skulltula #9 | Kakariko Village | Child | Show on map |
| Skulltula #10 | Kakariko Village | Child, night | Show on map |
| Skulltula #11 | Kakariko Village | Child, night | Show on map |
| Skulltula #12 | Kakariko Village | Fairy Slingshot, child, night | Show on map |
| Skulltula #13 | Kakariko Village | Child, night | Show on map |
| Skulltula #44 | Kakariko Village | Hookshot, adult, night | Show on map |
| Skulltula #14 | Graveyard | Bug, child | Show on map |
| Skulltula #40 | Graveyard | Night; Boomerang as a child or Hookshot as an adult | Show on map |
Hyrule Field, Castle Town, Hyrule Castle and Lon Lon Ranch (10)
| Spider | Where | Needs | Map |
|---|---|---|---|
| Skulltula #5 | Hyrule Field | Child is fine | Show on map |
| Skulltula #27 | Hyrule Field | Bombs; Boomerang as a child or Hookshot as an adult | Show on map |
| Skulltula #55 | Hyrule Field | Bombs; child first, then adult | Show on map |
| Skulltula #6 | Castle Town | Child | Show on map |
| Skulltula #7 | Hyrule Castle | Child | Show on map |
| Skulltula #54 | Hyrule Castle | Song of Storms, Bombs, Boomerang, child | Show on map |
| Skulltula #45 | Outside Ganondorf’s Castle | Hookshot, adult | Show on map |
| Skulltula #8 | Lon Lon Ranch | Child is fine | Show on map |
| Skulltula #38 | Lon Lon Ranch | Boomerang, child, night | Show on map |
| Skulltula #39 | Lon Lon Ranch | Boomerang, night | Show on map |
Kokiri Forest, the Lost Woods and the Sacred Grove (7)
| Spider | Where | Needs | Map |
|---|---|---|---|
| Skulltula #15 | Kokiri Forest | Bug, child | Show on map |
| Skulltula #16 | Kokiri Forest | Child, night | Show on map |
| Skulltula #46 | Kokiri Forest | Hookshot, adult, night | Show on map |
| Skulltula #17 | Lost Woods | Bug, child | Show on map |
| Skulltula #18 | Lost Woods | Bug, child | Show on map |
| Skulltula #47 | Lost Woods | Magic Bean, adult | Show on map |
| Skulltula #48 | Sacred Grove | Hookshot, adult, night | Show on map |
Death Mountain (8)
| Spider | Where | Needs | Map |
|---|---|---|---|
| Skulltula #19 | Death Mountain Trail | Goron Bracelet, bug, child | Show on map |
| Skulltula #24 | Death Mountain Trail | Bombs | Show on map |
| Skulltula #64 | Death Mountain Trail | Megaton Hammer, adult, night | Show on map |
| Skulltula #65 | Death Mountain Trail | Megaton Hammer, adult, night | Show on map |
| Skulltula #25 | Goron City | Bombs, child | Show on map |
| Skulltula #57 | Goron City | Hookshot, adult | Show on map |
| Skulltula #26 | Death Mountain Crater | Child | Show on map |
| Skulltula #58 | Death Mountain Crater | Bolero of Fire, bug, child | Show on map |
Zora River, Zora Domain, Zora Fountain and the Ice Cavern (11)
| Spider | Where | Needs | Map |
|---|---|---|---|
| Skulltula #28 | Zora River | Bug, child | Show on map |
| Skulltula #29 | Zora River | Child, night | Show on map |
| Skulltula #66 | Zora River | Hookshot, adult, night | Show on map |
| Skulltula #67 | Zora River | Hookshot, adult, night | Show on map |
| Skulltula #68 | Zora Domain | Hookshot, adult | Show on map |
| Skulltula #32 | Zora Fountain | Child | Show on map |
| Skulltula #37 | Zora Fountain | Boomerang, child, night | Show on map |
| Skulltula #100 | Zora Fountain | Silver Gauntlets, Longshot, adult, night; bring the Lenses of Truth | Show on map |
| Skulltula #69 | Ice Cavern | Hookshot | Show on map |
| Skulltula #70 | Ice Cavern | Blue Fire, Hookshot | Show on map |
| Skulltula #71 | Ice Cavern | Blue Fire, Hookshot | Show on map |
Lake Hylia (5)
| Spider | Where | Needs | Map |
|---|---|---|---|
| Skulltula #30 | Lake Hylia | Bug, child | Show on map |
| Skulltula #31 | Lake Hylia | Child | Show on map |
| Skulltula #43 | Lake Hylia | Boomerang, child, night | Show on map |
| Skulltula #72 | Lakeside Laboratory | Iron Boots, Hookshot, adult | Show on map |
| Skulltula #78 | Lake Hylia | Longshot, adult, night | Show on map |
Gerudo Valley and the desert (10)
| Spider | Where | Needs | Map |
|---|---|---|---|
| Skulltula #41 | Gerudo Valley | Boomerang, child, night | Show on map |
| Skulltula #42 | Gerudo Valley | Bug, Cucco, child | Show on map |
| Skulltula #87 | Gerudo Valley | Adult, night; Epona or the Longshot to cross the broken bridge | Show on map |
| Skulltula #88 | Gerudo Valley | Megaton Hammer, Hookshot, adult, night | Show on map |
| Skulltula #89 | Gerudo Fortress | Longshot, adult, night | Show on map |
| Skulltula #90 | Gerudo Fortress | Gerudo Pass, Longshot, adult, night | Show on map |
| Skulltula #91 | Mirage Desert | Adult | Show on map |
| Skulltula #92 | Evil Desert Colossus | Longshot, adult, night | Show on map |
| Skulltula #93 | Evil Desert Colossus | Requiem of Spirit, bug, child | Show on map |
| Skulltula #97 | Evil Desert Colossus | Magic Bean, adult, night | Show on map |
Adult temples (25)
| Spider | Where | Needs | Map |
|---|---|---|---|
| Skulltula #49 | Forest Temple | Hookshot | Show on map |
| Skulltula #50 | Forest Temple | Hookshot | Show on map |
| Skulltula #51 | Forest Temple | Hookshot, Fairy Bow | Show on map |
| Skulltula #52 | Forest Temple | Hookshot, Scarecrow Song | Show on map |
| Skulltula #53 | Forest Temple | Hookshot | Show on map |
| Skulltula #59 | Fire Temple | Song of Time | Show on map |
| Skulltula #60 | Fire Temple | Bombs | Show on map |
| Skulltula #61 | Fire Temple | Hookshot, Scarecrow Song | Show on map |
| Skulltula #62 | Fire Temple | Hookshot, Scarecrow Song | Show on map |
| Skulltula #63 | Fire Temple | Megaton Hammer | Show on map |
| Skulltula #73 | Water Temple | Iron Boots, Hookshot | Show on map |
| Skulltula #74 | Water Temple | Iron Boots, Bombs | Show on map |
| Skulltula #75 | Water Temple | Iron Boots, Longshot | Show on map |
| Skulltula #76 | Water Temple | Longshot | Show on map |
| Skulltula #77 | Water Temple | Longshot | Show on map |
| Skulltula #82 | Shadow Temple | Lenses of Truth, Hover Boots | Show on map |
| Skulltula #83 | Shadow Temple | Lenses of Truth | Show on map |
| Skulltula #84 | Shadow Temple | Iron Boots, Longshot | Show on map |
| Skulltula #85 | Shadow Temple | Scarecrow Song, Longshot | Show on map |
| Skulltula #86 | Shadow Temple | Bombs, Lenses of Truth | Show on map |
| Skulltula #94 | Spirit Temple | Boomerang, child | Show on map |
| Skulltula #95 | Spirit Temple | Child | Show on map |
| Skulltula #96 | Spirit Temple | Boomerang, child | Show on map |
| Skulltula #98 | Spirit Temple | Silver Gauntlets, adult | Show on map |
| Skulltula #99 | Spirit Temple | Scarecrow Song, Hookshot, adult | Show on map |
Which 13 songs do you need? (13)
Six story songs, six warp songs from Sheik and the Scarecrow Song you make up yourself. Notes for every song are in the songs guide.
| Song | Where you learn it | Age | Map |
|---|---|---|---|
| Zelda’s Lullaby | Impa, Hyrule Castle courtyard | Child | Show on map |
| Epona’s Song | Malon, Lon Lon Ranch | Child | Show on map |
| Saria’s Song | Saria, Sacred Grove | Child | Show on map |
| Sun’s Song | Stone tablet, Royal Family’s Tomb | Child or adult | Show on map |
| Song of Time | Zelda’s message, outside Castle Town | Child | Show on map |
| Song of Storms | The man in the Kakariko windmill | Adult | Show on map |
| Minuet of the Forest | Sheik, Sacred Grove | Adult | Show on map |
| Bolero of Fire | Sheik, Death Mountain Crater | Adult | Show on map |
| Serenade of Water | Sheik, Ice Cavern | Adult | Show on map |
| Nocturne of Shadow | Sheik, Kakariko Village | Adult | Show on map |
| Requiem of Spirit | Sheik, Evil Desert Colossus | Adult | Show on map |
| Prelude of Light | Sheik, Temple of Time | Adult | Show on map |
| Scarecrow Song | Bonooru at Lake Hylia | Child, then adult | Show on map |
Which Spiritual Stones and Medallions are there? (9)
You collect all nine on the main story, so they tick themselves off as you play the walkthrough. The Key Items tab of the pause menu shows them together.
| Stone or Medallion | Where you get it | Map |
|---|---|---|
| Kokiri Emerald | After Gohma, Great Deku Tree | Show on map |
| Goron Ruby | After King Dodongo, Dodongo Cavern | Show on map |
| Zora Sapphire | After Barinade, Lord Jabu-Jabu’s Belly | Show on map |
| Light Medallion | Rauru, after you first become an adult in the Temple of Time | — |
| Forest Medallion | After Phantom Ganon, Forest Temple | Show on map |
| Fire Medallion | After Volvagia, Fire Temple | Show on map |
| Water Medallion | After Morpha, Water Temple | Show on map |
| Shadow Medallion | After Bongo Bongo, Shadow Temple | Show on map |
| Spirit Medallion | After Twinrova, Spirit Temple | Show on map |
Which items do you need? (17)
Items you put on a button. The three spells are in the Great Fairy section below, and bottles have their own section. Where each one fits on the story route is in items and upgrades.
| Item | Where you get it | Age | Map |
|---|---|---|---|
| Deku Sticks | Deku Babas on the path to the Great Deku Tree; later the Kokiri Shop | Child | — |
| Deku Nuts | Deku Babas on the path to the Great Deku Tree | Child | — |
| Fairy Slingshot | Great Deku Tree | Child | Show on map |
| Fairy Ocarina | Saria, past the exit of Kokiri Forest | Child | — |
| Ocarina of Time | The Hyrule Castle moat, after Zelda flees the castle | Child | — |
| Bomb Bag | Dodongo Cavern | Child | Show on map |
| Bombchus | First Bombchu Bowling prize; 40 Gold Skulltula tokens also give 20 | Child | Show on map |
| Boomerang | Lord Jabu-Jabu’s Belly | Child | Show on map |
| Magic Beans | Bean Seller on Zora River, 10 rupees for the first | Child | Show on map |
| Lenses of Truth | Bottom of the Well | Child | Show on map |
| Hookshot | Dampé’s race under the Graveyard, the first time | Adult | Show on map |
| Longshot | Water Temple | Adult | Show on map |
| Fairy Bow | Forest Temple | Adult | Show on map |
| Megaton Hammer | Fire Temple | Adult | Show on map |
| Fire Arrows | Lake Hylia: after the Water Temple, shoot the rising sun from the stone tablet and swim to where the arrow lands | Adult | — |
| Ice Arrow | The last chest of the Gerudo Proving Grounds | Adult | Show on map |
| Light Arrows | Temple of Time, after the Spirit Temple | Adult | — |
Which swords, shields, tunics and boots are there? (11)
You start in the Hero’s Clothes, so it has no row. Effects and prices are in tunics, boots and shields.
| Gear | Where you get it | Age | Map |
|---|---|---|---|
| Kokiri Sword | Kokiri Forest, through the tunnel past the training ground | Child | Show on map |
| Master Sword | Temple of Time, once you have the three Spiritual Stones | Child, then adult | Show on map |
| Giant’s Knife | Goron City, 200 rupees; it breaks easily and is not the Biggoron Sword | Adult | — |
| Biggoron Sword | The end of the adult trading quest | Adult | Show on map |
| Deku Shield | Kokiri Shop, 40 rupees | Child | Show on map |
| Hylian Shield | Castle Town Bazaar for 80 rupees, or free from a Graveyard chest | Child | Show on map |
| Mirror Shield | Spirit Temple | Adult | Show on map |
| Goron Tunic | Goron City; free from the small Goron, or 600 rupees in the shop | Adult | Show on map |
| Zora Tunic | King Zora, after the Ice Cavern | Adult | Show on map |
| Iron Boots | Ice Cavern | Adult | Show on map |
| Hover Boots | Shadow Temple | Adult | Show on map |
Which capacity upgrades are there? (16)
Bigger wallets, bags and quivers, plus the scales and the strength upgrades. Most come from minigames; the side quests page explains how to win each one.
| Upgrade | Where you get it | Age | Map |
|---|---|---|---|
| Adult’s Wallet (500 rupees) | 10 Gold Skulltula tokens, House of Skulltula in Kakariko | Either | — |
| Giant’s Wallet (1,000 rupees) | 30 Gold Skulltula tokens, House of Skulltula in Kakariko | Either | — |
| Bomb Bag, 30 bombs | Stop the rolling Goron in Goron City with a bomb | Child | Show on map |
| Bomb Bag, 40 bombs | Second Bombchu Bowling prize, Castle Town | Child | Show on map |
| Seed bag, 40 seeds | Castle Town Shooting Gallery, all 10 targets | Child | Show on map |
| Seed bag, 50 seeds | The hanging target in the Lost Woods | Child | Show on map |
| Quiver, 40 arrows | Kakariko Shooting Gallery, all 10 targets | Adult | Show on map |
| Quiver, 50 arrows | Horseback Archery at Gerudo Fortress, 1,400 points | Adult | Show on map |
| Deku Stick bag, 20 sticks | Business Scrub in the Lost Woods, 40 rupees | Child | Show on map |
| Deku Nut bag, 30 nuts | Business Scrub in a Lost Woods grotto under a cracked rock, 40 rupees | Child | Show on map |
| Deku Nut bag, 40 nuts | The large Scrub on the underground Deku stage in the Lost Woods, wearing the Mask of Truth | Child | — |
| Silver Scale | Diving game in Zora Domain | Child | Show on map |
| Golden Scale | Fishing Pond at Lake Hylia, a fish of 60 cm or more | Adult | Show on map |
| Goron Bracelet | Darunia in Goron City | Child | Show on map |
| Silver Gauntlets | Spirit Temple, child side | Child | Show on map |
| Golden Gauntlets | Ganondorf’s Castle | Adult | Show on map |
Where are the five bottles? (5)
Four come from childhood errands, the fifth from selling Big Poes. Directions are in the bottles guide.
| Stop | Age | What to do | Map |
|---|---|---|---|
| Castle Town Potion Shop | Child | Catch the escaped bug with the shopkeeper’s bottle | Show on map |
| Kakariko Village | Child | Return all seven Cuccos | Show on map |
| Lon Lon Ranch | Child | Find three special Cuccos within 30 seconds | Show on map |
| Lake Hylia → Zora Domain | Child | Obtain Ruto’s Letter and show it to King Zora | Show on map |
| Castle Town Poe Collector | Adult | Sell five Big Poes, reaching 500 points | Show on map |
Which Great Fairy gifts do you need? (6)
Each fountain needs Zelda’s Lullaby on the Triforce mark and a rupee offering. The order and the trip to each one are in Great Fairy Fountains.
| Great Fairy | Needs | Offering | Gift |
|---|---|---|---|
| Death Mountain summit | Child; Bombs and Zelda’s Lullaby | 25 rupees | Magic meter and Din’s Fire |
| Hyrule Castle area | Child; Bombs | 50 rupees | Improved Spin Attack |
| Zora Fountain | Child; access past King Zora and Bombs | 100 rupees | Farore’s Wind |
| Death Mountain Crater | Adult; Hookshot and Megaton Hammer | 200 rupees | Doubled magic |
| Evil Desert Colossus | Adult; desert access and Megaton Hammer | 300 rupees | Nayru’s Love |
| Near Ganondorf’s Castle | Adult; reach Ganondorf’s Castle (this route: after four barriers) | 500 rupees | Halved damage |
Which masks count? (5)
Borrow each mask from the Happy Mask Shop in Castle Town, sell it, pay the shop back and borrow the next. Paying for the Bunny Hood earns the Mask of Truth. The masks guide covers the order and the money.
| Mask | Sell it to | They pay | Map |
|---|---|---|---|
| Keaton Mask | Kakariko gate guard | 15 rupees | Show on map |
| Skull Mask | Skull Kid in the Lost Woods | 10 rupees | Show on map |
| Spooky Mask | Graveyard boy | 50 rupees | Show on map |
| Bunny Hood | Running Man in Hyrule Field | 200 rupees | Show on map |
| Mask | How you get it | Map |
|---|---|---|
| Mask of Truth | Lent by the shopkeeper once the Bunny Hood is paid for | — |
Where are the ten Big Poes? (10)
As an adult on Epona, with the Fairy Bow and empty bottles. Sell them to the Poe Collector in Castle Town: five earn the fifth bottle, all ten a 200-rupee Gold Rupee. The Big Poe guide describes each spot.
| Big Poe | Where | Map |
|---|---|---|
| Big Poe #1 | Castle Town drawbridge, west side | Show on map |
| Big Poe #2 | South of the drawbridge | Show on map |
| Big Poe #3 | North of Lon Lon Ranch | Show on map |
| Big Poe #4 | Northwest of Lon Lon Ranch | Show on map |
| Big Poe #5 | Gerudo Valley entrance | Show on map |
| Big Poe #6 | Between Gerudo Valley and the ranch | Show on map |
| Big Poe #7 | South of Lon Lon Ranch | Show on map |
| Big Poe #8 | North-east of the Lake Hylia entrance | Show on map |
| Big Poe #9 | South-west of the Kokiri Forest entrance | Show on map |
| Big Poe #10 | East of Lon Lon Ranch | Show on map |
Which owl statues does the Hall of Fallen Foes give? (3)
The first clear of each boss rush trial sends an owl statue to Link’s house in Kokiri Forest. The last trial opens after the ending. See Hall of Fallen Foes.
| Owl statue | Trial | Opens |
|---|---|---|
| Stone owl statue | Trial of the Spiritual Stones | As soon as you can visit the hall |
| Silver owl statue | Trial of the Five Sages | After you beat all five temple bosses |
| Gold owl statue | Trial of the Hero of Time | After you finish the story |
What else is worth collecting? (4)
| Reward | Where you get it | Map |
|---|---|---|
| Echo Gem | 20 Gold Skulltula tokens, House of Skulltula in Kakariko | — |
| Epona | Win Ingo’s races at Lon Lon Ranch as an adult, see Epona | Show on map |
| Gerudo Pass | Free the four carpenters in Gerudo Fortress | — |
| Cow in Link’s house | Beat Malon’s 40-second obstacle course record at Lon Lon Ranch | Show on map |
What is not on this checklist?
Places and repeatable things are left out, because they are not something you keep:
- Secret grottos (36), Business Scrub spots (7), cows (6) and Gossip Stones (32). What they hold is already on this list; the secret grottos guide maps all of them.
- Magic Bean planting stops. The beans are an item above, and the Magic Beans guide lists where to plant them.
- Minigame repeats and trading items. Second rounds that only pay rupees, and the items you pass along in the Biggoron trade, are covered in side quests and the Biggoron Sword guide.
- Dungeon maps, compasses and keys. They only work inside their dungeon.
What should you read next?
- Heart Piece checklist and Gold Skulltula checklist for full directions.
- Interactive map to find every spot by area.
- Walkthrough for the story route that picks up the stones, medallions and most items.
FAQ
Does Ocarina of Time Remake show a completion percentage?
What does 100% include in Ocarina of Time Remake?
How many hearts can you have in Ocarina of Time Remake?
Do the ticks on this page carry over from the Heart Piece and Gold Skulltula checklists?
Related Articles
guides
Ocarina of Time Remake Map: Heart Pieces, Gold Skulltulas and Area Maps
Ocarina of Time Switch 2 remake map: 36 Pieces of Heart, 100 Gold Skulltulas, beans, songs, bottles and Great Fairies, on in-game maps of 21 areas and 10 dungeons.
guides
Ocarina of Time Remake Kokiri Forest: Sword, Shop and Mido
Kokiri Forest in the Ocarina of Time remake: find the Kokiri Sword, buy the Deku Shield, get past Mido, see what changes as an adult and what you can collect.
guides
Ocarina of Time Remake Hyrule Field and Castle Town Guide
Hyrule Field in the Ocarina of Time remake: where every road leads, the skeletons at night, the Castle Town shops and minigames, the ruined town and Lon Lon Ranch.
Was this helpful?
Thanks for the feedback!