

Ocarina of Time Remake Enemies: ReDead, Like Like and More
Enemies in the Switch 2 Ocarina of Time remake: where ReDeads, Like Likes, Wallmasters, Iron Knuckles and other foes appear, how to beat them and what works best.
This is a guide to the enemies of the Ocarina of Time remake on Nintendo Switch 2: what each one is, where it appears, how to beat it and which items help. It starts with the foes that catch new players out, such as ReDeads, Like Likes and Wallmasters, then covers the mini-bosses that guard dungeon items. Names and locations follow the remake’s own enemy statues in the Hall of Fallen Foes. Dungeon bosses are only summarised here; the boss guide has the full fights.
How does the remake tell you about enemies?
Two things in the game do the explaining for you:
- Navi. The first time you meet most monsters, Navi names them and gives a tip, for example “This monster is a ReDead! Whatever you do, stay out of its line of sight!”
- The Hall of Fallen Foes. Every monster you defeat leaves a statue in this dream hall. Examine one to read a short description, its Main Locations and its Useful Items, the weapons and tools that work well against it. The hall has 84 statues in all, and mini-boss statues also let you fight a rematch. See the Hall of Fallen Foes guide for how to get in.
The table at the end of this page lists the main locations and useful items for every enemy covered here.
Which enemies are dangerous early on?
Most child-era enemies go down to a few sword strikes, but each has a habit worth knowing.
- Deku Baba. A plant that lunges at anyone who steps too close. Navi’s tip: finish one off with a hit to the head for a Deku Nut, or hit the stem for a Deku Stick.
- Skulltula. A large spider that likes to hide and wait for prey, first met in the Great Deku Tree. Its sturdy-looking armored body is vulnerable to fire, so Din’s Fire works well; bombs and the Megaton Hammer do too. The small Skullwalltula clings to walls: shoot it with the Fairy Slingshot, and later the Megaton Hammer’s shockwave knocks it down.
- Mad Scrub. A short-tempered Deku Scrub that fires three nuts in a row. Raise your shield to deflect the nuts, then strike.
- Stalchild. Skeletons that climb out of the ground in Hyrule Field after dark. They keep coming, so keep moving rather than fighting every one. Their statue adds a rumour that they stay hidden if someone appears cute enough.
- Peahat. A plant monster of Hyrule Field that is active during the day; its larvae chase you single-mindedly. Din’s Fire works well on it.
- Keese and Fire Keese. Bats that lurk in dark places. A Keese that flies through flame becomes a Fire Keese and goes back to normal if the fire goes out. Shoot them down with the Fairy Slingshot or Fairy Bow.
- Wolfos. A wolf that blocks with its claws. Guard, wait until it attacks, then strike; Din’s Fire and Fire Arrows also work. The first one waits in the Sacred Grove of the Lost Woods.
- Baby Dodongo, Armos and Beamos. All three are in Dodongo Cavern. Baby Dodongos swallow bombs. Armos look like stone statues until they sense danger; a Bomb Flower or bomb takes one down. Beamos fire a beam from their single eye: blow them up with a bomb, smash them with the Megaton Hammer, or, as an adult, turn the beam aside with the Mirror Shield.
- Octorok. Lurks in shallow water along Zora River and spits clumps of mud. Raise your shield against the mud.
How do you beat ReDeads and Gibdos?
ReDead
ReDeads are walking corpses with masks on their faces, and they are the enemy most players remember. Navi’s warning sums them up: stay out of a ReDead’s line of sight, because if its glare catches you, you are cursed and cannot move. It then walks over, grabs you and keeps hurting you until you get free.
Where: their statue lists Hyrule Castle Town, which ReDeads fill once Link returns as an adult, and the Graveyard in Kakariko Village, where they guard the Royal Family’s Tomb and a chamber under one of the graves.
How to deal with them:
- Stay out of sight. Move slowly around their edges instead of walking up to them. Where several stand in one room, plan a path that keeps you out of every one’s sight.
- Freeze them with the Sun’s Song. Their statue confirms the Sun’s Song freezes them in place. Play it near them and attack while they cannot move; make sure the song has taken hold before you close in. You learn the song in the Royal Family’s Tomb itself; see Ocarina songs.
- If one grabs you, flail around. Navi’s advice is to struggle until you break free. Navi adds that ReDeads are not that strong.
- Light Arrows are the item their statue lists, for when you have them.
Their statue also notes that ReDeads mourn for fallen comrades.
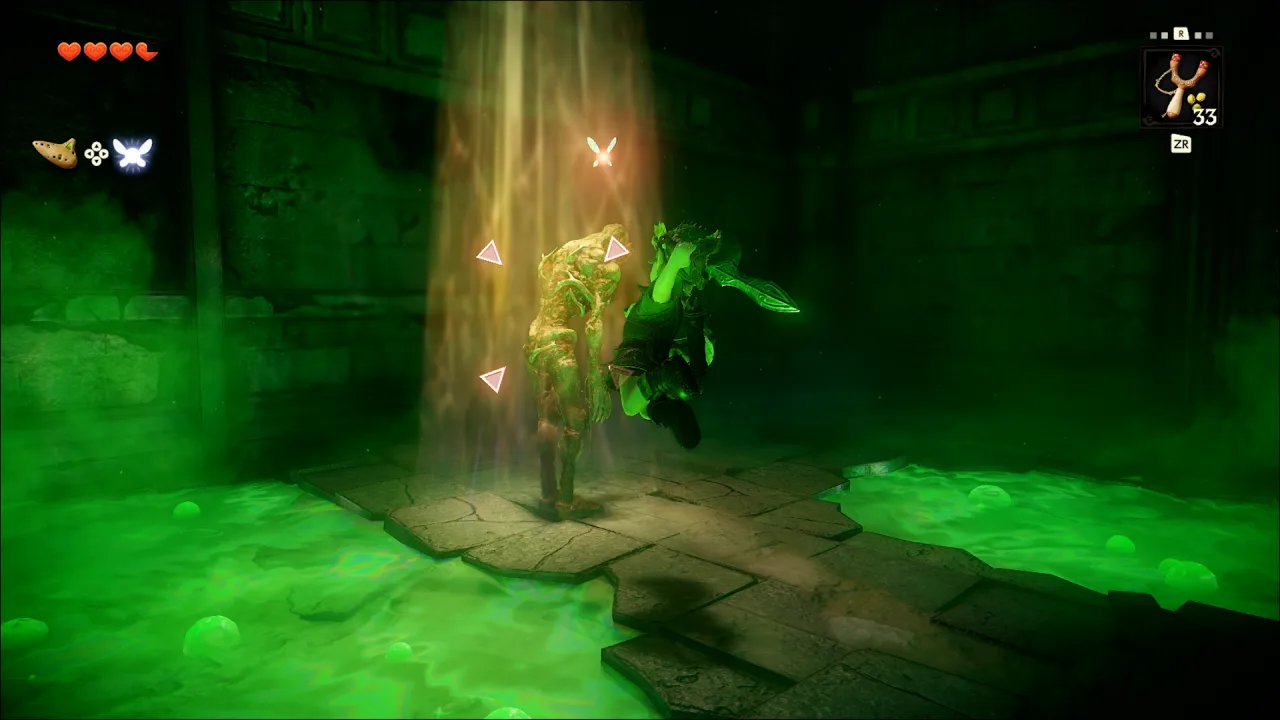
Gibdo
Gibdos are bandaged corpses brought back to life. The Sun’s Song freezes them in place too, and their statue also lists the Light Arrows. They mistake slow-moving things for allies, which is another reason to move carefully near them. They appear in the Bottom of the Well and the Shadow Temple.
Which enemies steal your gear or throw you out?
Like Like
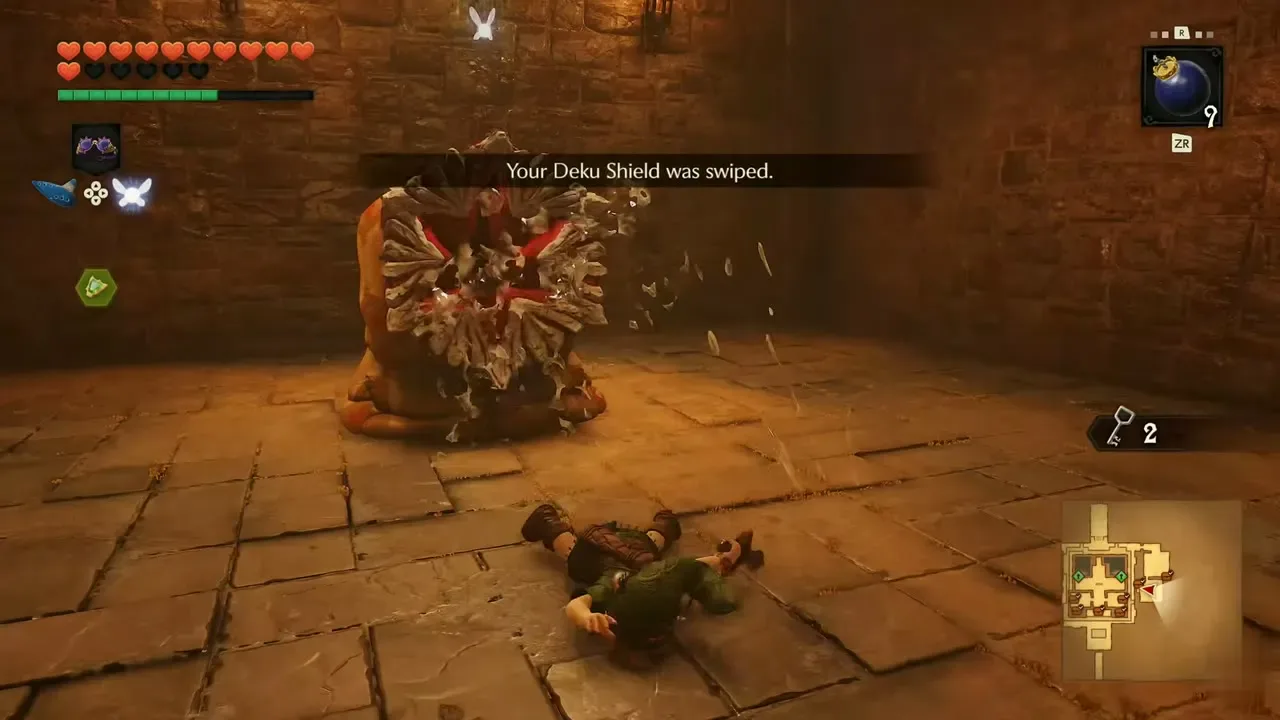
A Like Like eats practically anything that gets close enough to its gaping mouth, including Link. If it swallows you, it spits you out without your shield: “Your Deku Shield was swiped.” Keep your distance and strike it with the sword when it is not lunging.
Their statue lists the Fire Temple and Water Temple, and there is one in the Bottom of the Well as well. Defeat it and Link gets the shield back, so finish the fight before you leave the room. See tunics, boots and shields.
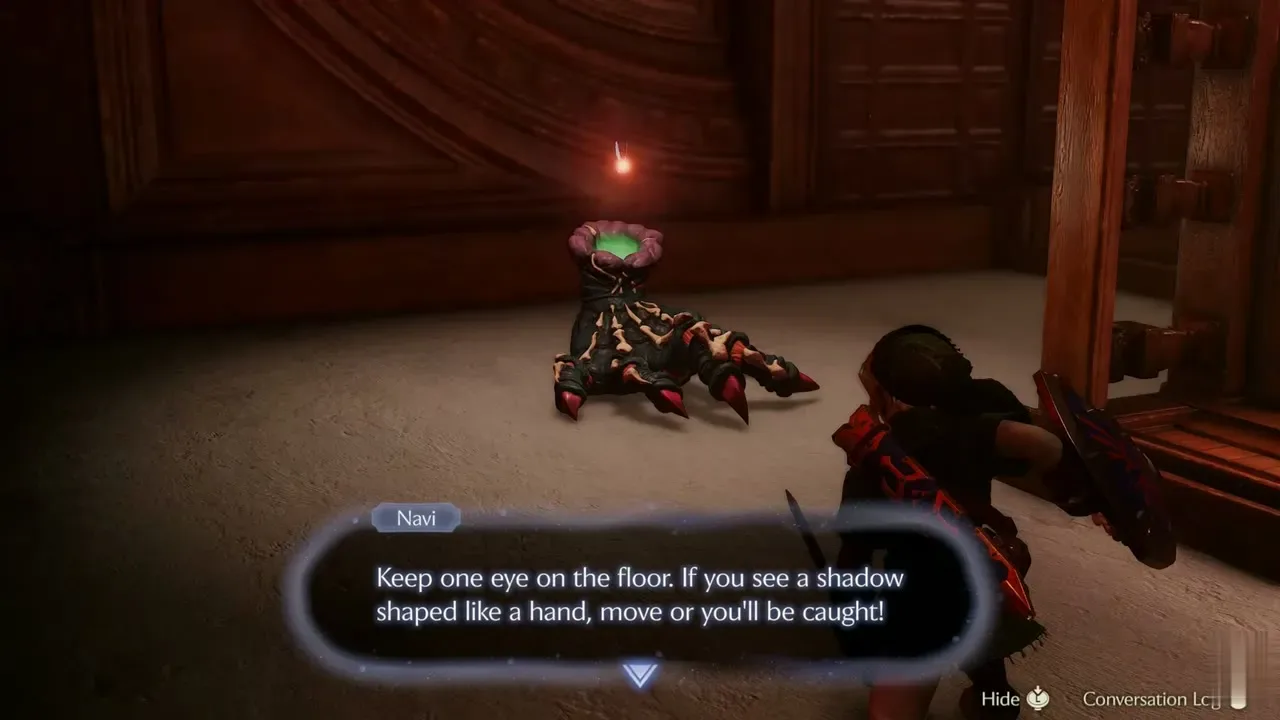
Wallmaster and Floormaster
A Wallmaster is a large green hand. If it catches hold of you, it casts you out of the area and you have to make your way back. Navi’s tip is the whole strategy: keep one eye on the floor, and if you see a shadow shaped like a hand, move or you will be caught. Wallmasters appear in the Forest Temple and the Bottom of the Well.
A Floormaster is a large red hand that crawls along the floor and splits apart when you attack it. Navi’s tip: the moment it splits is your chance to finish it off. Floormasters appear in the Forest Temple and the Shadow Temple. Both hands list the Light Arrows as a useful item.
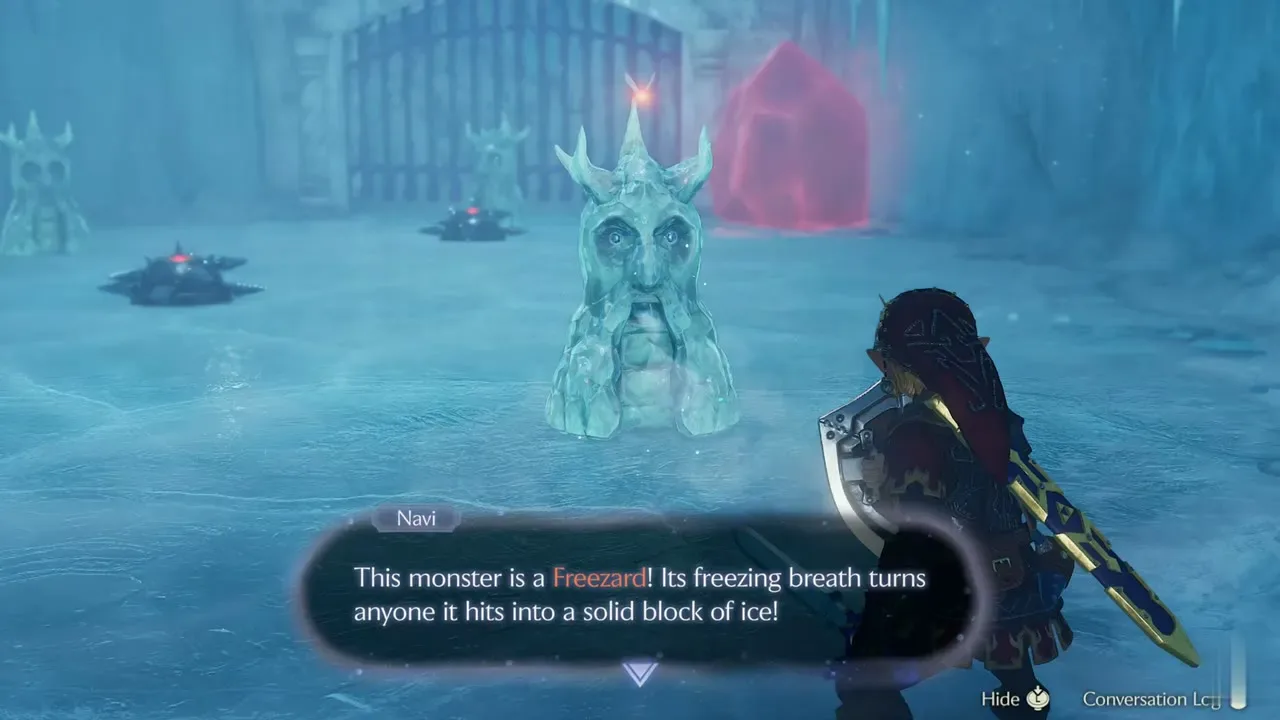
Freezard and other ice enemies
A Freezard stands still like an ice statue. Navi warns that its freezing breath turns anyone it hits into a solid block of ice, so stay out of range. Freezards melt away when exposed to heat: use Din’s Fire or Fire Arrows, or break them with bombs or the Megaton Hammer. They live in the Ice Cavern, along with Ice Keese, whose touch can freeze you, and the White Wolfos, whose frosty claws freeze you in place.
Anubis and the Bubbles
- Anubis guards the Spirit Temple and copies the movements of whoever it meets. Fire hurts it, so use Din’s Fire or Fire Arrows.
- Bubbles are flying skulls wrapped in an aura. Blue Bubbles cannot help approaching a bomb they see, Green Bubbles cannot be hurt while their aura lasts, Red Bubbles burn and lurk in lava or shadows, and White Bubbles spin around in place. Raise the Hylian Shield against them; a Green Bubble can only be hurt once its aura is gone.
What are the dungeon mini-bosses?
Mini-bosses guard dungeon items or the way forward. Each has a statue in the Hall of Fallen Foes that lets you fight it again. The boss guide lists every mini-boss with its reward; the most common ones are below.
Lizalfos and Dinolfos
Lizalfos fight with a sword and often come at you with reckless abandon. You meet two pairs in Dodongo Cavern: raise your shield, let them attack, then counter, and do not chase them off the platforms. Dinolfos are quicker swordsmen with nimble movements, found in the Spirit Temple and the Gerudo Proving Grounds.
Stalfos
Skeleton swordsmen. The Forest Temple’s Stalfos are, according to their statue, the fate of adults who disappear in the Lost Woods. Block their swings, then strike when they leave an opening; when one falls, keep up the pressure on those still standing. Beating them in the Forest Temple gives a Small Key and later the Fairy Bow. Better-armed Stalfos with masterful swordplay and solid defence appear in the Shadow and Spirit Temples.
Iron Knuckle
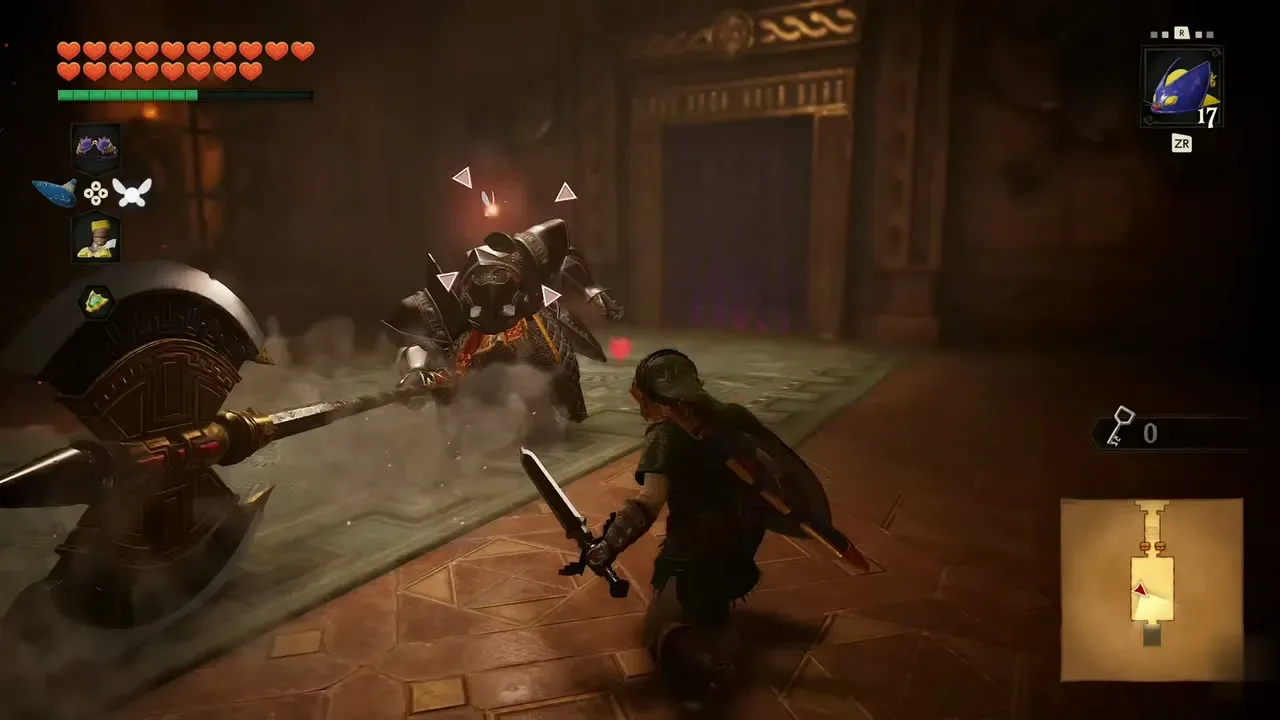
Monsters fully enclosed in heavy armor. The armor keeps them from moving quickly, but each axe swing hits hard enough to break pillars. Approach to bait a swing, step back or sideways, and strike while it recovers; do not rely on your shield in front of the axe. You fight them three times in the Spirit Temple, the first as child Link, and as a pair in the tower of Ganondorf’s Castle (Ganon’s Castle in the N64 original). One Spirit Temple Iron Knuckle has a story twist: its statue reveals it was Nabooru under a spell.
Dead Hand
Dead Hand hides in the dark, and the Lenses of Truth can reveal it. Pale hands rise from the floor: strike them to draw out the body, then hit its head when it lowers it toward you. You fight it twice: in the Bottom of the Well, where it guards the Lenses of Truth, and in the Shadow Temple, where it guards the Hover Boots. Its statue lists Din’s Fire and bombs as useful items.
The other mini-bosses
Big Octo in Lord Jabu-Jabu’s Belly, the Poe Sisters in the Forest Temple, the Flare Dancer in the Fire Temple, the White Wolfos in the Ice Cavern, Dark Link in the Water Temple and the Gerudo guards of the Gerudo Fortress are the rest. Their fights are covered in the boss guide and the dungeon chapters.
What about the bosses?
Each dungeon ends with a boss: Gohma, King Dodongo, Barinade, Phantom Ganon, Volvagia, Morpha, Bongo Bongo and Twinrova, followed by Ganondorf and Ganon. Their weak points and the item that beats each one are in the boss guide. All of them can be fought again, alone or back to back, in the Hall of Fallen Foes.
Where does each enemy appear?
Main locations are those on each enemy’s statue in the Hall of Fallen Foes; some enemies also turn up elsewhere. “What works” combines the statue’s Useful Items with the tactics above.
| Enemy | Main locations | What works | More |
|---|---|---|---|
| Deku Baba | Great Deku Tree | Sword; head drops Deku Nuts, stem drops Deku Sticks | Great Deku Tree |
| Skulltula | Great Deku Tree, Forest Temple | Bombs, Megaton Hammer, Din’s Fire | Great Deku Tree |
| Skullwalltula | Great Deku Tree, Death Mountain Trail | Fairy Slingshot, Megaton Hammer | Gold Skulltulas |
| Mad Scrub | Sacred Grove | Send its nuts back with a shield | Lost Woods |
| Stalchild | Hyrule Field | Keep moving; sword | Hyrule Field |
| Peahat | Hyrule Field | Din’s Fire | Hyrule Field |
| Wolfos | Sacred Grove, Forest Temple | Counter after its attack; Din’s Fire, Fire Arrows | Lost Woods |
| Keese | Graveyard, Dodongo Cavern | Fairy Slingshot, Fairy Bow | Dodongo Cavern |
| Fire Keese | Dodongo Cavern, Fire Temple | Fairy Slingshot, Fairy Bow | Fire Temple |
| Baby Dodongo | Dodongo Cavern | Bombs | Dodongo Cavern |
| Armos | Dodongo Cavern, Spirit Temple | Bombs, Megaton Hammer | Dodongo Cavern |
| Beamos | Dodongo Cavern, Shadow Temple | Bombs, Megaton Hammer, Mirror Shield | Shadow Temple |
| Octorok | Zora River, Lord Jabu-Jabu’s Belly | Deku Shield or Hylian Shield to send the mud back | Zora Domain |
| ReDead | Hyrule Castle Town, Graveyard | Stay out of sight; Sun’s Song; Light Arrows | Kakariko Village |
| Gibdo | Bottom of the Well, Shadow Temple | Sun’s Song; Light Arrows | Bottom of the Well |
| Like Like | Fire Temple, Water Temple | Keep away from its mouth; sword; defeat it to get your shield back | Tunics, boots and shields |
| Wallmaster | Forest Temple, Bottom of the Well | Move when you see its shadow; Light Arrows | Forest Temple |
| Floormaster | Forest Temple, Shadow Temple | Clear the pieces after it splits; Light Arrows | Forest Temple |
| Freezard | Ice Cavern | Din’s Fire, Fire Arrows, bombs, Megaton Hammer | Ice Cavern |
| Ice Keese | Ice Cavern | Fairy Bow | Ice Cavern |
| Anubis | Spirit Temple | Din’s Fire, Fire Arrows | Spirit Temple |
| Blue, Green, Red and White Bubbles | Forest, Fire and Spirit Temples, Death Mountain Crater | Hylian Shield | Forest Temple |
| Leever | Mirage Desert, Evil Desert Colossus | Din’s Fire | Mirage Desert |
| Lizalfos (mini-boss) | Dodongo Cavern, Spirit Temple | Shield, then counter | Dodongo Cavern |
| Dinolfos (mini-boss) | Spirit Temple, Gerudo Proving Grounds | Shield, then counter | Gerudo Proving Grounds |
| Stalfos (mini-boss) | Forest Temple; armed Stalfos in the Shadow and Spirit Temples | Block, then strike the opening | Forest Temple |
| Iron Knuckle (mini-boss) | Spirit Temple, Ganondorf’s Castle | Bait the axe, then strike during recovery | Spirit Temple |
| Dead Hand (mini-boss) | Bottom of the Well, Shadow Temple | Strike the hands, then the lowered head; Din’s Fire, bombs | Bottom of the Well |
What should you read next?
- Boss guide: every boss and mini-boss with its weak point and reward
- Hall of Fallen Foes: enemy statues, rematches and the boss rush trials
- Beginner tips: combat basics, targeting and what the remake changed
- Ocarina songs: where to learn the Sun’s Song
FAQ
How do you stop a ReDead from freezing you?
What happens if a Like Like eats your shield?
Where are the ReDeads in Ocarina of Time?
What does a Wallmaster do?
Where can you read about enemies in the remake?
Related Articles
guides
Ocarina of Time Remake Bosses: Weak Points, Items and Rematches
Every boss in the Switch 2 Ocarina of Time remake from Gohma to Ganon, plus the mini-bosses: weak point, item, how the fight works, rewards and rematches.
guides
Ocarina of Time Remake Map: Heart Pieces, Gold Skulltulas and Area Maps
Ocarina of Time Switch 2 remake map: all 36 Pieces of Heart, 100 Gold Skulltulas, beans, songs, bottles, minigames and Great Fairies, with in-game maps of 21 areas.
guides
Ocarina of Time Remake Items and Capacity Upgrades
Find the remake’s main tools and upgrade your wallet, Bomb Bag, seed bag and quiver, with the new rupee limits and horseback archery score.
Was this helpful?
Thanks for the feedback!