

BotW Stal Enemies: Stalkoblin, Stalmoblin, Stalizalfos HP, Drops
Stalkoblins, Stalmoblins and Stalizalfos in Breath of the Wild: night-only, 1 or 2 HP, breaking the skull, fang, talon and horn drops, and a map of 135 placements.
A loading tip warns: “When night falls, skeletal Stal monsters will emerge from the ground. Stay vigilant!” In The Legend of Zelda: Breath of the Wild, Stal monsters are the remains of Bokoblins, Moblins and Lizalfos. They fall apart at a touch, but pull themselves back together as long as the skull is intact. This page covers the HP, tactics and drops of all three, and maps the 135 the game places. Each family’s full data is on Bokoblins, Moblins and Lizalfos; other monsters are in the enemy overview.
What kinds of Stal enemy are there?
| Kind | HP | What the Compendium says |
|---|---|---|
| Stalkoblin | 1 | Fragile enough to crumble from a single blow; sometimes picks up the wrong skull |
| Stalmoblin | 2 | Fragile as a pile of bones; crumbles after just a few attacks |
| Stalizalfos | 1 | As sly as ever; a single solid hit reduces it to pieces |
HP is from the game’s parameters. All three “appear in the dark of the night” and rebuild while a skull remains intact.
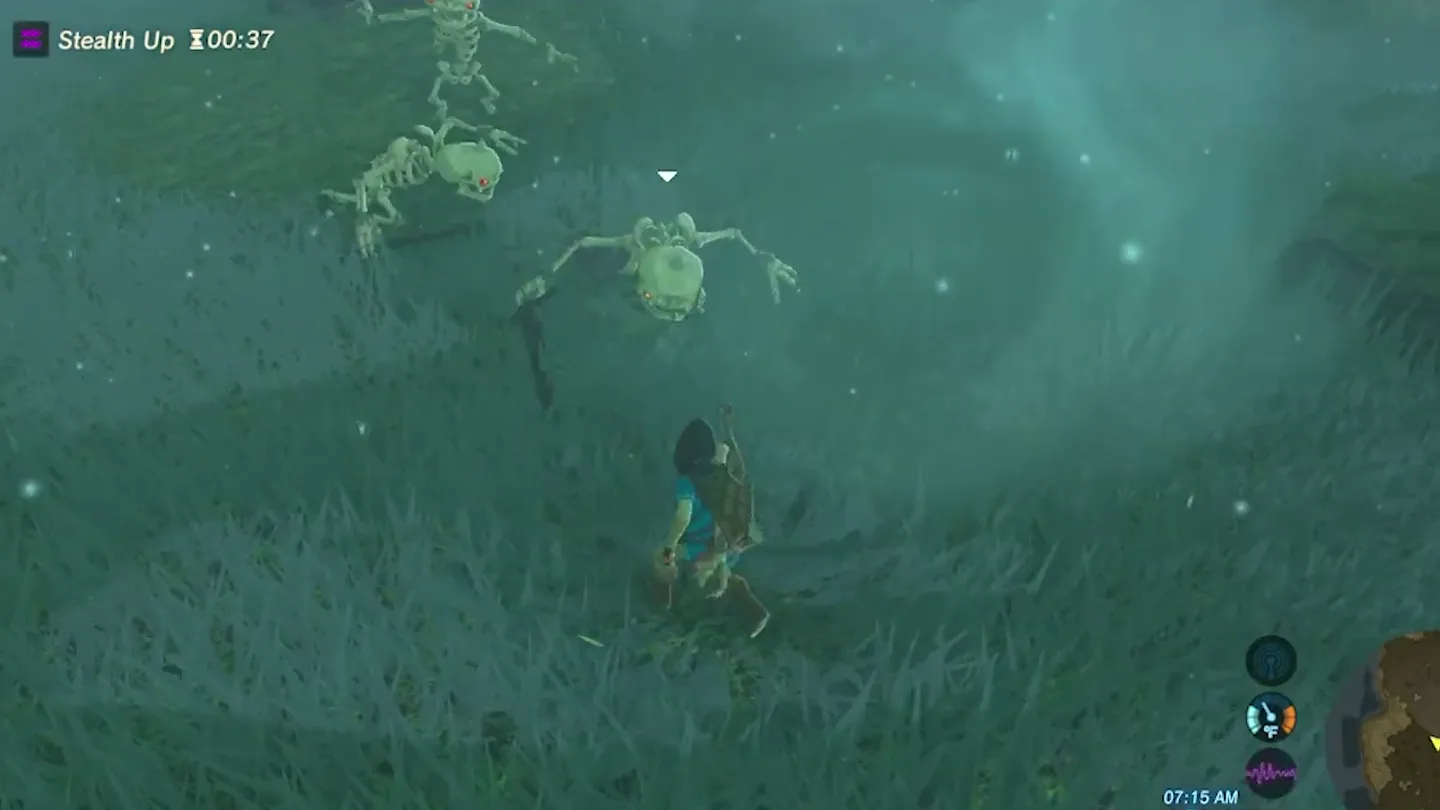
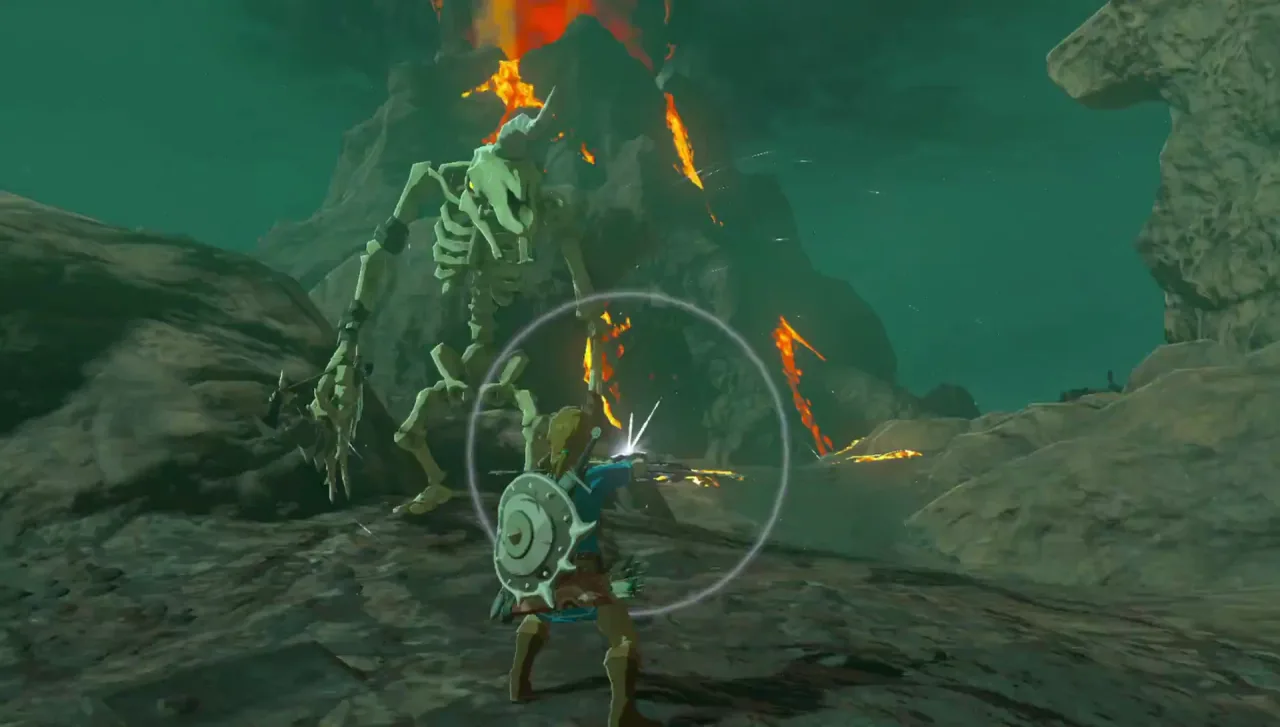
Two more Stal monsters are covered elsewhere: the giant Stalnox in Hinox locations, and the Stalhorse in the horse guide.
How do you beat Stal enemies?
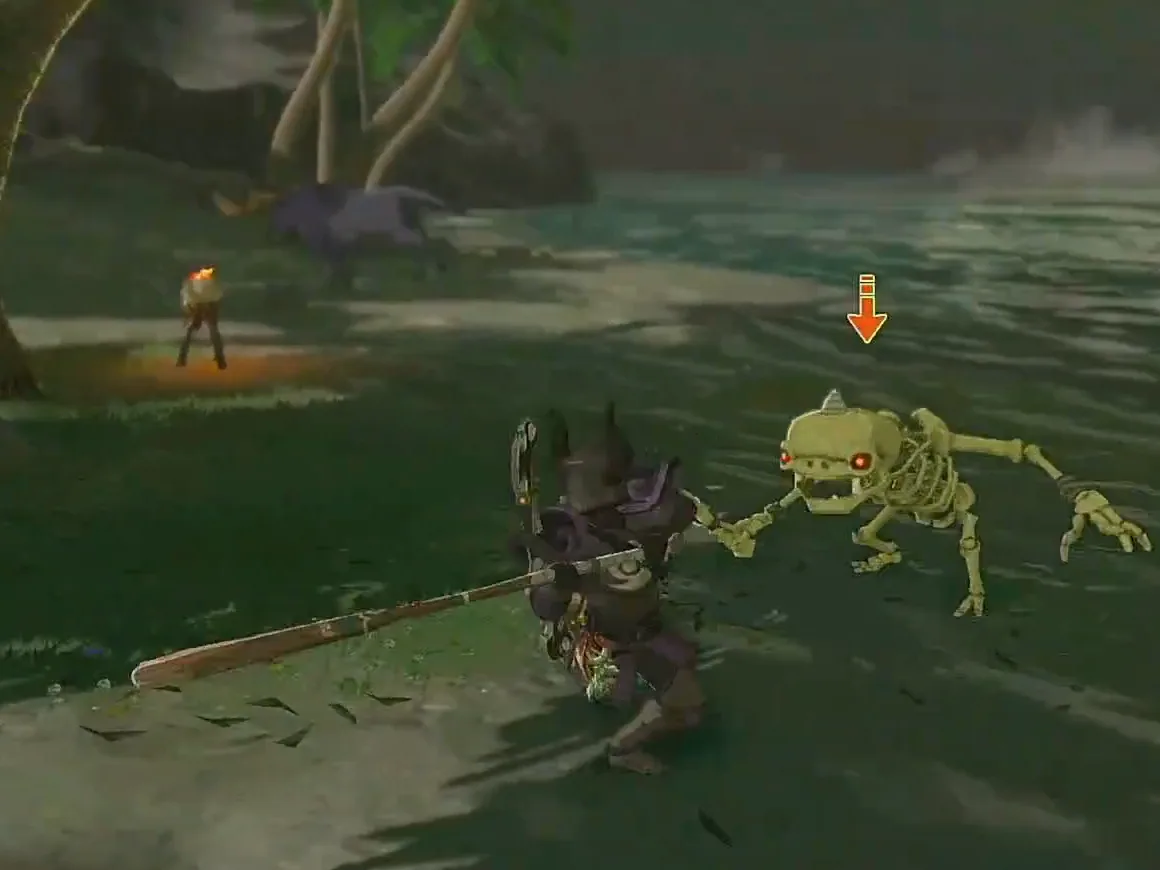
- Break the skull. The Compendium says that “as long as a skull remains intact, they’ll continue to pull themselves back together and go on fighting.” The body falls apart in one hit; then hit the skull on the ground and it is gone.
- Hit again while it is scattered. A Stalmoblin takes “just a few attacks” to fall apart, one more than the other two.
- Take its arm. Once the body falls apart, the arm can be picked up as a weapon: Bokoblin Arm, Moblin Arm or Lizalfos Arm. The item text says the bones keep moving after they come off, and that they break quickly.
The Compendium also notes that Stalkoblins and Stalizalfos sometimes grab the wrong skull, “but this doesn’t seem to be a problem”.
What do Stal enemies drop?
| Monster | Always | Also |
|---|---|---|
| Stalkoblin | Bokoblin Fang ×1–2 | Bokoblin Horn 50% |
| Stalmoblin | Moblin Fang ×2–4 | Moblin Horn ×1 |
| Stalizalfos | Lizalfos Talon ×1–2 | Lizalfos Horn ×1 |
From the game’s drop tables (the ones rolled on every kill).
Where do Stal enemies spawn?
| Kind | Placed |
|---|---|
| Stalkoblin | 95 |
| Stalizalfos | 26 |
| Stalmoblin | 14 |
| Total | 135 |
This is the normal-mode placement data, leaving out the 8 used only in the Great Plateau trial of the DLC pack The Champions’ Ballad.
- By tower region: Ridgeland 33, Woodland 30, Great Plateau 15, Wasteland 10, Central 9, Hebra 8, and 4 to 7 in each of the others.
- Stalkoblins cluster most around Nima Plain 8, the Eastern Abbey 6, Lake Kolomo 5, Satori Mountain 5 and the Military Training Camp 5.
- In the Woodland region, around Mido Swamp, the Thyphlo Ruins and Lake Saria, another 16 Stalkoblins use a different placement.
- Stalizalfos are most common on Satori Mountain (5); Stalmoblins are spread out, with 6 in the Ridgeland region.
Loading the terrain map… slow connections can take a few seconds.
Some terrain tiles failed to load.
- Stalkoblin (95)
- Stalmoblin (14)
- Stalizalfos (26)
Drag to move and zoom in to tell the points apart; on a computer, click the map first and the mouse wheel zooms it. Ticks are saved in this browser only; no account is needed.
Progress cannot be saved in this browser session.
All 135 Stal placements
| # | Monster | Nearest landmark | Region | Location |
|---|---|---|---|---|
| 1 | Stalkoblin | East Akkala Plains | Akkala | Show on map |
| 2 | Stalkoblin | East Akkala Plains | Akkala | Show on map |
| 3 | Stalkoblin | East Akkala Plains | Akkala | Show on map |
| 4 | Stalkoblin | East Akkala Plains | Akkala | Show on map |
| 5 | Stalkoblin | Crenel Hills | Central | Show on map |
| 6 | Stalkoblin | Crenel Hills | Central | Show on map |
| 7 | Stalkoblin | Orsedd Bridge | Central | Show on map |
| 8 | Stalkoblin | Dueling Peaks | Dueling Peaks | Show on map |
| 9 | Stalkoblin | Dueling Peaks | Dueling Peaks | Show on map |
| 10 | Stalkoblin | East Post Ruins | Dueling Peaks | Show on map |
| 11 | Stalkoblin | East Post Ruins | Dueling Peaks | Show on map |
| 12 | Stalkoblin | Rabella Wetlands | Faron | Show on map |
| 13 | Stalkoblin | Rabella Wetlands | Faron | Show on map |
| 14 | Stalkoblin | Toronbo Beach | Faron | Show on map |
| 15 | Stalkoblin | Toronbo Beach | Faron | Show on map |
| 16 | Stalkoblin | Toronbo Beach | Faron | Show on map |
| 17 | Stalkoblin | Toronbo Beach | Faron | Show on map |
| 18 | Stalkoblin | Eastern Abbey | Great Plateau | Show on map |
| 19 | Stalkoblin | Eastern Abbey | Great Plateau | Show on map |
| 20 | Stalkoblin | Eastern Abbey | Great Plateau | Show on map |
| 21 | Stalkoblin | Eastern Abbey | Great Plateau | Show on map |
| 22 | Stalkoblin | Eastern Abbey | Great Plateau | Show on map |
| 23 | Stalkoblin | Eastern Abbey | Great Plateau | Show on map |
| 24 | Stalkoblin | Gatepost Town Ruins | Great Plateau | Show on map |
| 25 | Stalkoblin | Gatepost Town Ruins | Great Plateau | Show on map |
| 26 | Stalkoblin | Great Plateau | Great Plateau | Show on map |
| 27 | Stalkoblin | Great Plateau | Great Plateau | Show on map |
| 28 | Stalkoblin | Lake Kolomo | Great Plateau | Show on map |
| 29 | Stalkoblin | Lake Kolomo | Great Plateau | Show on map |
| 30 | Stalkoblin | Lake Kolomo | Great Plateau | Show on map |
| 31 | Stalkoblin | Lake Kolomo | Great Plateau | Show on map |
| 32 | Stalkoblin | Lake Kolomo | Great Plateau | Show on map |
| 33 | Stalkoblin | North Lomei Labyrinth | Hebra | Show on map |
| 34 | Stalkoblin | North Lomei Labyrinth | Hebra | Show on map |
| 35 | Stalkoblin | North Lomei Labyrinth | Hebra | Show on map |
| 36 | Stalkoblin | North Lomei Labyrinth | Hebra | Show on map |
| 37 | Stalkoblin | S. Tabantha Snowfield | Hebra | Show on map |
| 38 | Stalkoblin | S. Tabantha Snowfield | Hebra | Show on map |
| 39 | Stalkoblin | Oseira Plains | Lake | Show on map |
| 40 | Stalkoblin | Oseira Plains | Lake | Show on map |
| 41 | Stalkoblin | Pagos Woods | Lake | Show on map |
| 42 | Stalkoblin | Pagos Woods | Lake | Show on map |
| 43 | Stalkoblin | Ranch Ruins | Lanayru | Show on map |
| 44 | Stalkoblin | Ranch Ruins | Lanayru | Show on map |
| 45 | Stalkoblin | Dalite Forest | Ridgeland | Show on map |
| 46 | Stalkoblin | Dalite Forest | Ridgeland | Show on map |
| 47 | Stalkoblin | Nima Plain | Ridgeland | Show on map |
| 48 | Stalkoblin | Nima Plain | Ridgeland | Show on map |
| 49 | Stalkoblin | Nima Plain | Ridgeland | Show on map |
| 50 | Stalkoblin | Nima Plain | Ridgeland | Show on map |
| 51 | Stalkoblin | Nima Plain | Ridgeland | Show on map |
| 52 | Stalkoblin | Nima Plain | Ridgeland | Show on map |
| 53 | Stalkoblin | Nima Plain | Ridgeland | Show on map |
| 54 | Stalkoblin | Nima Plain | Ridgeland | Show on map |
| 55 | Stalkoblin | Rutile Lake | Ridgeland | Show on map |
| 56 | Stalkoblin | Rutile Lake | Ridgeland | Show on map |
| 57 | Stalkoblin | Rutile Lake | Ridgeland | Show on map |
| 58 | Stalkoblin | Rutile Lake | Ridgeland | Show on map |
| 59 | Stalkoblin | Satori Mountain | Ridgeland | Show on map |
| 60 | Stalkoblin | Satori Mountain | Ridgeland | Show on map |
| 61 | Stalkoblin | Satori Mountain | Ridgeland | Show on map |
| 62 | Stalkoblin | Satori Mountain | Ridgeland | Show on map |
| 63 | Stalkoblin | Satori Mountain | Ridgeland | Show on map |
| 64 | Stalkoblin | Nero Hill | Tabantha | Show on map |
| 65 | Stalkoblin | Nero Hill | Tabantha | Show on map |
| 66 | Stalkoblin | Nero Hill | Tabantha | Show on map |
| 67 | Stalkoblin | Strock Lake | Tabantha | Show on map |
| 68 | Stalkoblin | South Lomei Labyrinth | Wasteland | Show on map |
| 69 | Stalkoblin | South Lomei Labyrinth | Wasteland | Show on map |
| 70 | Stalkoblin | South Lomei Labyrinth | Wasteland | Show on map |
| 71 | Stalkoblin | Mekar Island | Woodland | Show on map |
| 72 | Stalkoblin | Mekar Island | Woodland | Show on map |
| 73 | Stalkoblin | Mekar Island | Woodland | Show on map |
| 74 | Stalkoblin | Mekar Island | Woodland | Show on map |
| 75 | Stalkoblin | Military Training Camp | Woodland | Show on map |
| 76 | Stalkoblin | Military Training Camp | Woodland | Show on map |
| 77 | Stalkoblin | Military Training Camp | Woodland | Show on map |
| 78 | Stalkoblin | Military Training Camp | Woodland | Show on map |
| 79 | Stalkoblin | Military Training Camp | Woodland | Show on map |
| 80 | Stalkoblin | Lake Saria | Woodland | Show on map |
| 81 | Stalkoblin | Lake Saria | Woodland | Show on map |
| 82 | Stalkoblin | Lake Saria | Woodland | Show on map |
| 83 | Stalkoblin | Lake Saria | Woodland | Show on map |
| 84 | Stalkoblin | Mido Swamp | Woodland | Show on map |
| 85 | Stalkoblin | Mido Swamp | Woodland | Show on map |
| 86 | Stalkoblin | Mido Swamp | Woodland | Show on map |
| 87 | Stalkoblin | Mido Swamp | Woodland | Show on map |
| 88 | Stalkoblin | Mido Swamp | Woodland | Show on map |
| 89 | Stalkoblin | Mido Swamp | Woodland | Show on map |
| 90 | Stalkoblin | Mido Swamp | Woodland | Show on map |
| 91 | Stalkoblin | Thyphlo Ruins | Woodland | Show on map |
| 92 | Stalkoblin | Thyphlo Ruins | Woodland | Show on map |
| 93 | Stalkoblin | Thyphlo Ruins | Woodland | Show on map |
| 94 | Stalkoblin | Thyphlo Ruins | Woodland | Show on map |
| 95 | Stalkoblin | Thyphlo Ruins | Woodland | Show on map |
| 96 | Stalmoblin | Crenel Hills | Central | Show on map |
| 97 | Stalmoblin | Crenel Hills | Central | Show on map |
| 98 | Stalmoblin | Lanayru Bay | Lanayru | Show on map |
| 99 | Stalmoblin | Talus Plateau | Lanayru | Show on map |
| 100 | Stalmoblin | Rutile Lake | Ridgeland | Show on map |
| 101 | Stalmoblin | Rutile Lake | Ridgeland | Show on map |
| 102 | Stalmoblin | Satori Mountain | Ridgeland | Show on map |
| 103 | Stalmoblin | Satori Mountain | Ridgeland | Show on map |
| 104 | Stalmoblin | Tamio River | Ridgeland | Show on map |
| 105 | Stalmoblin | Tamio River | Ridgeland | Show on map |
| 106 | Stalmoblin | South Lomei Labyrinth | Wasteland | Show on map |
| 107 | Stalmoblin | South Lomei Labyrinth | Wasteland | Show on map |
| 108 | Stalmoblin | Mekar Island | Woodland | Show on map |
| 109 | Stalmoblin | Mekar Island | Woodland | Show on map |
| 110 | Stalizalfos | Sokkala Bridge | Akkala | Show on map |
| 111 | Stalizalfos | Thims Bridge | Central | Show on map |
| 112 | Stalizalfos | Thims Bridge | Central | Show on map |
| 113 | Stalizalfos | Woodland Stable | Central | Show on map |
| 114 | Stalizalfos | Woodland Stable | Central | Show on map |
| 115 | Stalizalfos | Hebra Plunge | Hebra | Show on map |
| 116 | Stalizalfos | Hebra Plunge | Hebra | Show on map |
| 117 | Stalizalfos | Brynna Plain | Lanayru | Show on map |
| 118 | Stalizalfos | Spool Bight | Lanayru | Show on map |
| 119 | Stalizalfos | Toto Lake | Lanayru | Show on map |
| 120 | Stalizalfos | Rutile Lake | Ridgeland | Show on map |
| 121 | Stalizalfos | Rutile Lake | Ridgeland | Show on map |
| 122 | Stalizalfos | Rutile Lake | Ridgeland | Show on map |
| 123 | Stalizalfos | Satori Mountain | Ridgeland | Show on map |
| 124 | Stalizalfos | Satori Mountain | Ridgeland | Show on map |
| 125 | Stalizalfos | Satori Mountain | Ridgeland | Show on map |
| 126 | Stalizalfos | Satori Mountain | Ridgeland | Show on map |
| 127 | Stalizalfos | Satori Mountain | Ridgeland | Show on map |
| 128 | Stalizalfos | Northern Icehouse | Wasteland | Show on map |
| 129 | Stalizalfos | Northern Icehouse | Wasteland | Show on map |
| 130 | Stalizalfos | Northern Icehouse | Wasteland | Show on map |
| 131 | Stalizalfos | South Lomei Labyrinth | Wasteland | Show on map |
| 132 | Stalizalfos | South Lomei Labyrinth | Wasteland | Show on map |
| 133 | Stalizalfos | Mekar Island | Woodland | Show on map |
| 134 | Stalizalfos | Mekar Island | Woodland | Show on map |
| 135 | Stalizalfos | Mekar Island | Woodland | Show on map |
Other monsters are in the enemy overview.
FAQ
When do Stal enemies appear in Breath of the Wild?
How do you kill a Stal enemy for good?
What do Stal enemies drop?
How much HP do Stal enemies have?
Related Articles
guides
Ocarina of Time Remake Big Poes: All 10 Locations and Ghost Shop Rewards
All ten Big Poe locations in the Ocarina of Time remake, how to make them appear on Epona, and Ghost Shop rewards: 30 rupees each, a bottle at 500 points.
guides
Ocarina of Time Remake Map: Heart Pieces, Gold Skulltulas and Area Maps
Ocarina of Time Switch 2 remake map: all 36 Pieces of Heart, 100 Gold Skulltulas, beans, songs, bottles, minigames and Great Fairies, with in-game maps of 21 areas.
guides
BotW Gerudo Town: How to Enter, Shops, Inn and Vah Naboris
Enter Gerudo Town in Breath of the Wild with the Gerudo disguise, prepare for desert heat and cold, find shops and lodging, and begin Riju’s quest.
Was this helpful?
Thanks for the feedback!