

Kamia Omuna Shrine Guide: Moving Targets (BotW)
Defeat the Igneo Talus Titan at Lake Darman, time Kamia Omuna’s cannon shots, rotate the target cage, and recover its Diamond chest in Breath of the Wild.
How do you reveal Kamia Omuna Shrine?
In The Legend of Zelda: Breath of the Wild, this shrine belongs to EX Champion Daruk’s Song. Complete the four opening DLC shrines, then visit this Champion’s monument to start its trials. The Champions’ Ballad overview covers those prerequisites and the branch order.
At Lake Darman, defeat the Igneo Talus Titan standing in the lava. Use an ice attack to cool its hot body before approaching the ore deposit, and attack that deposit during the opening. Retreat to solid ground when the body heats up again. The shrine appears near the lake after the titan falls; fire protection does not make the surrounding lava safe to stand in.
| Detail | Answer |
|---|---|
| Trial | Moving Targets |
| Main mechanic | Time cannon shots and rotate a target cage |
| Treasure | 1 chest: Diamond |
| Completion reward | Rudania’s Emblem |
This is an additional DLC shrine and does not count towards the 120 base-game shrines.
How do you solve Moving Targets?
1. Load the first cannon and hit both targets
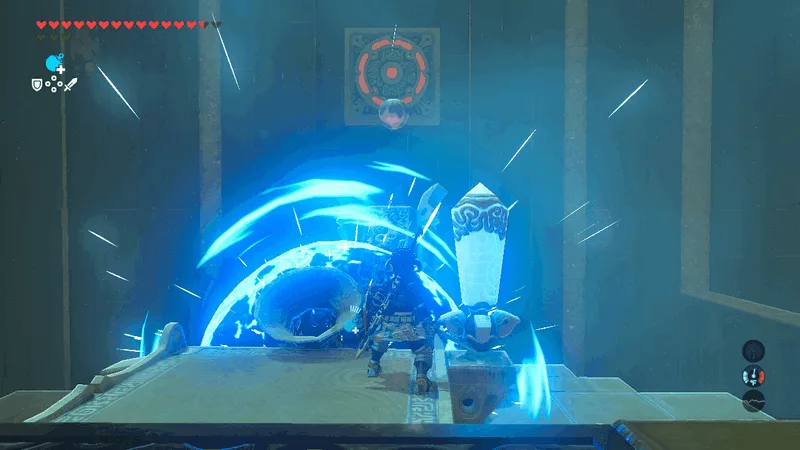
Place a round Remote Bomb in the cannon’s funnel. Strike the nearby crystal to swing the cannon, then detonate the bomb when the barrel lines up with the wall target. Hitting it reveals another target that moves vertically. Load a fresh bomb and time another shot to meet it. Once that target is hit, the first main gate opens.
2. Blast down and retrieve the side chest
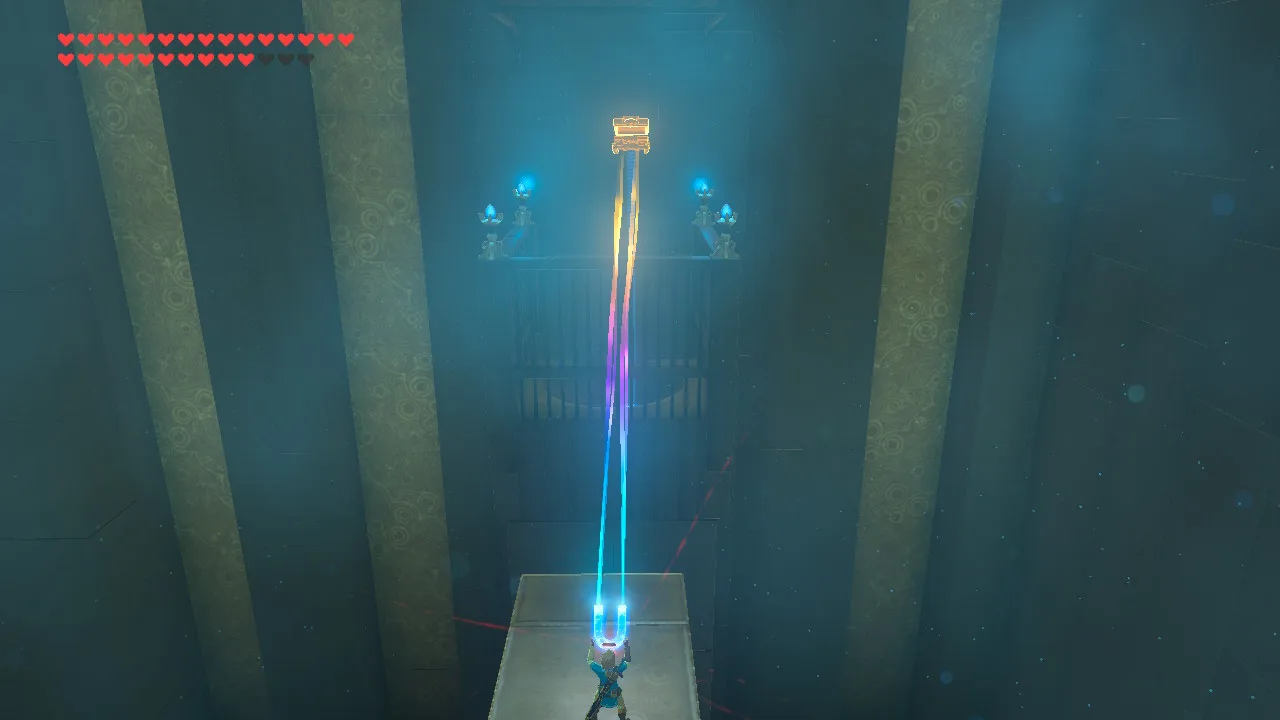
Before leaving this area, load another round bomb and swing the cannon towards the support holding the chest off to the side. Fire to break the support. Follow the narrow walkway to the cage below, lift the fallen chest out with Magnesis, and place it on safe flooring before opening it. Use the nearby ladder to return to the main route.
3. Rotate the cage to expose its target
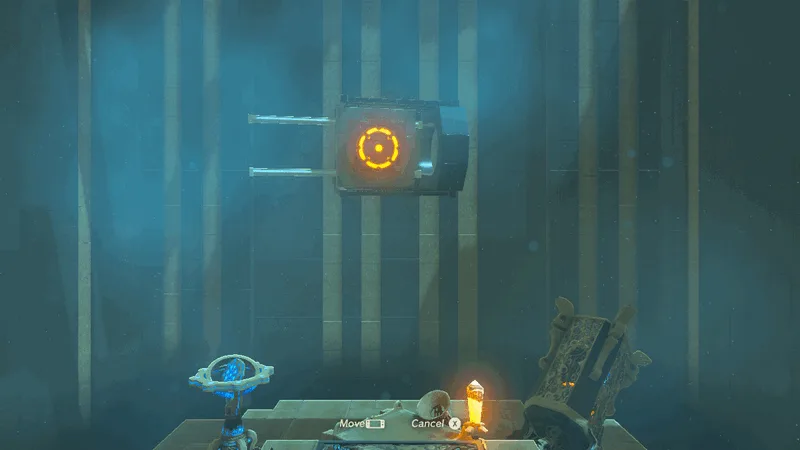
In the next room, operate the motion-control apparatus beside the cannon. Rotate the suspended cage until its target faces the cannon through an unobstructed opening. Leave the apparatus, load a round bomb, swing the barrel and fire when aligned. If the shot hits the cage, adjust the cage’s angle before trying again.
4. Clear the shot to the newly revealed rear target
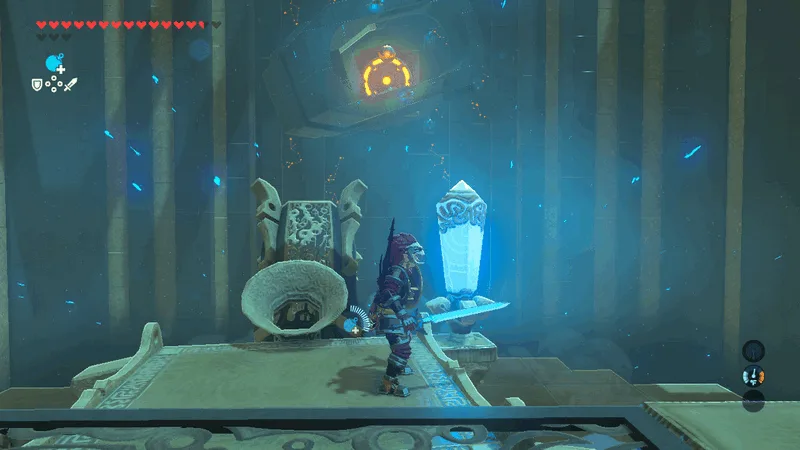
The first hit lowers the wall behind the cage, exposing a more distant target. Return to the apparatus and tilt the cage out of that new firing line. Load and fire again once you can see a clear route from cannon to rear target. Hitting it opens the last gate; follow the walkway to the monk.
Where is the treasure chest?
The only chest contains a Diamond. It starts on a breakable support beside the first cannon. Shoot the support to drop the chest into the cage below, follow the narrow side walkway and use Magnesis to lift it out. Opening the main gate does not collect this chest automatically.
What can go wrong?
- Hitting the crystal does not fire a shot: the crystal moves the cannon; detonating the loaded round bomb fires it.
- Shots miss the moving target: line up the cannon and the target at the moment of firing, allowing for the projectile’s travel.
- The second room’s rear target stays blocked: rotate the cage again after the first hit; its earlier position is not necessarily suitable for the second shot.
- The chest is trapped in the cage: lift it out with Magnesis from the side walkway rather than trying to climb inside.
What do you receive, and where do you go next?
Speak to the monk for Rudania’s Emblem. The other shrines in this branch are Sharo Lun Shrine and Rinu Honika Shrine. Collect all three emblems from this branch, then return to Divine Beast Vah Rudania for the memory rematch. This shrine awards an emblem rather than a Spirit Orb; the main walkthrough explains the next fight.
Related Articles
shrines
Kee Dafunia Shrine Guide: The Melting Point (BotW)
Pass the sunrise ring, melt ice into stairs, reveal the Frostblade chest, and lift the final ice cube in Kee Dafunia Shrine in Breath of the Wild.
shrines
Keive Tala Shrine Guide: Big or Small (BotW)
Defeat the Molduking to reveal Keive Tala Shrine, connect its metal-and-water circuit, and solve the laser puzzle for a Radiant Shield in Breath of the Wild.
shrines
Kiah Toza Shrine Guide: Master the Orb (BotW)
Finish the snow-ring course, guide the orb across metal platforms and ice, time the launcher, and find Kiah Toza’s Falcon Bow in Breath of the Wild.
Was this helpful?
Thanks for the feedback!