

BotW Korok Seeds Map: All 900 Locations, Hestu Upgrade Costs
All 900 Korok Seeds in Breath of the Wild on one map and by region, with puzzle details, every Hestu upgrade cost and what all 900 unlock.
Korok Seeds buy more room for weapons, bows and shields. This guide separates the useful inventory target from the completionist target, gives every upgrade price, explains where Hestu moves and maps all 900 Koroks.
How many Korok Seeds are in Breath of the Wild?
There are 900 Korok Seeds. Every hidden Korok in this game gives one seed, whether you reveal it by lifting a suspicious rock or by completing a larger environmental puzzle.
How do the common Korok puzzles work?
| Puzzle clue | What to do |
|---|---|
| Lone or suspicious rock | Lift it; rocks can also sit under slabs, leaf piles or breakable cover |
| Incomplete stone pattern | Place the nearby missing stone so the ground pattern matches |
| Stone ring in water | Throw a loose rock through the ring |
| Boulder and a nearby hole | Roll or guide the boulder into the hole |
| Mismatched metal blocks | Use Magnesis to copy the completed block shape |
| Flower trail or flower order | Follow the appearing flower, or touch the flowers in their indicated order |
| Pinwheel, balloon or acorn | Stand by the pinwheel when present, then shoot the revealed targets |
| Lily-pad ring | Dive or fall through the center of the ring |
| Leaf-marked stump | Step on it, then reach the goal ring before it disappears |
| Matching fruit trees | Remove the extra fruit until the trees match |
| Offering bowls | Put the matching fruit into the empty bowl |
| Large ice block | Melt it with a heat source to reveal what is inside |
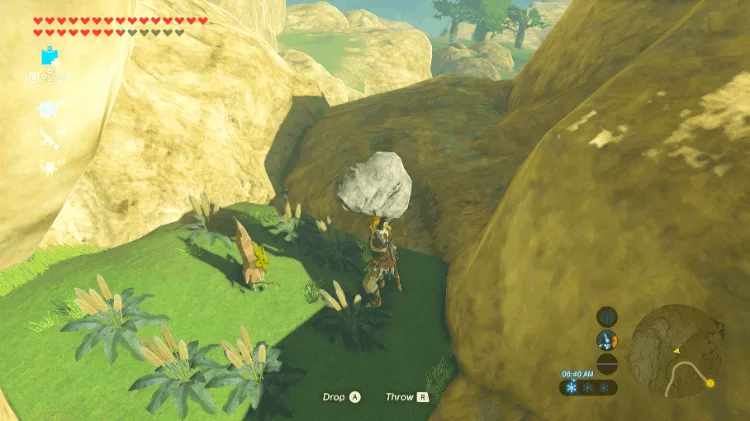
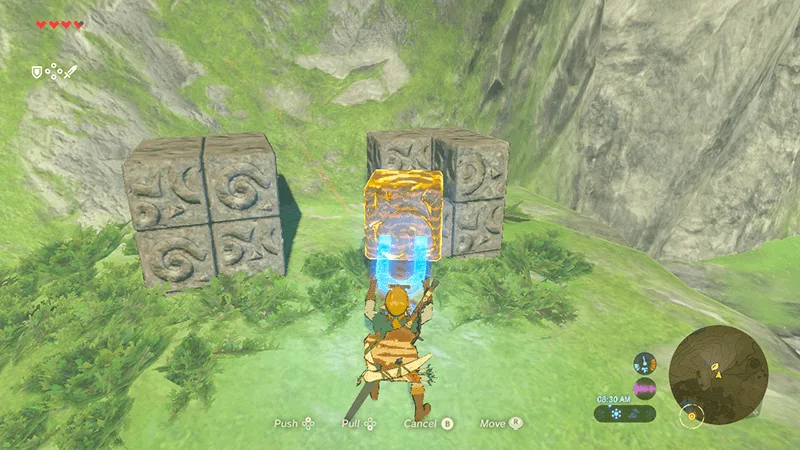
Unlike BotW, Tears of the Kingdom has 1,000 seeds and adds backpack Korok reunions that award two seeds.

How many BotW Korok Seeds do you need for full inventory?
You need 441 seeds to buy every permanent weapon, bow and shield expansion. The category totals are:
| Stash | Expansion count | Seeds for every expansion |
|---|---|---|
| Weapons | 11 | 208 |
| Bows | 8 | 73 |
| Shields | 16 | 160 |
| All stashes | — | 441 |
That leaves 459 seeds after every useful inventory purchase. The Master Sword guide explains the dedicated sword slot separately, while the shrine map guide covers the other major exploration checklist.
Hestu’s three locations, the maracas quest and which stash to expand first are covered in inventory expansion.
What does every Hestu inventory upgrade cost?
The price rises separately for each stash. Choosing a weapon upgrade does not advance the bow or shield price ladder.
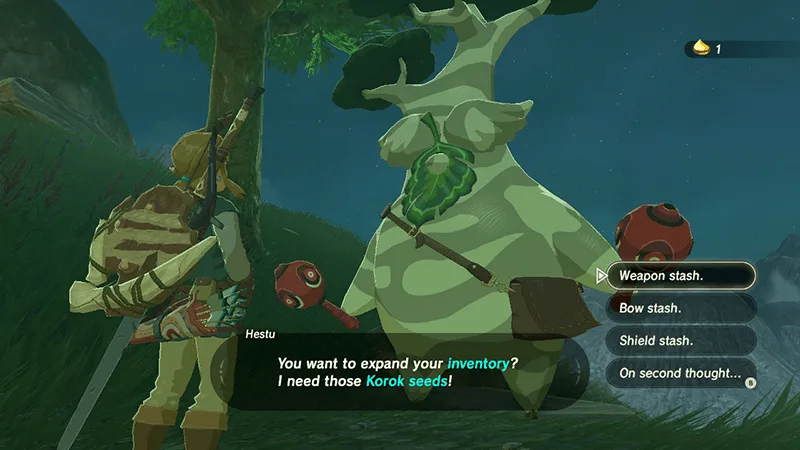
| Expansion | Weapon cost | Bow cost | Shield cost |
|---|---|---|---|
| 1 | 1 | 1 | 1 |
| 2 | 2 | 2 | 2 |
| 3 | 3 | 3 | 3 |
| 4 | 5 | 5 | 4 |
| 5 | 8 | 8 | 5 |
| 6 | 12 | 12 | 10 |
| 7 | 17 | 17 | 10 |
| 8 | 25 | 25 | 10 |
| 9 | 35 | — | 10 |
| 10 | 45 | — | 10 |
| 11 | 55 | — | 15 |
| 12 | — | — | 15 |
| 13 | — | — | 15 |
| 14 | — | — | 15 |
| 15 | — | — | 15 |
| 16 | — | — | 20 |
| Total | 208 | 73 | 160 |
Where is Hestu in Breath of the Wild?
Hestu changes location as you progress, so finding an empty roadside spot does not mean the quest is broken.
| Stage | Location | What moves him onward |
|---|---|---|
| First meeting | Road between Kakariko Bridge and Kakariko Village | Recover his maracas from the nearby monster camp; he offers only 2 upgrades here |
| Lost on the way home | Riverside Stable, Wetland Stable or Woodland Stable | He offers 5 more upgrades across this stage |
| Permanent home | Korok Forest | All remaining inventory expansions are available here |
Browse Korok Seeds by region
Choose a region for its own map, all puzzle locations and a solution reference. Seeds and locations are counted separately.
| Region | Locations | Seeds |
|---|---|---|
| Akkala | 61 | 61 |
| Central | 118 | 118 |
| Dueling Peaks | 68 | 68 |
| Eldin | 44 | 44 |
| Faron | 53 | 53 |
| Gerudo | 41 | 41 |
| Great Plateau | 32 | 32 |
| Hateno | 61 | 61 |
| Hebra | 79 | 79 |
| Lake | 86 | 86 |
| Lanayru | 60 | 60 |
| Ridgeland | 60 | 60 |
| Tabantha | 42 | 42 |
| Wasteland | 64 | 64 |
| Woodland | 31 | 31 |
| Total | 900 | 900 |
Where are all 900 Korok Seeds?
Loading the terrain map… slow connections can take a few seconds.
Some terrain tiles failed to load.
Drag to move and zoom in to tell the points apart; on a computer, click the map first and the mouse wheel zooms it. Ticks are saved in this browser only; no account is needed.
Progress cannot be saved in this browser session.
Every Korok comes from the game’s own placement data, one seed each. The map data sorts the puzzles into 33 kinds; the most common are lift a rock 174, complete a rock pattern 73, match the metal cube shape 66, reach the goal before time runs out 51, touch a sparkle that stays put 51, follow a flower trail 46. Those puzzle names are the map community’s labels put into words — the game never names Korok puzzles.
“Nearest landmark” is the closest place name on the map; the region is the tower region of the nearest shrine.
Central (118)
Click “Show on map” to move the map above to that spot.
| # | Puzzle | Nearest landmark | Region | Location |
|---|---|---|---|---|
| 1 | Chase a moving sparkle | Exchange Ruins | Central | Show on map |
| 2 | Chase a moving sparkle | Windvane Meadow | Central | Show on map |
| 3 | Chase a moving sparkle | Whistling Hill | Central | Show on map |
| 4 | Chase a moving sparkle | Passeri Greenbelt | Central | Show on map |
| 5 | Chase a moving sparkle | Hylia River | Central | Show on map |
| 6 | Complete a circle of rocks | North Hyrule Plain | Central | Show on map |
| 7 | Complete a circle of rocks | Regencia River | Central | Show on map |
| 8 | Complete a circle of rocks | Regencia River | Central | Show on map |
| 9 | Complete a circle of rocks | Digdogg Suspension Bridge | Central | Show on map |
| 10 | Complete a circle of rocks | Boneyard Bridge | Central | Show on map |
| 11 | Complete a rock pattern | Aquame Bridge | Central | Show on map |
| 12 | Complete a rock pattern | Aquame Lake | Central | Show on map |
| 13 | Complete a rock pattern | Quarry Ruins | Central | Show on map |
| 14 | Complete a rock pattern | Water Reservoir | Central | Show on map |
| 15 | Complete a rock pattern | Whistling Hill | Central | Show on map |
| 16 | Dive into the ring of lily pads | Ancient Tree Stump | Central | Show on map |
| 17 | Dive into the ring of lily pads | Mount Nabooru | Central | Show on map |
| 18 | Dive into the ring of lily pads | King's Study | Central | Show on map |
| 19 | Dive into the ring of lily pads | Moat Bridge | Central | Show on map |
| 20 | Dive into the ring of lily pads | Crenel Hills | Central | Show on map |
| 21 | Follow a flower trail | Regencia River | Central | Show on map |
| 22 | Follow a flower trail | Giant's Forest | Central | Show on map |
| 23 | Follow a flower trail | Hyrule Castle | Central | Show on map |
| 24 | Follow a flower trail | Exchange Ruins | Central | Show on map |
| 25 | Lift a rock | Carok Bridge | Central | Show on map |
| 26 | Lift a rock | Aquame Bridge | Central | Show on map |
| 27 | Lift a rock | Regencia River | Central | Show on map |
| 28 | Lift a rock | Regencia River | Central | Show on map |
| 29 | Lift a rock | Regencia River | Central | Show on map |
| 30 | Lift a rock | Coliseum Ruins | Central | Show on map |
| 31 | Lift a rock | Outskirt Stable | Central | Show on map |
| 32 | Lift a rock | Regencia River | Central | Show on map |
| 33 | Lift a rock | Digdogg Suspension Bridge | Central | Show on map |
| 34 | Lift a rock | Coliseum Ruins | Central | Show on map |
| 35 | Lift a rock | Digdogg Suspension Bridge | Central | Show on map |
| 36 | Lift a rock | Docks | Central | Show on map |
| 37 | Lift a rock | Hyrule Castle Moat | Central | Show on map |
| 38 | Lift a rock | Princess Zelda's Room | Central | Show on map |
| 39 | Lift a rock | Hyrule Castle Moat | Central | Show on map |
| 40 | Lift a rock | Sacred Ground Ruins | Central | Show on map |
| 41 | Lift a rock | West Castle Town | Central | Show on map |
| 42 | Lift a rock | East Passage | Central | Show on map |
| 43 | Lift a rock | Princess Zelda's Study | Central | Show on map |
| 44 | Lift a rock | First Gatehouse | Central | Show on map |
| 45 | Lift a rock | Quarry Ruins | Central | Show on map |
| 46 | Lift a rock | Carok Bridge | Central | Show on map |
| 47 | Lift a rock | Hyrule Castle | Central | Show on map |
| 48 | Lift a rock | Passeri Greenbelt | Central | Show on map |
| 49 | Lift a rock | Crenel Hills | Central | Show on map |
| 50 | Lift a rock | Hyrule Forest Park | Central | Show on map |
| 51 | Lift a rock | Crenel Hills | Central | Show on map |
| 52 | Lift a rock | Whistling Hill | Central | Show on map |
| 53 | Lift a rock | Batrea Lake | Central | Show on map |
| 54 | Lift a rock in a rock pile | Mount Gustaf | Central | Show on map |
| 55 | Lift a rock in a rock pile | Moat Bridge | Central | Show on map |
| 56 | Lift a rock in a rock pile | Docks | Central | Show on map |
| 57 | Lift a rock in a rock pile | Guards' Chamber | Central | Show on map |
| 58 | Lift a rock in a rock pile | Second Gatehouse | Central | Show on map |
| 59 | Lift a rock under leaves | Hyrule Cathedral | Central | Show on map |
| 60 | Lift the rock blocking a door | Castle Town Watchtower | Central | Show on map |
| 61 | Match the metal cube shape | North Hyrule Plain | Central | Show on map |
| 62 | Match the metal cube shape | Aquame Bridge | Central | Show on map |
| 63 | Match the metal cube shape | Regencia River | Central | Show on map |
| 64 | Match the metal cube shape | Digdogg Suspension Bridge | Central | Show on map |
| 65 | Match the metal cube shape | Hyrule Castle Moat | Central | Show on map |
| 66 | Match the metal cube shape | Rauru Settlement Ruins | Central | Show on map |
| 67 | Melt a block of ice | East Passage | Central | Show on map |
| 68 | Put the chained metal ball in the hole | Gleeok Bridge | Central | Show on map |
| 69 | Put the chained metal ball in the hole | Batrea Lake | Central | Show on map |
| 70 | Put the missing fruit on the offering plate | Safula Hill | Central | Show on map |
| 71 | Put the missing fruit on the offering plate | Mount Daphnes | Central | Show on map |
| 72 | Put the missing fruit on the offering plate | Dalite Forest | Central | Show on map |
| 73 | Put the missing fruit on the offering plate | Princess Zelda's Study | Central | Show on map |
| 74 | Put the missing fruit on the offering plate | Castle Town Prison | Central | Show on map |
| 75 | Put the missing fruit on the offering plate | Bottomless Swamp | Central | Show on map |
| 76 | Reach the goal before time runs out | Aquame Lake | Central | Show on map |
| 77 | Reach the goal before time runs out | Carok Bridge | Central | Show on map |
| 78 | Reach the goal before time runs out | Princess Zelda's Room | Central | Show on map |
| 79 | Reach the goal before time runs out | Central Square | Central | Show on map |
| 80 | Roll a boulder into the hole | Carok Bridge | Central | Show on map |
| 81 | Roll a boulder into the hole | Squabble River | Central | Show on map |
| 82 | Shoot a balloon | Sanctum | Central | Show on map |
| 83 | Shoot a balloon | Quarry Ruins | Central | Show on map |
| 84 | Shoot a balloon | Passeri Greenbelt | Central | Show on map |
| 85 | Shoot a hanging acorn | Dalite Forest | Central | Show on map |
| 86 | Shoot a hanging acorn | Carok Bridge | Central | Show on map |
| 87 | Shoot a hanging acorn | Aquame Bridge | Central | Show on map |
| 88 | Shoot a hanging acorn | First Gatehouse | Central | Show on map |
| 89 | Shoot a hanging acorn | Second Gatehouse | Central | Show on map |
| 90 | Shoot a hanging acorn | Windvane Meadow | Central | Show on map |
| 91 | Shoot a hanging acorn | Orsedd Bridge | Central | Show on map |
| 92 | Shoot a hanging acorn | Owlan Bridge | Central | Show on map |
| 93 | Shoot the acorn in a hole | Gleeok Bridge | Central | Show on map |
| 94 | Shoot the acorn in a hole | Coliseum Ruins | Central | Show on map |
| 95 | Shoot the acorn in a hole | Irch Plain | Central | Show on map |
| 96 | Shoot the acorn in a hole | Hyrule Castle | Central | Show on map |
| 97 | Shoot the acorn in a hole | Passeri Greenbelt | Central | Show on map |
| 98 | Shoot the acorn in a hole | Hyrule Forest Park | Central | Show on map |
| 99 | Shoot the acorn in a hole | Whistling Hill | Central | Show on map |
| 100 | Shoot the acorns by a pinwheel | Aquame Lake | Central | Show on map |
| 101 | Shoot the acorns by a pinwheel | Castle Town Prison | Central | Show on map |
| 102 | Shoot the acorns by a pinwheel | Passeri Greenbelt | Central | Show on map |
| 103 | Shoot the balloons by a pinwheel | Observation Room | Central | Show on map |
| 104 | Shoot the balloons by a pinwheel | Lockup | Central | Show on map |
| 105 | Shoot the balloons by a pinwheel | Observation Room | Central | Show on map |
| 106 | Shoot the balloons by a pinwheel | Hyrule Castle Town Ruins | Central | Show on map |
| 107 | Shoot the balloons by a pinwheel | Orsedd Bridge | Central | Show on map |
| 108 | Shoot the balloons by a pinwheel | Owlan Bridge | Central | Show on map |
| 109 | Shoot the crest | Observation Room | Central | Show on map |
| 110 | Shoot the crest | Hyrule Castle Town Ruins | Central | Show on map |
| 111 | Touch a sparkle that stays put | Princess Zelda's Study | Central | Show on map |
| 112 | Touch a sparkle that stays put | First Gatehouse | Central | Show on map |
| 113 | Touch a sparkle that stays put | Second Gatehouse | Central | Show on map |
| 114 | Touch a sparkle that stays put | Sanctum | Central | Show on map |
| 115 | Touch a sparkle that stays put | Hyrule Garrison Ruins | Central | Show on map |
| 116 | Touch a sparkle that stays put | Passeri Greenbelt | Central | Show on map |
| 117 | Touch a sparkle that stays put | Crenel Hills | Central | Show on map |
| 118 | Touch a sparkle that stays put | Castle Town Watchtower | Central | Show on map |
Lake (86)
Click “Show on map” to move the map above to that spot.
| # | Puzzle | Nearest landmark | Region | Location |
|---|---|---|---|---|
| 1 | Chase a moving sparkle | Daval Peak | Lake | Show on map |
| 2 | Chase a moving sparkle | Laverra Beach | Lake | Show on map |
| 3 | Chase a moving sparkle | Farosh Hills | Lake | Show on map |
| 4 | Chase a moving sparkle | Farosh Hills | Lake | Show on map |
| 5 | Chase a moving sparkle | Deya Lake | Lake | Show on map |
| 6 | Chase a moving sparkle | Lake Hylia | Lake | Show on map |
| 7 | Chase a moving sparkle | Puffer Beach | Lake | Show on map |
| 8 | Chase a moving sparkle | Floria River | Lake | Show on map |
| 9 | Complete a circle of rocks | Lake Hylia | Lake | Show on map |
| 10 | Complete a circle of rocks | Pagos Woods | Lake | Show on map |
| 11 | Complete a rock pattern | Lake Hylia | Lake | Show on map |
| 12 | Complete a rock pattern | Cora Lake | Lake | Show on map |
| 13 | Complete a rock pattern | Laverra Beach | Lake | Show on map |
| 14 | Complete a rock pattern | Horse God Bridge | Lake | Show on map |
| 15 | Complete a rock pattern | Horse God Bridge | Lake | Show on map |
| 16 | Complete a rock pattern | Haran Lake | Lake | Show on map |
| 17 | Complete a rock pattern | Tobio's Hollow | Lake | Show on map |
| 18 | Dive into the ring of lily pads | Zonai Ruins | Lake | Show on map |
| 19 | Dive into the ring of lily pads | Lake Hylia | Lake | Show on map |
| 20 | Dive into the ring of lily pads | Puffer Beach | Lake | Show on map |
| 21 | Dive into the ring of lily pads | Menoat River | Lake | Show on map |
| 22 | Dive into the ring of lily pads | Lake of the Horse God | Lake | Show on map |
| 23 | Follow a flower trail | Bridge of Hylia | Lake | Show on map |
| 24 | Follow a flower trail | Parache Plains | Lake | Show on map |
| 25 | Follow a flower trail | Deya Lake | Lake | Show on map |
| 26 | Follow a flower trail | Pagos Woods | Lake | Show on map |
| 27 | Follow a flower trail | Sarjon Bridge | Lake | Show on map |
| 28 | Lift a rock | Hylia Island | Lake | Show on map |
| 29 | Lift a rock | Laverra Beach | Lake | Show on map |
| 30 | Lift a rock | Cora Lake | Lake | Show on map |
| 31 | Lift a rock | Bridge of Hylia | Lake | Show on map |
| 32 | Lift a rock | Lake Hylia | Lake | Show on map |
| 33 | Lift a rock | Finra Woods | Lake | Show on map |
| 34 | Lift a rock | Spring of Courage | Lake | Show on map |
| 35 | Lift a rock | Farosh Hills | Lake | Show on map |
| 36 | Lift a rock | Malanya Spring | Lake | Show on map |
| 37 | Lift a rock | Puffer Beach | Lake | Show on map |
| 38 | Lift a rock | Faron Woods | Lake | Show on map |
| 39 | Lift a rock | Dracozu River | Lake | Show on map |
| 40 | Lift a rock in a rock pile | Oseira Plains | Lake | Show on map |
| 41 | Lift a rock in a rock pile | Laverra Beach | Lake | Show on map |
| 42 | Lift a rock in a rock pile | Spring of Courage | Lake | Show on map |
| 43 | Lift a rock in a rock pile | Menoat River | Lake | Show on map |
| 44 | Lift a stone slab | Bridge of Hylia | Lake | Show on map |
| 45 | Lift a stone slab | Popla Foothills | Lake | Show on map |
| 46 | Lift a stone slab | Pagos Woods | Lake | Show on map |
| 47 | Light the torch | Lake Hylia | Lake | Show on map |
| 48 | Make the rows of trees match | Farosh Hills | Lake | Show on map |
| 49 | Match the metal cube shape | Lake Hylia | Lake | Show on map |
| 50 | Match the metal cube shape | Oseira Plains | Lake | Show on map |
| 51 | Match the metal cube shape | Cora Lake | Lake | Show on map |
| 52 | Match the metal cube shape | Deya Lake | Lake | Show on map |
| 53 | Match the metal cube shape | Spring of Courage | Lake | Show on map |
| 54 | Match the metal cube shape | Ibara Butte | Lake | Show on map |
| 55 | Match the metal cube shape | Puffer Beach | Lake | Show on map |
| 56 | Move a boulder | Laverra Beach | Lake | Show on map |
| 57 | Put the chained metal ball in the hole | Deya Lake | Lake | Show on map |
| 58 | Put the chained metal ball in the hole | Finra Woods | Lake | Show on map |
| 59 | Put the chained metal ball in the hole | Zonai Ruins | Lake | Show on map |
| 60 | Put the missing fruit on the offering plate | Parache Plains | Lake | Show on map |
| 61 | Touch the flowers in order | Farosh Hills | Lake | Show on map |
| 62 | Reach the goal before time runs out | Nautelle Wetlands | Lake | Show on map |
| 63 | Reach the goal before time runs out | Parache Plains | Lake | Show on map |
| 64 | Reach the goal before time runs out | Barula Plain | Lake | Show on map |
| 65 | Reach the goal before time runs out | Guchini Plain | Lake | Show on map |
| 66 | Reach the goal before time runs out | Tobio's Hollow | Lake | Show on map |
| 67 | Roll a boulder into the hole | Finra Woods | Lake | Show on map |
| 68 | Roll a boulder into the hole | Dracozu Lake | Lake | Show on map |
| 69 | Roll a boulder into the hole | Lake Hylia | Lake | Show on map |
| 70 | Roll a boulder into the hole | Barula Plain | Lake | Show on map |
| 71 | Roll a boulder into the hole | Lake Hylia | Lake | Show on map |
| 72 | Roll a boulder into the hole | Popla Foothills | Lake | Show on map |
| 73 | Roll a boulder into the hole | Nette Plateau | Lake | Show on map |
| 74 | Roll a boulder into the hole | Horse God Bridge | Lake | Show on map |
| 75 | Shoot a balloon | Bridge of Hylia | Lake | Show on map |
| 76 | Shoot a balloon | Sarjon Bridge | Lake | Show on map |
| 77 | Shoot the acorn in a hole | Lake Hylia | Lake | Show on map |
| 78 | Shoot the acorns by a pinwheel | Nette Plateau | Lake | Show on map |
| 79 | Shoot the balloons by a pinwheel | Daval Peak | Lake | Show on map |
| 80 | Shoot the balloons by a pinwheel | Lake Hylia | Lake | Show on map |
| 81 | Shoot the balloons by a pinwheel | Nette Plateau | Lake | Show on map |
| 82 | Shoot the balloons by a pinwheel | Tobio's Hollow | Lake | Show on map |
| 83 | Take the stick | Bridge of Hylia | Lake | Show on map |
| 84 | Touch a sparkle that stays put | Bridge of Hylia | Lake | Show on map |
| 85 | Touch a sparkle that stays put | Hylia Island | Lake | Show on map |
| 86 | Touch a sparkle that stays put | Laverra Beach | Lake | Show on map |
Hebra (79)
Click “Show on map” to move the map above to that spot.
| # | Puzzle | Nearest landmark | Region | Location |
|---|---|---|---|---|
| 1 | Chase a moving sparkle | Hebra West Summit | Hebra | Show on map |
| 2 | Chase a moving sparkle | S. Tabantha Snowfield | Hebra | Show on map |
| 3 | Complete a rock pattern | Sherfin's Secret Hot Spring | Hebra | Show on map |
| 4 | Complete a rock pattern | Sturnida Secret Hot Spring | Hebra | Show on map |
| 5 | Complete a rock pattern | Hebra North Crest | Hebra | Show on map |
| 6 | Complete a rock pattern | Selmie's Spot | Hebra | Show on map |
| 7 | Complete a rock pattern | Kopeeki Drifts | Hebra | Show on map |
| 8 | Complete a rock pattern | Upland Lindor | Hebra | Show on map |
| 9 | Complete a rock pattern | Mount Drena | Hebra | Show on map |
| 10 | Dive into the ring of lily pads | Strock Lake | Hebra | Show on map |
| 11 | Dive into the ring of lily pads | Hebra Plunge | Hebra | Show on map |
| 12 | Dive into the ring of lily pads | Tama Pond | Hebra | Show on map |
| 13 | Follow a flower trail | Hebra Great Skeleton | Hebra | Show on map |
| 14 | Follow a flower trail | Biron Snowshelf | Hebra | Show on map |
| 15 | Follow a flower trail | Sturnida Secret Hot Spring | Hebra | Show on map |
| 16 | Follow a flower trail | Lake Kilsie | Hebra | Show on map |
| 17 | Follow a flower trail | Hebra Falls | Hebra | Show on map |
| 18 | Follow a flower trail | Tanagar Canyon | Hebra | Show on map |
| 19 | Lift a rock | Hebra West Summit | Hebra | Show on map |
| 20 | Lift a rock | Hebra West Summit | Hebra | Show on map |
| 21 | Lift a rock | Lake Kilsie | Hebra | Show on map |
| 22 | Lift a rock | Biron Snowshelf | Hebra | Show on map |
| 23 | Lift a rock | Biron Snowshelf | Hebra | Show on map |
| 24 | Lift a rock | Tanagar Canyon Course | Hebra | Show on map |
| 25 | Lift a rock | Hebra Peak | Hebra | Show on map |
| 26 | Lift a rock | Hebra Plunge | Hebra | Show on map |
| 27 | Lift a rock | Hebra Falls | Hebra | Show on map |
| 28 | Lift a rock | Hebra Peak | Hebra | Show on map |
| 29 | Lift a rock | Tabantha Village Ruins | Hebra | Show on map |
| 30 | Lift a rock | Hebra Falls | Hebra | Show on map |
| 31 | Lift a rock | Forgotten Temple | Hebra | Show on map |
| 32 | Lift a rock | Forgotten Temple | Hebra | Show on map |
| 33 | Lift a rock in a rock pile | Lake Kilsie | Hebra | Show on map |
| 34 | Lift a rock in a rock pile | Kolami Bridge | Hebra | Show on map |
| 35 | Lift a rock in a rock pile | Forgotten Temple | Hebra | Show on map |
| 36 | Lift a rock under leaves | Goflam's Secret Hot Spring | Hebra | Show on map |
| 37 | Lift a rock under leaves | S. Tabantha Snowfield | Hebra | Show on map |
| 38 | Lift the rock blocking a door | Forgotten Temple | Hebra | Show on map |
| 39 | Match the metal cube shape | Icefall Foothills | Hebra | Show on map |
| 40 | Match the metal cube shape | Mount Drena | Hebra | Show on map |
| 41 | Melt a block of ice | Hebra Great Skeleton | Hebra | Show on map |
| 42 | Melt a block of ice | Talonto Peak | Hebra | Show on map |
| 43 | Melt a block of ice | Hebra Falls | Hebra | Show on map |
| 44 | Melt a block of ice | Coldsnap Hollow | Hebra | Show on map |
| 45 | Melt a block of ice | Pikida Stonegrove | Hebra | Show on map |
| 46 | Melt a block of ice | Pikida Stonegrove | Hebra | Show on map |
| 47 | Melt a block of ice | Hebra Falls | Hebra | Show on map |
| 48 | Melt a block of ice | Pikida Stonegrove | Hebra | Show on map |
| 49 | Put the chained metal ball in the hole | Tabantha Village Ruins | Hebra | Show on map |
| 50 | Reach the goal before time runs out | Hebra Great Skeleton | Hebra | Show on map |
| 51 | Reach the goal before time runs out | Hebra Headspring | Hebra | Show on map |
| 52 | Reach the goal before time runs out | Tama Pond | Hebra | Show on map |
| 53 | Roll a boulder into the hole | Kopeeki Drifts | Hebra | Show on map |
| 54 | Roll a boulder into the hole | Forgotten Temple | Hebra | Show on map |
| 55 | Shoot a balloon | Talonto Peak | Hebra | Show on map |
| 56 | Shoot a balloon | Hebra Headspring | Hebra | Show on map |
| 57 | Shoot a balloon | Hebra Falls | Hebra | Show on map |
| 58 | Shoot a balloon | North Lomei Labyrinth | Hebra | Show on map |
| 59 | Shoot the acorn in a hole | Goflam's Secret Hot Spring | Hebra | Show on map |
| 60 | Shoot the acorn in a hole | Talonto Peak | Hebra | Show on map |
| 61 | Shoot the acorn in a hole | S. Tabantha Snowfield | Hebra | Show on map |
| 62 | Shoot the acorn in a hole | Tabantha Hills | Hebra | Show on map |
| 63 | Shoot the acorn in a hole | Footrace Check-In | Hebra | Show on map |
| 64 | Shoot the acorn in a hole | N. Tabantha Snowfield | Hebra | Show on map |
| 65 | Shoot the acorns by a pinwheel | Pikida Stonegrove | Hebra | Show on map |
| 66 | Shoot the balloons by a pinwheel | Hebra North Summit | Hebra | Show on map |
| 67 | Shoot the balloons by a pinwheel | Lake Kilsie | Hebra | Show on map |
| 68 | Shoot the balloons by a pinwheel | Hebra Tundra | Hebra | Show on map |
| 69 | Shoot the balloons by a pinwheel | Hebra Tundra | Hebra | Show on map |
| 70 | Shoot the balloons by a pinwheel | N. Tabantha Snowfield | Hebra | Show on map |
| 71 | Shoot the balloons by a pinwheel | Forgotten Temple | Hebra | Show on map |
| 72 | Shoot the balloons by a pinwheel | Drenan Highlands | Hebra | Show on map |
| 73 | Touch a sparkle that stays put | Biron Snowshelf | Hebra | Show on map |
| 74 | Touch a sparkle that stays put | Goflam's Secret Hot Spring | Hebra | Show on map |
| 75 | Touch a sparkle that stays put | Selmie's Spot | Hebra | Show on map |
| 76 | Touch a sparkle that stays put | Hebra East Summit | Hebra | Show on map |
| 77 | Touch a sparkle that stays put | Tama Pond | Hebra | Show on map |
| 78 | Touch a sparkle that stays put | Hebra Plunge | Hebra | Show on map |
| 79 | Touch a sparkle that stays put | Tama Pond | Hebra | Show on map |
Dueling Peaks (68)
Click “Show on map” to move the map above to that spot.
| # | Puzzle | Nearest landmark | Region | Location |
|---|---|---|---|---|
| 1 | Complete a circle of rocks | Hylia River | Dueling Peaks | Show on map |
| 2 | Complete a circle of rocks | Kakariko Bridge | Dueling Peaks | Show on map |
| 3 | Complete a circle of rocks | Lake Siela | Dueling Peaks | Show on map |
| 4 | Complete a circle of rocks | Breman Peak | Dueling Peaks | Show on map |
| 5 | Dive into the ring of lily pads | Lake Siela | Dueling Peaks | Show on map |
| 6 | Dive into the ring of lily pads | Kakariko Village | Dueling Peaks | Show on map |
| 7 | Dive into the ring of lily pads | Koto Pond | Dueling Peaks | Show on map |
| 8 | Follow a flower trail | Hills of Baumer | Dueling Peaks | Show on map |
| 9 | Follow a flower trail | Squabble River | Dueling Peaks | Show on map |
| 10 | Follow a flower trail | Lanayru Road - West Gate | Dueling Peaks | Show on map |
| 11 | Follow a flower trail | Breman Peak | Dueling Peaks | Show on map |
| 12 | Jump the fences before time runs out | South Nabi Lake | Dueling Peaks | Show on map |
| 13 | Lift a rock | Eagus Bridge | Dueling Peaks | Show on map |
| 14 | Lift a rock | South Nabi Lake | Dueling Peaks | Show on map |
| 15 | Lift a rock | Nabi Lake | Dueling Peaks | Show on map |
| 16 | Lift a rock | Squabble River | Dueling Peaks | Show on map |
| 17 | Lift a rock | Proxim Bridge | Dueling Peaks | Show on map |
| 18 | Lift a rock | Deya Village Ruins | Dueling Peaks | Show on map |
| 19 | Lift a rock | Proxim Bridge | Dueling Peaks | Show on map |
| 20 | Lift a rock | Scout's Hill | Dueling Peaks | Show on map |
| 21 | Lift a rock | Pillars of Levia | Dueling Peaks | Show on map |
| 22 | Lift a rock | Dueling Peaks | Dueling Peaks | Show on map |
| 23 | Lift a rock | Pillars of Levia | Dueling Peaks | Show on map |
| 24 | Lift a rock | Squabble River | Dueling Peaks | Show on map |
| 25 | Lift a rock | Pillars of Levia | Dueling Peaks | Show on map |
| 26 | Lift a rock | Mable Ridge | Dueling Peaks | Show on map |
| 27 | Lift a rock | Kakariko Village | Dueling Peaks | Show on map |
| 28 | Lift a rock | Hickaly Woods | Dueling Peaks | Show on map |
| 29 | Lift a rock | Dueling Peaks Stable | Dueling Peaks | Show on map |
| 30 | Lift a rock | Hickaly Woods | Dueling Peaks | Show on map |
| 31 | Lift a rock | Little Twin Bridge | Dueling Peaks | Show on map |
| 32 | Lift a rock | Mount Floria | Dueling Peaks | Show on map |
| 33 | Lift a rock | Bonooru's Stand | Dueling Peaks | Show on map |
| 34 | Lift a rock | Breman Peak | Dueling Peaks | Show on map |
| 35 | Make the rows of trees match | Deya Lake | Dueling Peaks | Show on map |
| 36 | Make the rows of trees match | Pillars of Levia | Dueling Peaks | Show on map |
| 37 | Make the rows of trees match | Quatta's Shelf | Dueling Peaks | Show on map |
| 38 | Match the metal cube shape | Hylia River | Dueling Peaks | Show on map |
| 39 | Match the metal cube shape | Lake Hylia | Dueling Peaks | Show on map |
| 40 | Match the metal cube shape | Pierre Plateau | Dueling Peaks | Show on map |
| 41 | Match the metal cube shape | Bonooru's Stand | Dueling Peaks | Show on map |
| 42 | Move a boulder | Owlan Bridge | Dueling Peaks | Show on map |
| 43 | Move a boulder | Millennio Sandbar | Dueling Peaks | Show on map |
| 44 | Put the chained metal ball in the hole | Deya Village Ruins | Dueling Peaks | Show on map |
| 45 | Put the chained metal ball in the hole | Deya Village Ruins | Dueling Peaks | Show on map |
| 46 | Put the missing fruit on the offering plate | Telta Lake | Dueling Peaks | Show on map |
| 47 | Put the missing fruit on the offering plate | Dueling Peaks | Dueling Peaks | Show on map |
| 48 | Put the missing fruit on the offering plate | Kakariko Village | Dueling Peaks | Show on map |
| 49 | Put the missing fruit on the offering plate | Dueling Peaks | Dueling Peaks | Show on map |
| 50 | Put the missing fruit on the offering plate | Lanayru Road - West Gate | Dueling Peaks | Show on map |
| 51 | Roll a boulder into the hole | Hills of Baumer | Dueling Peaks | Show on map |
| 52 | Roll a boulder into the hole | Hylia River | Dueling Peaks | Show on map |
| 53 | Roll a boulder into the hole | Dueling Peaks | Dueling Peaks | Show on map |
| 54 | Roll a boulder into the hole | Lanayru Road - West Gate | Dueling Peaks | Show on map |
| 55 | Shoot the acorn in a hole | Jia Highlands | Dueling Peaks | Show on map |
| 56 | Shoot the acorns by a pinwheel | Squabble River | Dueling Peaks | Show on map |
| 57 | Shoot the acorns by a pinwheel | East Post Ruins | Dueling Peaks | Show on map |
| 58 | Shoot the acorns by a pinwheel | Mount Rozudo | Dueling Peaks | Show on map |
| 59 | Shoot the balloons by a pinwheel | Hills of Baumer | Dueling Peaks | Show on map |
| 60 | Shoot the balloons by a pinwheel | Squabble River | Dueling Peaks | Show on map |
| 61 | Shoot the balloons by a pinwheel | Jia Highlands | Dueling Peaks | Show on map |
| 62 | Shoot the balloons by a pinwheel | Bubinga Forest | Dueling Peaks | Show on map |
| 63 | Shoot the crest | Kakariko Village | Dueling Peaks | Show on map |
| 64 | Shoot the crest | Kakariko Village | Dueling Peaks | Show on map |
| 65 | Touch a sparkle that stays put | East Post Ruins | Dueling Peaks | Show on map |
| 66 | Touch a sparkle that stays put | Scout's Hill | Dueling Peaks | Show on map |
| 67 | Touch a sparkle that stays put | South Nabi Lake | Dueling Peaks | Show on map |
| 68 | Touch a sparkle that stays put | Dueling Peaks Stable | Dueling Peaks | Show on map |
Wasteland (64)
Click “Show on map” to move the map above to that spot.
| # | Puzzle | Nearest landmark | Region | Location |
|---|---|---|---|---|
| 1 | Complete a rock pattern | East Barrens | Wasteland | Show on map |
| 2 | Complete a rock pattern | Yarna Valley | Wasteland | Show on map |
| 3 | Complete a rock pattern | Daval Peak | Wasteland | Show on map |
| 4 | Complete a rock pattern | East Gerudo Mesa | Wasteland | Show on map |
| 5 | Follow a flower trail | Karusa Valley | Wasteland | Show on map |
| 6 | Follow a flower trail | Gerudo Town | Wasteland | Show on map |
| 7 | Follow a flower trail | Palu Wasteland | Wasteland | Show on map |
| 8 | Follow a flower trail | Palu Wasteland | Wasteland | Show on map |
| 9 | Lift a rock | Arbiter's Grounds | Wasteland | Show on map |
| 10 | Lift a rock | Arbiter's Grounds | Wasteland | Show on map |
| 11 | Lift a rock | Southern Oasis | Wasteland | Show on map |
| 12 | Lift a rock | Gerudo Canyon Stable | Wasteland | Show on map |
| 13 | Lift a rock | Spectacle Rock | Wasteland | Show on map |
| 14 | Lift a rock | Spectacle Rock | Wasteland | Show on map |
| 15 | Lift a rock | Spectacle Rock | Wasteland | Show on map |
| 16 | Lift a rock | East Gerudo Ruins | Wasteland | Show on map |
| 17 | Lift a rock | Gerudo Desert Gateway | Wasteland | Show on map |
| 18 | Lift a rock | Mount Nabooru | Wasteland | Show on map |
| 19 | Lift a rock | East Barrens | Wasteland | Show on map |
| 20 | Lift a rock | East Gerudo Mesa | Wasteland | Show on map |
| 21 | Lift a rock | Champion's Gate | Wasteland | Show on map |
| 22 | Lift a rock | Mount Granajh | Wasteland | Show on map |
| 23 | Lift a rock | Mount Granajh | Wasteland | Show on map |
| 24 | Lift a rock in a rock pile | East Gerudo Mesa | Wasteland | Show on map |
| 25 | Lift a rock in a rock pile | Mount Granajh | Wasteland | Show on map |
| 26 | Make the rows of trees match | Toruma Dunes | Wasteland | Show on map |
| 27 | Make the rows of trees match | West Barrens | Wasteland | Show on map |
| 28 | Make the rows of trees match | Arbiter's Grounds | Wasteland | Show on map |
| 29 | Make the rows of trees match | Dragon's Exile | Wasteland | Show on map |
| 30 | Make the rows of trees match | Southern Oasis | Wasteland | Show on map |
| 31 | Match the metal cube shape | Great Cliffs | Wasteland | Show on map |
| 32 | Match the metal cube shape | Gerudo Desert Gateway | Wasteland | Show on map |
| 33 | Match the metal cube shape | Yarna Valley | Wasteland | Show on map |
| 34 | Match the metal cube shape | Spectacle Rock | Wasteland | Show on map |
| 35 | Match the metal cube shape | East Gerudo Ruins | Wasteland | Show on map |
| 36 | Match the metal cube shape | Champion's Gate | Wasteland | Show on map |
| 37 | Match the metal cube shape | Palu Wasteland | Wasteland | Show on map |
| 38 | Match the metal cube shape | East Barrens | Wasteland | Show on map |
| 39 | Match the metal cube shape | Stalry Plateau | Wasteland | Show on map |
| 40 | Match the metal cube shape | Taobab Grassland | Wasteland | Show on map |
| 41 | Match the metal cube shape | Gerudo Canyon Pass | Wasteland | Show on map |
| 42 | Match the metal cube shape | Champion's Gate | Wasteland | Show on map |
| 43 | Melt a block of ice | Daval Peak | Wasteland | Show on map |
| 44 | Melt a block of ice | South Lomei Labyrinth | Wasteland | Show on map |
| 45 | Put the chained metal ball in the hole | Gerudo Canyon Pass | Wasteland | Show on map |
| 46 | Reach the goal before time runs out | West Barrens | Wasteland | Show on map |
| 47 | Reach the goal before time runs out | Northern Icehouse | Wasteland | Show on map |
| 48 | Reach the goal before time runs out | Gerudo Canyon Stable | Wasteland | Show on map |
| 49 | Reach the goal before time runs out | Spectacle Rock | Wasteland | Show on map |
| 50 | Reach the goal before time runs out | South Lomei Labyrinth | Wasteland | Show on map |
| 51 | Reach the goal before time runs out | East Barrens | Wasteland | Show on map |
| 52 | Roll a boulder into the hole | Gerudo Canyon | Wasteland | Show on map |
| 53 | Shoot a balloon | Southern Oasis | Wasteland | Show on map |
| 54 | Shoot a balloon | Spectacle Rock | Wasteland | Show on map |
| 55 | Shoot a balloon | Gerudo Canyon | Wasteland | Show on map |
| 56 | Shoot a balloon | East Gerudo Ruins | Wasteland | Show on map |
| 57 | Shoot a hanging acorn | Gerudo Canyon | Wasteland | Show on map |
| 58 | Shoot the balloons by a pinwheel | Stalry Plateau | Wasteland | Show on map |
| 59 | Touch a sparkle that stays put | West Gerudo Ruins | Wasteland | Show on map |
| 60 | Touch a sparkle that stays put | West Gerudo Ruins | Wasteland | Show on map |
| 61 | Touch a sparkle that stays put | West Gerudo Ruins | Wasteland | Show on map |
| 62 | Touch a sparkle that stays put | Great Fairy Fountain | Wasteland | Show on map |
| 63 | Touch a sparkle that stays put | Gerudo Town | Wasteland | Show on map |
| 64 | Touch a sparkle that stays put | Gerudo Canyon Pass | Wasteland | Show on map |
Akkala (61)
Click “Show on map” to move the map above to that spot.
| # | Puzzle | Nearest landmark | Region | Location |
|---|---|---|---|---|
| 1 | Chase a moving sparkle | Ordorac Quarry | Akkala | Show on map |
| 2 | Chase a moving sparkle | Kanalet Ridge | Akkala | Show on map |
| 3 | Chase a moving sparkle | Ulria Grotto | Akkala | Show on map |
| 4 | Complete a circle of rocks | Akkala Falls | Akkala | Show on map |
| 5 | Complete a rock pattern | Skull Lake | Akkala | Show on map |
| 6 | Complete a rock pattern | Akkala Bridge Ruins | Akkala | Show on map |
| 7 | Complete a rock pattern | East Akkala Stable | Akkala | Show on map |
| 8 | Complete a rock pattern | Lake Akkala | Akkala | Show on map |
| 9 | Dive into the ring of lily pads | Davdi Island | Akkala | Show on map |
| 10 | Follow a flower trail | Tarrey Town | Akkala | Show on map |
| 11 | Follow a flower trail | Malin Bay | Akkala | Show on map |
| 12 | Follow a flower trail | Tal Tal Peak | Akkala | Show on map |
| 13 | Lift a rock | Skull Lake | Akkala | Show on map |
| 14 | Lift a rock | Rok Woods | Akkala | Show on map |
| 15 | Lift a rock | Spring of Power | Akkala | Show on map |
| 16 | Lift a rock | Akkala Citadel Ruins | Akkala | Show on map |
| 17 | Lift a rock | Torin Wetland | Akkala | Show on map |
| 18 | Lift a rock | West Sokkala Bridge | Akkala | Show on map |
| 19 | Lift a rock | Bloodleaf Lake | Akkala | Show on map |
| 20 | Lift a rock in a rock pile | Ploymus Mountain | Akkala | Show on map |
| 21 | Lift a rock in a rock pile | Tumlea Heights | Akkala | Show on map |
| 22 | Lift a rock in a rock pile | Davdi Island | Akkala | Show on map |
| 23 | Lift a rock under leaves | Tumlea Heights | Akkala | Show on map |
| 24 | Lift a rock under leaves | Ulri Mountain | Akkala | Show on map |
| 25 | Lift a rock under leaves | Akkala Citadel Ruins | Akkala | Show on map |
| 26 | Lift a rock under leaves | Akkala Citadel Ruins | Akkala | Show on map |
| 27 | Lift a rock under leaves | Akkala Citadel Ruins | Akkala | Show on map |
| 28 | Lift a rock under leaves | East Akkala Stable | Akkala | Show on map |
| 29 | Lift a rock under leaves | Rist Peninsula | Akkala | Show on map |
| 30 | Lift a stone slab | Rok Woods | Akkala | Show on map |
| 31 | Lift a stone slab | Tempest Gulch | Akkala | Show on map |
| 32 | Lift a stone slab | Lomei Labyrinth Island | Akkala | Show on map |
| 33 | Lift the rock blocking a door | Akkala Parade Ground Ruins | Akkala | Show on map |
| 34 | Lift the rock blocking a door | Akkala Citadel Ruins | Akkala | Show on map |
| 35 | Make the rows of trees match | Ulri Mountain | Akkala | Show on map |
| 36 | Make the rows of trees match | Kaepora Pass | Akkala | Show on map |
| 37 | Make the rows of trees match | Ulria Grotto | Akkala | Show on map |
| 38 | Match the metal cube shape | Ordorac Quarry | Akkala | Show on map |
| 39 | Match the metal cube shape | Ordorac Quarry | Akkala | Show on map |
| 40 | Match the metal cube shape | Rok Woods | Akkala | Show on map |
| 41 | Match the metal cube shape | East Akkala Beach | Akkala | Show on map |
| 42 | Match the metal cube shape | Malin Bay | Akkala | Show on map |
| 43 | Move a boulder | Akkala Wilds | Akkala | Show on map |
| 44 | Move a boulder | Ulria Grotto | Akkala | Show on map |
| 45 | Put the missing fruit on the offering plate | Lake Akkala | Akkala | Show on map |
| 46 | Touch the flowers in order | Akkala Wilds | Akkala | Show on map |
| 47 | Touch the flowers in order | North Akkala Beach | Akkala | Show on map |
| 48 | Touch the flowers in order | North Akkala Foothill | Akkala | Show on map |
| 49 | Touch the flowers in order | Great Fairy Fountain | Akkala | Show on map |
| 50 | Reach the goal before time runs out | Skull Lake | Akkala | Show on map |
| 51 | Reach the goal before time runs out | Bloodleaf Lake | Akkala | Show on map |
| 52 | Reach the goal before time runs out | East Akkala Stable | Akkala | Show on map |
| 53 | Roll a boulder into the hole | Akkala Wilds | Akkala | Show on map |
| 54 | Roll a boulder into the hole | Tal Tal Peak | Akkala | Show on map |
| 55 | Shoot a balloon | Rok Woods | Akkala | Show on map |
| 56 | Shoot the acorn in a hole | North Akkala Valley | Akkala | Show on map |
| 57 | Shoot the balloons by a pinwheel | Ukuku Plains | Akkala | Show on map |
| 58 | Shoot the balloons by a pinwheel | East Akkala Beach | Akkala | Show on map |
| 59 | Touch a sparkle that stays put | Shadow Pass | Akkala | Show on map |
| 60 | Touch a sparkle that stays put | Bloodleaf Lake | Akkala | Show on map |
| 61 | Touch a sparkle that stays put | Ulria Grotto | Akkala | Show on map |
Hateno (61)
Click “Show on map” to move the map above to that spot.
| # | Puzzle | Nearest landmark | Region | Location |
|---|---|---|---|---|
| 1 | Chase a moving sparkle | Rabia Plain | Hateno | Show on map |
| 2 | Chase a moving sparkle | Naydra Snowfield | Hateno | Show on map |
| 3 | Complete a circle of rocks | Bank of Wishes | Hateno | Show on map |
| 4 | Complete a circle of rocks | Kitano Bay | Hateno | Show on map |
| 5 | Complete a rock pattern | Phalian Highlands | Hateno | Show on map |
| 6 | Complete a rock pattern | Ebon Mountain | Hateno | Show on map |
| 7 | Complete a rock pattern | Wintre Island | Hateno | Show on map |
| 8 | Complete a rock pattern | Spring of Wisdom | Hateno | Show on map |
| 9 | Complete a rock pattern | Mapla Point | Hateno | Show on map |
| 10 | Dive into the ring of lily pads | Lanayru Promenade | Hateno | Show on map |
| 11 | Dive into the ring of lily pads | Oakle's Navel | Hateno | Show on map |
| 12 | Dive into the ring of lily pads | Nirvata Lake | Hateno | Show on map |
| 13 | Dive into the ring of lily pads | Nirvata Plateau | Hateno | Show on map |
| 14 | Dive into the ring of lily pads | Camphor Pond | Hateno | Show on map |
| 15 | Dive into the ring of lily pads | Retsam Forest | Hateno | Show on map |
| 16 | Dive into the ring of lily pads | Mapla Point | Hateno | Show on map |
| 17 | Follow a flower trail | Ebon Mountain | Hateno | Show on map |
| 18 | Follow a flower trail | Wintre Island | Hateno | Show on map |
| 19 | Follow a flower trail | Walnot Mountain | Hateno | Show on map |
| 20 | Follow a flower trail | Mapla Point | Hateno | Show on map |
| 21 | Follow a flower trail | Hateno Bay | Hateno | Show on map |
| 22 | Lift a rock | Rutala River | Hateno | Show on map |
| 23 | Lift a rock | Rutala River | Hateno | Show on map |
| 24 | Lift a rock | Lanayru Promenade | Hateno | Show on map |
| 25 | Lift a rock | Peak of Awakening | Hateno | Show on map |
| 26 | Lift a rock | Lake Sumac | Hateno | Show on map |
| 27 | Lift a rock | Zelkoa Pond | Hateno | Show on map |
| 28 | Lift a rock | Firly Pond | Hateno | Show on map |
| 29 | Lift a rock | Lake Jarrah | Hateno | Show on map |
| 30 | Lift a rock in a rock pile | Lake Siela | Hateno | Show on map |
| 31 | Lift a stone slab | Afromsia Coast | Hateno | Show on map |
| 32 | Lift the rock blocking a door | Fort Hateno | Hateno | Show on map |
| 33 | Lift the rock blocking a door | Lake Jarrah | Hateno | Show on map |
| 34 | Make the rows of trees match | Nirvata Lake | Hateno | Show on map |
| 35 | Match the metal cube shape | Rutala River | Hateno | Show on map |
| 36 | Match the metal cube shape | Cliffs of Quince | Hateno | Show on map |
| 37 | Match the metal cube shape | Nirvata Plateau | Hateno | Show on map |
| 38 | Match the metal cube shape | Firly Plateau | Hateno | Show on map |
| 39 | Melt a block of ice | Spring of Wisdom | Hateno | Show on map |
| 40 | Melt a block of ice | Lanayru Range | Hateno | Show on map |
| 41 | Melt a block of ice | Spring of Wisdom | Hateno | Show on map |
| 42 | Put the missing fruit on the offering plate | Robred Dropoff | Hateno | Show on map |
| 43 | Put the missing fruit on the offering plate | Deepback Bay | Hateno | Show on map |
| 44 | Reach the goal before time runs out | Purifier Lake | Hateno | Show on map |
| 45 | Reach the goal before time runs out | Zelkoa Pond | Hateno | Show on map |
| 46 | Reach the goal before time runs out | Walnot Mountain | Hateno | Show on map |
| 47 | Reach the goal before time runs out | Tenoko Island | Hateno | Show on map |
| 48 | Roll a boulder into the hole | Lanayru Heights | Hateno | Show on map |
| 49 | Roll a boulder into the hole | Lake Siela | Hateno | Show on map |
| 50 | Roll a boulder into the hole | Afromsia Coast | Hateno | Show on map |
| 51 | Shoot a balloon | Zodobon Highlands | Hateno | Show on map |
| 52 | Shoot the acorn in a hole | Fir River | Hateno | Show on map |
| 53 | Shoot the acorn in a hole | Midla Woods | Hateno | Show on map |
| 54 | Shoot the acorns by a pinwheel | Rabia Plain | Hateno | Show on map |
| 55 | Shoot the acorns by a pinwheel | Fort Hateno | Hateno | Show on map |
| 56 | Shoot the balloons by a pinwheel | Ovli Plain | Hateno | Show on map |
| 57 | Shoot the balloons by a pinwheel | Mapla Point | Hateno | Show on map |
| 58 | Shoot the targets | Lake Jarrah | Hateno | Show on map |
| 59 | Touch a sparkle that stays put | Rabia Plain | Hateno | Show on map |
| 60 | Touch a sparkle that stays put | Lake Siela | Hateno | Show on map |
| 61 | Touch a sparkle that stays put | Retsam Forest | Hateno | Show on map |
Lanayru (60)
Click “Show on map” to move the map above to that spot.
| # | Puzzle | Nearest landmark | Region | Location |
|---|---|---|---|---|
| 1 | Chase a moving sparkle | Millennio Sandbar | Lanayru | Show on map |
| 2 | Chase a moving sparkle | Goponga Village Ruins | Lanayru | Show on map |
| 3 | Chase a moving sparkle | Rikoka Hills | Lanayru | Show on map |
| 4 | Chase a moving sparkle | Toto Lake | Lanayru | Show on map |
| 5 | Chase a moving sparkle | Brynna Plain | Lanayru | Show on map |
| 6 | Chase a moving sparkle | Ruto Mountain | Lanayru | Show on map |
| 7 | Chase a moving sparkle | Rutala River | Lanayru | Show on map |
| 8 | Complete a circle of rocks | Thims Bridge | Lanayru | Show on map |
| 9 | Complete a circle of rocks | Horon Lagoon | Lanayru | Show on map |
| 10 | Complete a rock pattern | Crenel Peak | Lanayru | Show on map |
| 11 | Complete a rock pattern | Moor Garrison Ruins | Lanayru | Show on map |
| 12 | Complete a rock pattern | Crenel Peak | Lanayru | Show on map |
| 13 | Complete a rock pattern | Kincean Island | Lanayru | Show on map |
| 14 | Complete a rock pattern | Luto's Crossing | Lanayru | Show on map |
| 15 | Complete a rock pattern | Samasa Plain | Lanayru | Show on map |
| 16 | Complete a rock pattern | Lanayru Bay | Lanayru | Show on map |
| 17 | Complete a rock pattern | Lanayru Bay | Lanayru | Show on map |
| 18 | Dive into the ring of lily pads | Zelo Pond | Lanayru | Show on map |
| 19 | Follow a flower trail | Ruto Lake | Lanayru | Show on map |
| 20 | Follow a flower trail | Lanayru Bay | Lanayru | Show on map |
| 21 | Follow a flower trail | Tingel Island | Lanayru | Show on map |
| 22 | Follow a flower trail | Lodrum Headland | Lanayru | Show on map |
| 23 | Lift a rock | Mabe Village Ruins | Lanayru | Show on map |
| 24 | Lift a rock | Wetland Stable | Lanayru | Show on map |
| 25 | Lift a rock | Rebonae Bridge | Lanayru | Show on map |
| 26 | Lift a rock | Mabe Prairie | Lanayru | Show on map |
| 27 | Lift a rock | Millennio Sandbar | Lanayru | Show on map |
| 28 | Lift a rock | Tabahl Woods | Lanayru | Show on map |
| 29 | Lift a rock | Upland Zorana | Lanayru | Show on map |
| 30 | Lift a rock | Ruto Precipice | Lanayru | Show on map |
| 31 | Lift a rock | Great Zora Bridge | Lanayru | Show on map |
| 32 | Lift a rock | Ruto Mountain | Lanayru | Show on map |
| 33 | Lift a rock | Lanayru Bay | Lanayru | Show on map |
| 34 | Lift a rock | Ankel Island | Lanayru | Show on map |
| 35 | Lift a rock | Ankel Island | Lanayru | Show on map |
| 36 | Lift a rock in a rock pile | Lanayru Bay | Lanayru | Show on map |
| 37 | Lift a rock in a rock pile | Tal Tal Peak | Lanayru | Show on map |
| 38 | Lift a rock in a rock pile | Horon Lagoon | Lanayru | Show on map |
| 39 | Lift a rock in a rock pile | Ja'Abu Ridge | Lanayru | Show on map |
| 40 | Lift a rock under leaves | Samasa Plain | Lanayru | Show on map |
| 41 | Lift a stone slab | Lodrum Headland | Lanayru | Show on map |
| 42 | Make the rows of trees match | Applean Forest | Lanayru | Show on map |
| 43 | Make the rows of trees match | Millennio Sandbar | Lanayru | Show on map |
| 44 | Match the metal cube shape | Trilby Plain | Lanayru | Show on map |
| 45 | Match the metal cube shape | Zora River | Lanayru | Show on map |
| 46 | Match the metal cube shape | Ruto Precipice | Lanayru | Show on map |
| 47 | Match the metal cube shape | Tal Tal Peak | Lanayru | Show on map |
| 48 | Match the metal cube shape | Horon Lagoon | Lanayru | Show on map |
| 49 | Put the chained metal ball in the hole | Zauz Island | Lanayru | Show on map |
| 50 | Put the chained metal ball in the hole | Bank of Wishes | Lanayru | Show on map |
| 51 | Touch the flowers in order | Ranch Ruins | Lanayru | Show on map |
| 52 | Reach the goal before time runs out | Zelo Pond | Lanayru | Show on map |
| 53 | Reach the goal before time runs out | Great Fairy Fountain | Lanayru | Show on map |
| 54 | Roll a boulder into the hole | Rebonae Bridge | Lanayru | Show on map |
| 55 | Shoot a balloon | Crenel Peak | Lanayru | Show on map |
| 56 | Shoot a balloon | Talus Plateau | Lanayru | Show on map |
| 57 | Shoot a hanging acorn | Linebeck Island | Lanayru | Show on map |
| 58 | Touch a sparkle that stays put | Inogo Bridge | Lanayru | Show on map |
| 59 | Touch a sparkle that stays put | Zora's Domain | Lanayru | Show on map |
| 60 | Touch a sparkle that stays put | Zora's Domain | Lanayru | Show on map |
Ridgeland (60)
Click “Show on map” to move the map above to that spot.
| # | Puzzle | Nearest landmark | Region | Location |
|---|---|---|---|---|
| 1 | Chase a moving sparkle | Tabantha Bridge Stable | Ridgeland | Show on map |
| 2 | Chase a moving sparkle | Thundra Plateau | Ridgeland | Show on map |
| 3 | Chase a moving sparkle | West Hyrule Plains | Ridgeland | Show on map |
| 4 | Complete a circle of rocks | Rutile Lake | Ridgeland | Show on map |
| 5 | Complete a rock pattern | Ludfo's Bog | Ridgeland | Show on map |
| 6 | Complete a rock pattern | Tamio River | Ridgeland | Show on map |
| 7 | Dive into the ring of lily pads | Ludfo's Bog | Ridgeland | Show on map |
| 8 | Follow a flower trail | Ludfo's Bog | Ridgeland | Show on map |
| 9 | Follow a flower trail | Satori Mountain | Ridgeland | Show on map |
| 10 | Follow a flower trail | Royal Ancient Lab Ruins | Ridgeland | Show on map |
| 11 | Lift a rock | Pondo's Lodge | Ridgeland | Show on map |
| 12 | Lift a rock | Tanagar Canyon | Ridgeland | Show on map |
| 13 | Lift a rock | Mount Rhoam | Ridgeland | Show on map |
| 14 | Lift a rock | Mount Rhoam | Ridgeland | Show on map |
| 15 | Lift a rock | Tamio River | Ridgeland | Show on map |
| 16 | Lift a rock | Tamio River | Ridgeland | Show on map |
| 17 | Lift a rock | Satori Mountain | Ridgeland | Show on map |
| 18 | Lift a rock | Dalite Forest | Ridgeland | Show on map |
| 19 | Lift a rock | Maritta Exchange Ruins | Ridgeland | Show on map |
| 20 | Lift a rock | Regencia River | Ridgeland | Show on map |
| 21 | Lift a rock | Sage Temple Ruins | Ridgeland | Show on map |
| 22 | Lift a rock | Satori Mountain | Ridgeland | Show on map |
| 23 | Lift a rock in a rock pile | Maritta Exchange Ruins | Ridgeland | Show on map |
| 24 | Lift a rock in a rock pile | Upland Lindor | Ridgeland | Show on map |
| 25 | Lift a rock in a rock pile | Tabantha Village Ruins | Ridgeland | Show on map |
| 26 | Lift a rock in a rock pile | Tanagar Canyon | Ridgeland | Show on map |
| 27 | Lift a rock in a rock pile | Rutile Lake | Ridgeland | Show on map |
| 28 | Lift a rock in a rock pile | Satori Mountain | Ridgeland | Show on map |
| 29 | Lift a rock in a rock pile | Salari Plain | Ridgeland | Show on map |
| 30 | Lift a rock under leaves | Rutile Lake | Ridgeland | Show on map |
| 31 | Lift a rock under leaves | Rutile Lake | Ridgeland | Show on map |
| 32 | Lift a rock under leaves | Satori Mountain | Ridgeland | Show on map |
| 33 | Lift a stone slab | West Hyrule Plains | Ridgeland | Show on map |
| 34 | Make the rows of trees match | West Hyrule Plains | Ridgeland | Show on map |
| 35 | Match the metal cube shape | Tanagar Canyon | Ridgeland | Show on map |
| 36 | Match the metal cube shape | Regencia River | Ridgeland | Show on map |
| 37 | Move a boulder | Nima Plain | Ridgeland | Show on map |
| 38 | Put the chained metal ball in the hole | Rutile Lake | Ridgeland | Show on map |
| 39 | Touch the flowers in order | Rutile Lake | Ridgeland | Show on map |
| 40 | Touch the flowers in order | West Hyrule Plains | Ridgeland | Show on map |
| 41 | Reach the goal before time runs out | Seres Scablands | Ridgeland | Show on map |
| 42 | Reach the goal before time runs out | Satori Mountain | Ridgeland | Show on map |
| 43 | Reach the goal before time runs out | Lindor's Brow | Ridgeland | Show on map |
| 44 | Reach the goal before time runs out | Breach of Demise | Ridgeland | Show on map |
| 45 | Reach the goal before time runs out | Ludfo's Bog | Ridgeland | Show on map |
| 46 | Roll a boulder into the hole | Rutile Lake | Ridgeland | Show on map |
| 47 | Shoot a balloon | Tamio River | Ridgeland | Show on map |
| 48 | Shoot a balloon | Seres Scablands | Ridgeland | Show on map |
| 49 | Shoot a balloon | Seres Scablands | Ridgeland | Show on map |
| 50 | Shoot a balloon | Regencia River | Ridgeland | Show on map |
| 51 | Shoot a hanging acorn | Dalite Forest | Ridgeland | Show on map |
| 52 | Shoot the acorn in a hole | Nima Plain | Ridgeland | Show on map |
| 53 | Shoot the acorn in a hole | Regencia River | Ridgeland | Show on map |
| 54 | Shoot the acorn in a hole | Nima Plain | Ridgeland | Show on map |
| 55 | Shoot the acorn in a hole | Jeddo Bridge | Ridgeland | Show on map |
| 56 | Shoot the balloons by a pinwheel | West Hyrule Plains | Ridgeland | Show on map |
| 57 | Shoot the balloons by a pinwheel | Nima Plain | Ridgeland | Show on map |
| 58 | Touch a sparkle that stays put | Tanagar Canyon Course | Ridgeland | Show on map |
| 59 | Touch a sparkle that stays put | Lindor's Brow | Ridgeland | Show on map |
| 60 | Touch a sparkle that stays put | Satori Mountain | Ridgeland | Show on map |
Faron (53)
Click “Show on map” to move the map above to that spot.
| # | Puzzle | Nearest landmark | Region | Location |
|---|---|---|---|---|
| 1 | Burn the leaves | Lakeside Stable | Faron | Show on map |
| 2 | Chase a moving sparkle | Sarjon Woods | Faron | Show on map |
| 3 | Chase a moving sparkle | Kamah Plateau | Faron | Show on map |
| 4 | Chase a moving sparkle | Koto Pond | Faron | Show on map |
| 5 | Chase a moving sparkle | Mount Dunsel | Faron | Show on map |
| 6 | Complete a rock pattern | Martha's Landing | Faron | Show on map |
| 7 | Complete a rock pattern | Herin Lake | Faron | Show on map |
| 8 | Complete a rock pattern | Clarnet Coast | Faron | Show on map |
| 9 | Complete a rock pattern | Temto Hill | Faron | Show on map |
| 10 | Complete a rock pattern | Lurelin Village | Faron | Show on map |
| 11 | Complete a rock pattern | Korne Beach | Faron | Show on map |
| 12 | Complete a rock pattern | Cape Cales | Faron | Show on map |
| 13 | Dive into the ring of lily pads | Stinger Cliffs | Faron | Show on map |
| 14 | Dive into the ring of lily pads | Rimba Beach | Faron | Show on map |
| 15 | Dive into the ring of lily pads | Cape Cresia | Faron | Show on map |
| 16 | Dive into the ring of lily pads | Gama Cove | Faron | Show on map |
| 17 | Follow a flower trail | Keelay Plain | Faron | Show on map |
| 18 | Follow a flower trail | Floria Falls | Faron | Show on map |
| 19 | Follow a flower trail | Dunsel Plateau | Faron | Show on map |
| 20 | Follow a flower trail | Lurelin Village | Faron | Show on map |
| 21 | Follow a flower trail | Korne Beach | Faron | Show on map |
| 22 | Lift a rock | Mount Floria | Faron | Show on map |
| 23 | Lift a rock | Ubota Point | Faron | Show on map |
| 24 | Lift a rock | Rodai Lake | Faron | Show on map |
| 25 | Lift a rock | Herin Lake | Faron | Show on map |
| 26 | Lift a rock | Lakeside Stable | Faron | Show on map |
| 27 | Lift a rock | Rassla Lake | Faron | Show on map |
| 28 | Lift a rock | Breman Peak | Faron | Show on map |
| 29 | Lift a rock | Yambi Lake | Faron | Show on map |
| 30 | Lift a rock | Cape Cales | Faron | Show on map |
| 31 | Lift a rock | Soka Point | Faron | Show on map |
| 32 | Lift a rock in a rock pile | Keya Pond | Faron | Show on map |
| 33 | Lift a rock under leaves | Atun Valley | Faron | Show on map |
| 34 | Make the rows of trees match | Rodai Lake | Faron | Show on map |
| 35 | Make the rows of trees match | Marblod Plain | Faron | Show on map |
| 36 | Make the rows of trees match | Calora Lake | Faron | Show on map |
| 37 | Make the rows of trees match | Keya Pond | Faron | Show on map |
| 38 | Match the metal cube shape | Rassla Lake | Faron | Show on map |
| 39 | Match the metal cube shape | Corta Lake | Faron | Show on map |
| 40 | Match the metal cube shape | Calora Lake | Faron | Show on map |
| 41 | Put the chained metal ball in the hole | Riola Spring | Faron | Show on map |
| 42 | Put the missing fruit on the offering plate | Rassla Lake | Faron | Show on map |
| 43 | Put the missing fruit on the offering plate | Bronas Forest | Faron | Show on map |
| 44 | Put the missing fruit on the offering plate | Lakeside Stable | Faron | Show on map |
| 45 | Put the missing fruit on the offering plate | Courage Steppe | Faron | Show on map |
| 46 | Reach the goal before time runs out | Keelay Plain | Faron | Show on map |
| 47 | Reach the goal before time runs out | Riola Spring | Faron | Show on map |
| 48 | Remove the Luminous Stone | Ebara Forest | Faron | Show on map |
| 49 | Shoot a balloon | Ubota Point | Faron | Show on map |
| 50 | Shoot the acorn in a hole | Marblod Plain | Faron | Show on map |
| 51 | Shoot the balloons by a pinwheel | Floria Bridge | Faron | Show on map |
| 52 | Shoot the balloons by a pinwheel | Bronas Forest | Faron | Show on map |
| 53 | Take the apple from the palm tree | Lurelin Village | Faron | Show on map |
Eldin (44)
Click “Show on map” to move the map above to that spot.
| # | Puzzle | Nearest landmark | Region | Location |
|---|---|---|---|---|
| 1 | Complete a circle of rocks | Gero Pond | Eldin | Show on map |
| 2 | Complete a circle of rocks | Cephla Lake | Eldin | Show on map |
| 3 | Complete a rock pattern | East Deplian Badlands | Eldin | Show on map |
| 4 | Complete a rock pattern | Goron Hot Springs | Eldin | Show on map |
| 5 | Complete a rock pattern | Gut Check Rock | Eldin | Show on map |
| 6 | Complete a rock pattern | Lake Darman | Eldin | Show on map |
| 7 | Complete a rock pattern | Lake Ferona | Eldin | Show on map |
| 8 | Complete a rock pattern | Broca Island | Eldin | Show on map |
| 9 | Dive into the ring of lily pads | Lake Ferona | Eldin | Show on map |
| 10 | Lift a rock | Isle of Rabac | Eldin | Show on map |
| 11 | Lift a rock | Goron City | Eldin | Show on map |
| 12 | Lift a rock | Abandoned North Mine | Eldin | Show on map |
| 13 | Lift a rock | Lake Darman | Eldin | Show on map |
| 14 | Lift a rock | Darb Pond | Eldin | Show on map |
| 15 | Lift a rock | Maw of Death Mountain | Eldin | Show on map |
| 16 | Lift a rock | Cephla Lake | Eldin | Show on map |
| 17 | Lift a rock in a rock pile | Gortram Cliff | Eldin | Show on map |
| 18 | Lift a rock in a rock pile | Gut Check Rock | Eldin | Show on map |
| 19 | Lift a rock in a rock pile | Eldin's Flank | Eldin | Show on map |
| 20 | Lift a rock in a rock pile | Death Caldera | Eldin | Show on map |
| 21 | Lift a rock in a rock pile | Broca Island | Eldin | Show on map |
| 22 | Lift a rock in a rock pile | Maw of Death Mountain | Eldin | Show on map |
| 23 | Lift a rock in a rock pile | Lake Ferona | Eldin | Show on map |
| 24 | Lift a rock in a rock pile | Lake Intenoch | Eldin | Show on map |
| 25 | Lift a rock under leaves | East Deplian Badlands | Eldin | Show on map |
| 26 | Lift a stone slab | Akkala Span | Eldin | Show on map |
| 27 | Match the metal cube shape | Eldin's Flank | Eldin | Show on map |
| 28 | Match the metal cube shape | Gorko Lake | Eldin | Show on map |
| 29 | Match the metal cube shape | Lake Intenoch | Eldin | Show on map |
| 30 | Match the metal cube shape | Broca Island | Eldin | Show on map |
| 31 | Reach the goal before time runs out | Goron City | Eldin | Show on map |
| 32 | Reach the goal before time runs out | Goro Cove | Eldin | Show on map |
| 33 | Reach the goal before time runs out | Goronbi River | Eldin | Show on map |
| 34 | Reach the goal before time runs out | Gero Pond | Eldin | Show on map |
| 35 | Reach the goal before time runs out | Trilby Valley | Eldin | Show on map |
| 36 | Roll a boulder into the hole | Goronbi River | Eldin | Show on map |
| 37 | Roll a boulder into the hole | Goronbi River | Eldin | Show on map |
| 38 | Roll a boulder into the hole | Gorko Lake | Eldin | Show on map |
| 39 | Shoot a balloon | Southern Mine | Eldin | Show on map |
| 40 | Shoot a balloon | Maw of Death Mountain | Eldin | Show on map |
| 41 | Shoot the balloons by a pinwheel | Lake Darman | Eldin | Show on map |
| 42 | Shoot the balloons by a pinwheel | Medingo Pool | Eldin | Show on map |
| 43 | Touch a sparkle that stays put | Goro Cove | Eldin | Show on map |
| 44 | Touch a sparkle that stays put | Stolock Bridge | Eldin | Show on map |
Tabantha (42)
Click “Show on map” to move the map above to that spot.
| # | Puzzle | Nearest landmark | Region | Location |
|---|---|---|---|---|
| 1 | Complete a rock pattern | Dragon Bone Mire | Tabantha | Show on map |
| 2 | Complete a rock pattern | Gisa Crater | Tabantha | Show on map |
| 3 | Complete a rock pattern | Warbler's Nest | Tabantha | Show on map |
| 4 | Complete a rock pattern | Tanagar Canyon | Tabantha | Show on map |
| 5 | Dive into the ring of lily pads | Ancient Columns | Tabantha | Show on map |
| 6 | Follow a flower trail | Passer Hill | Tabantha | Show on map |
| 7 | Lift a rock | Dragon Bone Mire | Tabantha | Show on map |
| 8 | Lift a rock | Lake Totori | Tabantha | Show on map |
| 9 | Lift a rock | Rospro Pass | Tabantha | Show on map |
| 10 | Lift a rock | Nero Hill | Tabantha | Show on map |
| 11 | Lift a rock | Rito Stable | Tabantha | Show on map |
| 12 | Lift a rock | Rito Village | Tabantha | Show on map |
| 13 | Lift a rock | Rayne Highlands | Tabantha | Show on map |
| 14 | Lift a rock | Tanagar Canyon | Tabantha | Show on map |
| 15 | Lift a rock | Tanagar Canyon | Tabantha | Show on map |
| 16 | Lift a rock | Rayne Highlands | Tabantha | Show on map |
| 17 | Lift a rock in a rock pile | Strock Lake | Tabantha | Show on map |
| 18 | Lift a rock under leaves | Dragon Bone Mire | Tabantha | Show on map |
| 19 | Lift a stone slab | Tanagar Canyon | Tabantha | Show on map |
| 20 | Match the metal cube shape | Strock Lake | Tabantha | Show on map |
| 21 | Match the metal cube shape | Tanagar Canyon | Tabantha | Show on map |
| 22 | Put the chained metal ball in the hole | Dronoc's Pass | Tabantha | Show on map |
| 23 | Put the chained metal ball in the hole | Gisa Crater | Tabantha | Show on map |
| 24 | Put the missing fruit on the offering plate | Dragon Bone Mire | Tabantha | Show on map |
| 25 | Put the missing fruit on the offering plate | Rayne Highlands | Tabantha | Show on map |
| 26 | Put the missing fruit on the offering plate | Lake Totori | Tabantha | Show on map |
| 27 | Put the missing fruit on the offering plate | Piper Ridge | Tabantha | Show on map |
| 28 | Touch the flowers in order | Tanagar Canyon | Tabantha | Show on map |
| 29 | Touch the flowers in order | Lake Illumeni | Tabantha | Show on map |
| 30 | Reach the goal before time runs out | Dragon Bone Mire | Tabantha | Show on map |
| 31 | Reach the goal before time runs out | Lake Totori | Tabantha | Show on map |
| 32 | Reach the goal before time runs out | Ancient Columns | Tabantha | Show on map |
| 33 | Reach the goal before time runs out | Nero Hill | Tabantha | Show on map |
| 34 | Reach the goal before time runs out | Tanagar Canyon | Tabantha | Show on map |
| 35 | Reach the goal before time runs out | Tabantha Great Bridge | Tabantha | Show on map |
| 36 | Roll a boulder into the hole | Rayne Highlands | Tabantha | Show on map |
| 37 | Shoot a balloon | Rito Village | Tabantha | Show on map |
| 38 | Shoot a hanging acorn | Tanagar Canyon | Tabantha | Show on map |
| 39 | Shoot the balloons by a pinwheel | Hemaar's Descent | Tabantha | Show on map |
| 40 | Shoot the balloons by a pinwheel | Corvash Peak | Tabantha | Show on map |
| 41 | Shoot the balloons by a pinwheel | Piper Ridge | Tabantha | Show on map |
| 42 | Touch a sparkle that stays put | Flight Range | Tabantha | Show on map |
Gerudo (41)
Click “Show on map” to move the map above to that spot.
| # | Puzzle | Nearest landmark | Region | Location |
|---|---|---|---|---|
| 1 | Chase a moving sparkle | Meadela's Mantle | Gerudo | Show on map |
| 2 | Complete a rock pattern | Mystathi's Shelf | Gerudo | Show on map |
| 3 | Complete a rock pattern | Rutimala Hill | Gerudo | Show on map |
| 4 | Complete a rock pattern | Karusa Valley | Gerudo | Show on map |
| 5 | Complete a rock pattern | Karusa Valley | Gerudo | Show on map |
| 6 | Complete a rock pattern | Laparoh Mesa | Gerudo | Show on map |
| 7 | Complete a rock pattern | Cliffs of Ruvara | Gerudo | Show on map |
| 8 | Complete a rock pattern | Sapphia's Table | Gerudo | Show on map |
| 9 | Complete a rock pattern | Nephra Hill | Gerudo | Show on map |
| 10 | Complete a rock pattern | Taafei Hill | Gerudo | Show on map |
| 11 | Complete a rock pattern | Zirco Mesa | Gerudo | Show on map |
| 12 | Follow a flower trail | Risoka Snowfield | Gerudo | Show on map |
| 13 | Lift a rock | Rutimala Hill | Gerudo | Show on map |
| 14 | Lift a rock | Cliffs of Ruvara | Gerudo | Show on map |
| 15 | Lift a rock | Yiga Clan Hideout | Gerudo | Show on map |
| 16 | Lift a rock | Tamio River | Gerudo | Show on map |
| 17 | Lift a rock | Zirco Mesa | Gerudo | Show on map |
| 18 | Lift a rock | Gerudo Canyon | Gerudo | Show on map |
| 19 | Match the metal cube shape | Risoka Snowfield | Gerudo | Show on map |
| 20 | Match the metal cube shape | Meadela's Mantle | Gerudo | Show on map |
| 21 | Match the metal cube shape | Vatorsa Snowfield | Gerudo | Show on map |
| 22 | Match the metal cube shape | Zirco Mesa | Gerudo | Show on map |
| 23 | Match the metal cube shape | Koukot Plateau | Gerudo | Show on map |
| 24 | Melt a block of ice | Risoka Snowfield | Gerudo | Show on map |
| 25 | Melt a block of ice | Laparoh Mesa | Gerudo | Show on map |
| 26 | Melt a block of ice | Laparoh Mesa | Gerudo | Show on map |
| 27 | Put the missing fruit on the offering plate | Karusa Valley | Gerudo | Show on map |
| 28 | Put the missing fruit on the offering plate | Karusa Valley | Gerudo | Show on map |
| 29 | Put the missing fruit on the offering plate | Meadela's Mantle | Gerudo | Show on map |
| 30 | Put the missing fruit on the offering plate | Karusa Valley | Gerudo | Show on map |
| 31 | Put the missing fruit on the offering plate | Meadela's Mantle | Gerudo | Show on map |
| 32 | Reach the goal before time runs out | Hemaar's Descent | Gerudo | Show on map |
| 33 | Reach the goal before time runs out | Statue of the Eighth Heroine | Gerudo | Show on map |
| 34 | Reach the goal before time runs out | Meadela's Mantle | Gerudo | Show on map |
| 35 | Reach the goal before time runs out | Koukot Plateau | Gerudo | Show on map |
| 36 | Roll a boulder into the hole | Statue of the Eighth Heroine | Gerudo | Show on map |
| 37 | Roll a boulder into the hole | Yiga Clan Hideout | Gerudo | Show on map |
| 38 | Shoot the balloons by a pinwheel | Birida Lookout | Gerudo | Show on map |
| 39 | Shoot the balloons by a pinwheel | Dalite Forest | Gerudo | Show on map |
| 40 | Touch a sparkle that stays put | Koukot Plateau | Gerudo | Show on map |
| 41 | Touch a sparkle that stays put | Laparoh Mesa | Gerudo | Show on map |
Great Plateau (32)
Click “Show on map” to move the map above to that spot.
| # | Puzzle | Nearest landmark | Region | Location |
|---|---|---|---|---|
| 1 | Chase a moving sparkle | Coliseum Ruins | Great Plateau | Show on map |
| 2 | Chase a moving sparkle | Gatepost Town Ruins | Great Plateau | Show on map |
| 3 | Complete a circle of rocks | Gerudo Canyon Pass | Great Plateau | Show on map |
| 4 | Complete a rock pattern | Mount Hylia | Great Plateau | Show on map |
| 5 | Dive into the ring of lily pads | Great Plateau | Great Plateau | Show on map |
| 6 | Dive into the ring of lily pads | Lake Kolomo | Great Plateau | Show on map |
| 7 | Follow a flower trail | Forest of Spirits | Great Plateau | Show on map |
| 8 | Lift a rock | Mount Hylia | Great Plateau | Show on map |
| 9 | Lift a rock | Forest of Spirits | Great Plateau | Show on map |
| 10 | Lift a rock | Forest of Spirits | Great Plateau | Show on map |
| 11 | Lift a rock under leaves | Kolomo Garrison Ruins | Great Plateau | Show on map |
| 12 | Lift a rock under leaves | Forest of Spirits | Great Plateau | Show on map |
| 13 | Lift a stone slab | Mount Hylia | Great Plateau | Show on map |
| 14 | Lift the rock blocking a door | Eastern Abbey | Great Plateau | Show on map |
| 15 | Lift the rock blocking a door | Eastern Abbey | Great Plateau | Show on map |
| 16 | Match the metal cube shape | Hopper Pond | Great Plateau | Show on map |
| 17 | Match the metal cube shape | Mount Hylia | Great Plateau | Show on map |
| 18 | Melt a block of ice | Gerudo Canyon Pass | Great Plateau | Show on map |
| 19 | Put the chained metal ball in the hole | Forest of Spirits | Great Plateau | Show on map |
| 20 | Touch the flowers in order | Outpost Ruins | Great Plateau | Show on map |
| 21 | Reach the goal before time runs out | Lake Hylia | Great Plateau | Show on map |
| 22 | Shoot a balloon | Taobab Grassland | Great Plateau | Show on map |
| 23 | Shoot a hanging acorn | Taobab Grassland | Great Plateau | Show on map |
| 24 | Shoot a hanging acorn | Lake Kolomo | Great Plateau | Show on map |
| 25 | Shoot the acorn in a hole | Grinnden Plains | Great Plateau | Show on map |
| 26 | Shoot the balloons by a pinwheel | Mount Hylia | Great Plateau | Show on map |
| 27 | Shoot the balloons by a pinwheel | Gatepost Town Ruins | Great Plateau | Show on map |
| 28 | Touch a sparkle that stays put | River of the Dead | Great Plateau | Show on map |
| 29 | Touch a sparkle that stays put | River of the Dead | Great Plateau | Show on map |
| 30 | Touch a sparkle that stays put | Mount Faloraa | Great Plateau | Show on map |
| 31 | Touch a sparkle that stays put | Temple of Time | Great Plateau | Show on map |
| 32 | Touch a sparkle that stays put | Temple of Time | Great Plateau | Show on map |
Woodland (31)
Click “Show on map” to move the map above to that spot.
| # | Puzzle | Nearest landmark | Region | Location |
|---|---|---|---|---|
| 1 | Chase a moving sparkle | Salari Hill | Woodland | Show on map |
| 2 | Chase a moving sparkle | Trilby Plain | Woodland | Show on map |
| 3 | Complete a rock pattern | Salari Plain | Woodland | Show on map |
| 4 | Complete a rock pattern | Goronbi Lake | Woodland | Show on map |
| 5 | Complete a rock pattern | Pico Pond | Woodland | Show on map |
| 6 | Dive into the ring of lily pads | Pico Pond | Woodland | Show on map |
| 7 | Jump the fences before time runs out | Rowan Plain | Woodland | Show on map |
| 8 | Lift a rock | Mount Drena | Woodland | Show on map |
| 9 | Lift a rock | Irch Plain | Woodland | Show on map |
| 10 | Lift a rock | Mount Drena | Woodland | Show on map |
| 11 | Lift a rock | Elma Knolls | Woodland | Show on map |
| 12 | Lift a rock | Deplian Badlands | Woodland | Show on map |
| 13 | Lift a rock | Minshi Woods | Woodland | Show on map |
| 14 | Lift a rock in a rock pile | Forgotten Temple | Woodland | Show on map |
| 15 | Lift a rock in a rock pile | S. Tabantha Snowfield | Woodland | Show on map |
| 16 | Match the metal cube shape | Mount Drena | Woodland | Show on map |
| 17 | Match the metal cube shape | Deplian Badlands | Woodland | Show on map |
| 18 | Match the metal cube shape | Pico Pond | Woodland | Show on map |
| 19 | Reach the goal before time runs out | Trilby Plain | Woodland | Show on map |
| 20 | Roll a boulder into the hole | Mount Drena | Woodland | Show on map |
| 21 | Shoot the acorn in a hole | Rowan Plain | Woodland | Show on map |
| 22 | Shoot the acorn in a hole | Salari Hill | Woodland | Show on map |
| 23 | Shoot the acorn in a hole | Drenan Highlands | Woodland | Show on map |
| 24 | Shoot the acorn in a hole | Aldor Foothills | Woodland | Show on map |
| 25 | Shoot the acorn in a hole | Military Training Camp | Woodland | Show on map |
| 26 | Shoot the balloons by a pinwheel | Elma Knolls | Woodland | Show on map |
| 27 | Shoot the balloons by a pinwheel | Irch Plain | Woodland | Show on map |
| 28 | Shoot the balloons by a pinwheel | East Deplian Badlands | Woodland | Show on map |
| 29 | Shoot the balloons by a pinwheel | Thyphlo Ruins | Woodland | Show on map |
| 30 | Shoot the balloons by a pinwheel | Lake Mekar | Woodland | Show on map |
| 31 | Touch a sparkle that stays put | Rowan Plain | Woodland | Show on map |
What do you get for collecting all 900 Korok Seeds?
After collecting all 900 and maxing the stashes, speak to Hestu in Korok Forest. He gives you Hestu’s Gift, a commemorative item with no gameplay effect. Its only unlock is the option to return and ask Hestu to dance.
Is it worth collecting every Korok Seed?
For inventory space, stop at 441. The remaining 459 do not buy more slots, so collecting every seed is worthwhile only if you want the full-map checklist and Hestu’s Gift. The 900 Koroks are over 70% of the map completion percentage; the rest is in the 100% completion guide.
If you are choosing which large checklist to tackle next, compare the games in Tears of the Kingdom vs Breath of the Wild before committing to another Korok hunt.
FAQ
How many Korok Seeds are in Breath of the Wild?
How many Korok Seeds do you need for full inventory in BotW?
Where is Hestu in Breath of the Wild?
What do you get for collecting all 900 Korok Seeds?
Related Articles
guides
Ocarina of Time Remake Big Poes: All 10 Locations and Ghost Shop Rewards
All ten Big Poe locations in the Ocarina of Time remake, how to make them appear on Epona, and Ghost Shop rewards: 30 rupees each, a bottle at 500 points.
guides
Ocarina of Time Remake Map: Heart Pieces, Gold Skulltulas and Area Maps
Ocarina of Time Switch 2 remake map: all 36 Pieces of Heart, 100 Gold Skulltulas, beans, songs, bottles, minigames and Great Fairies, with in-game maps of 21 areas.
guides
Ocarina of Time Remake Bottles: All 5 Locations
Find all five bottles in Ocarina of Time Remake: the new Potion Shop errand, Cuccos, ranch milk, Ruto’s Letter and the 500-point Big Poe reward.
Was this helpful?
Thanks for the feedback!