

TotK Stal Enemies: Stalkoblin, Stalmoblin, Stalizalfos HP, Drops
Stalkoblins, Stalmoblins and Stalizalfos in Tears of the Kingdom: rising at night, 2 or 3 HP, breaking the skull, Dazzlefruit, drops, and a map of 108 fixed spawns.
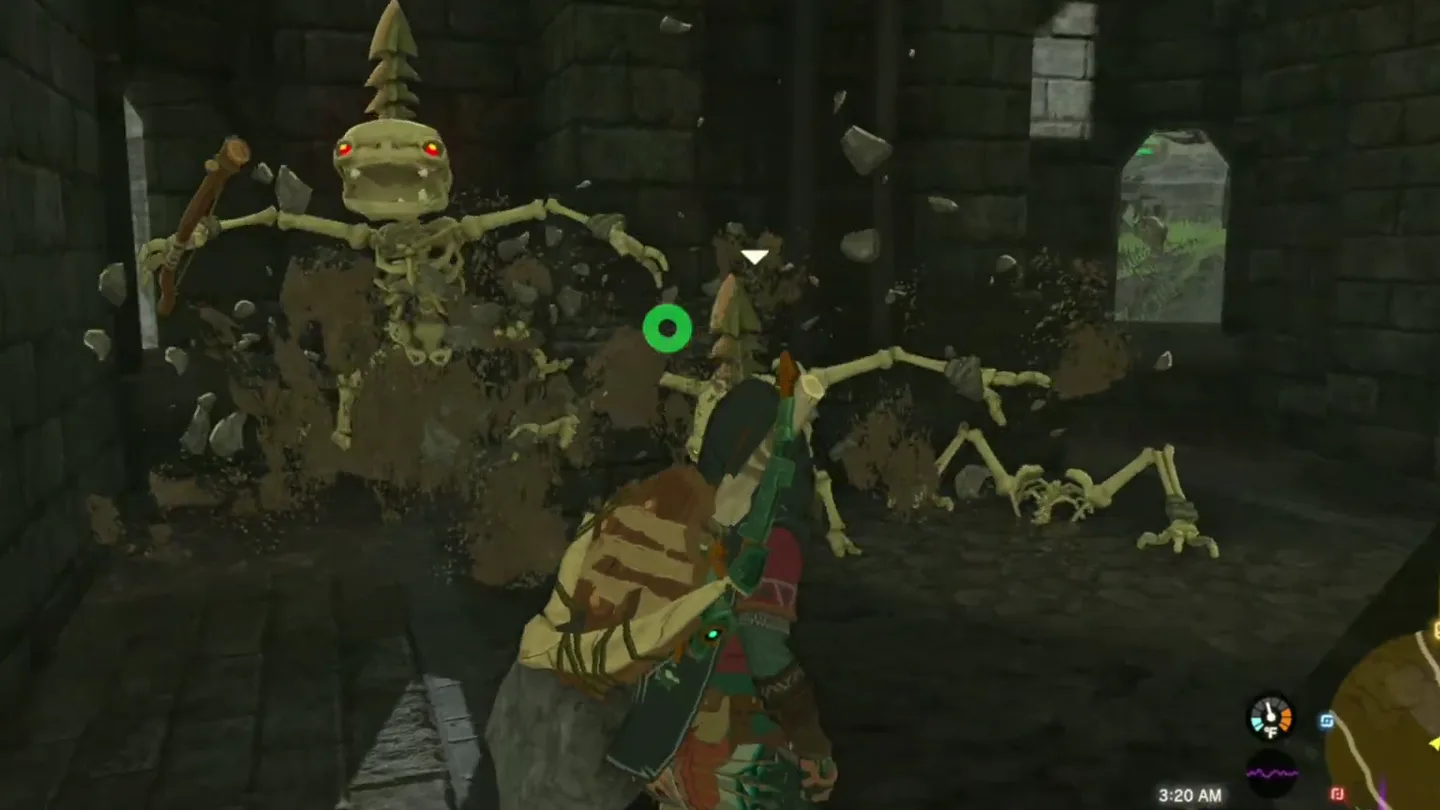
A loading tip warns: “When night falls, skeletal Stal monsters will emerge from the ground. Stay vigilant!” Stal monsters are the remains of Bokoblins, Moblins and Lizalfos. Their bodies fall apart at a touch, but they pull themselves back together as long as the skull is intact. This page covers the HP, tactics and drops of all three in The Legend of Zelda: Tears of the Kingdom, and maps the 108 the game places in fixed spots. Each family’s full data is on Bokoblins, Moblins and Lizalfos; other monsters are in the enemy overview.
What kinds of Stal enemy are there?
| Kind | HP | What the Compendium says |
|---|---|---|
| Stalkoblin | 2 | Hates light and only moves about in the dark; crumbles from a single blow |
| Stalmoblin | 3 | Crumbles after a few attacks; hates strong light; its hard, heavy horns are still dangerous |
| Stalizalfos | 2 | As sly as ever, and still has blade-like sharp horns |
HP is from the game’s parameters. All three take double damage to the head.
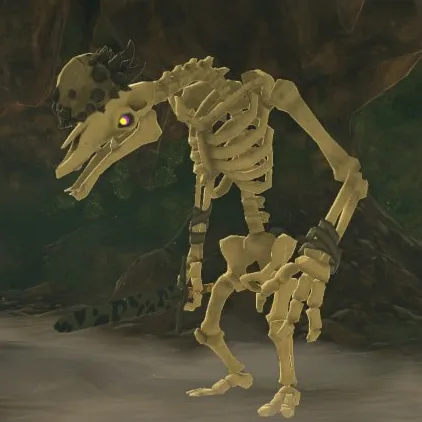
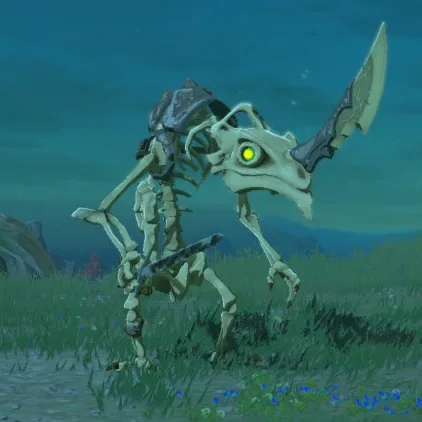
Two more Stal monsters have pages of their own: the giant Stalnox in Hinox locations, and the Stalhorse in the horse guide.
How do you beat Stal enemies?
- Break the skull. The Compendium says a Stalkoblin will “continue to pull themselves back together and go on fighting” as long as a skull remains intact. The body falls apart in one hit; then hit the skull on the ground and it is gone.
- Throw a Dazzlefruit. The Compendium says Stalkoblins and Stalmoblins hate light; a thrown Dazzlefruit destroys Stal monsters outright.
- Aim for the head. The damage settings give all three a head hitbox that takes double damage, and a lightning strike deals 999,999.
- Take its arm. When the body falls apart, the arm can be picked up as a weapon: Bokoblin Arm, Moblin Arm or Lizalfos Arm.
What do Stal enemies drop?
| Monster | Drop | Chance |
|---|---|---|
| Stalkoblin | Bokoblin Fang | 50% |
| Stalmoblin | Moblin Fang | 100% (rolled 2–4 times) |
| Stalizalfos | Lizalfos Talon | 100% (rolled up to twice) |
Chances are from the game’s drop tables; a roll is one draw from that row. Stal monsters drop no horns.
Where do Stal enemies spawn?
The Stal monsters that rise from the ground at night are not in the game’s placement data. The placement data does hold 108 fixed ones:
| Kind | Surface | Caves | Depths | Total |
|---|---|---|---|---|
| Stalkoblin | 24 | 30 | 37 | 91 |
| Stalmoblin | 8 | 4 | 5 | 17 |
| Total | 32 | 34 | 42 | 108 |
There are no fixed Stalizalfos in the placement data.
- Surface: Ginner Woods 15, Korok Forest 7, Mido Swamp 7, North Lomei Labyrinth 3.
- Caves: Skull Lake Cave 9, Cape Cales Cliffbase Cave 7, Royal Hidden Passage 6, Bottomless Pond Well 4, Whistling Hill Cave 3.
- Depths: most under Gerudo (14), then under Hyrule Field (9).
Surface spawns
Loading the terrain map… slow connections can take a few seconds.
Some terrain tiles failed to load.
- Stalkoblin (54)
- Stalmoblin (12)
Drag to move and zoom in to tell the points apart; on a computer, click the map first and the mouse wheel zooms it. Ticks are saved in this browser only; no account is needed.
Progress cannot be saved in this browser session.
Depths spawns
A Depths point is named after the place on the surface directly above it.
Loading the terrain map… slow connections can take a few seconds.
Some terrain tiles failed to load.
- Stalkoblin (37)
- Stalmoblin (5)
Drag to move and zoom in to tell the points apart; on a computer, click the map first and the mouse wheel zooms it. Ticks are saved in this browser only; no account is needed.
Progress cannot be saved in this browser session.
All 108 fixed Stal spawns
| # | Monster | Cave | Region | Location |
|---|---|---|---|---|
| 1 | Stalkoblin | North Lomei Labyrinth | Hebra | Show on map |
| 2 | Stalkoblin | North Lomei Labyrinth | Hebra | Show on map |
| 3 | Stalkoblin | North Lomei Labyrinth | Hebra | Show on map |
| 4 | Stalkoblin | Korok Forest | Great Hyrule Forest | Show on map |
| 5 | Stalkoblin | Korok Forest | Great Hyrule Forest | Show on map |
| 6 | Stalkoblin | Korok Forest | Great Hyrule Forest | Show on map |
| 7 | Stalkoblin | Korok Forest | Great Hyrule Forest | Show on map |
| 8 | Stalkoblin | Mido Swamp | Great Hyrule Forest | Show on map |
| 9 | Stalkoblin | Mido Swamp | Great Hyrule Forest | Show on map |
| 10 | Stalkoblin | Mido Swamp | Great Hyrule Forest | Show on map |
| 11 | Stalkoblin | Mido Swamp | Great Hyrule Forest | Show on map |
| 12 | Stalkoblin | Mido Swamp | Great Hyrule Forest | Show on map |
| 13 | Stalkoblin | Ginner Woods | Necluda | Show on map |
| 14 | Stalkoblin | Ginner Woods | Necluda | Show on map |
| 15 | Stalkoblin | Ginner Woods | Necluda | Show on map |
| 16 | Stalkoblin | Ginner Woods | Necluda | Show on map |
| 17 | Stalkoblin | Ginner Woods | Necluda | Show on map |
| 18 | Stalkoblin | Ginner Woods | Necluda | Show on map |
| 19 | Stalkoblin | Ginner Woods | Necluda | Show on map |
| 20 | Stalkoblin | Ginner Woods | Necluda | Show on map |
| 21 | Stalkoblin | Ginner Woods | Necluda | Show on map |
| 22 | Stalkoblin | Ginner Woods | Necluda | Show on map |
| 23 | Stalkoblin | Ginner Woods | Necluda | Show on map |
| 24 | Stalkoblin | Ginner Woods | Necluda | Show on map |
| 25 | Stalmoblin | Korok Forest | Great Hyrule Forest | Show on map |
| 26 | Stalmoblin | Korok Forest | Great Hyrule Forest | Show on map |
| 27 | Stalmoblin | Korok Forest | Great Hyrule Forest | Show on map |
| 28 | Stalmoblin | Mido Swamp | Great Hyrule Forest | Show on map |
| 29 | Stalmoblin | Mido Swamp | Great Hyrule Forest | Show on map |
| 30 | Stalmoblin | Ginner Woods | Necluda | Show on map |
| 31 | Stalmoblin | Ginner Woods | Necluda | Show on map |
| 32 | Stalmoblin | Ginner Woods | Necluda | Show on map |
| 33 | Stalkoblin | Skull Lake Cave | Akkala | Show on map |
| 34 | Stalkoblin | Skull Lake Cave | Akkala | Show on map |
| 35 | Stalkoblin | Skull Lake Cave | Akkala | Show on map |
| 36 | Stalkoblin | Skull Lake Cave | Akkala | Show on map |
| 37 | Stalkoblin | Skull Lake Cave | Akkala | Show on map |
| 38 | Stalkoblin | Skull Lake Cave | Akkala | Show on map |
| 39 | Stalkoblin | Skull Lake Cave | Akkala | Show on map |
| 40 | Stalkoblin | Skull Lake Cave | Akkala | Show on map |
| 41 | Stalkoblin | Bottomless Pond Well | Hyrule Field | Show on map |
| 42 | Stalkoblin | Bottomless Pond Well | Hyrule Field | Show on map |
| 43 | Stalkoblin | Bottomless Pond Well | Hyrule Field | Show on map |
| 44 | Stalkoblin | Royal Hidden Passage | Hyrule Field | Show on map |
| 45 | Stalkoblin | Royal Hidden Passage | Hyrule Field | Show on map |
| 46 | Stalkoblin | Royal Hidden Passage | Hyrule Field | Show on map |
| 47 | Stalkoblin | Royal Hidden Passage | Hyrule Field | Show on map |
| 48 | Stalkoblin | Royal Hidden Passage | Hyrule Field | Show on map |
| 49 | Stalkoblin | Whistling Hill Cave | Hyrule Field | Show on map |
| 50 | Stalkoblin | Whistling Hill Cave | Hyrule Field | Show on map |
| 51 | Stalkoblin | Whistling Hill Cave | Hyrule Field | Show on map |
| 52 | Stalkoblin | Upland Zorana Foothill Cave | Lanayru | Show on map |
| 53 | Stalkoblin | Upland Zorana Foothill Cave | Lanayru | Show on map |
| 54 | Stalkoblin | Cape Cales Cliffbase Cave | Necluda | Show on map |
| 55 | Stalkoblin | Cape Cales Cliffbase Cave | Necluda | Show on map |
| 56 | Stalkoblin | Cape Cales Cliffbase Cave | Necluda | Show on map |
| 57 | Stalkoblin | Cape Cales Cliffbase Cave | Necluda | Show on map |
| 58 | Stalkoblin | Cape Cales Cliffbase Cave | Necluda | Show on map |
| 59 | Stalkoblin | Cape Cales Cliffbase Cave | Necluda | Show on map |
| 60 | Stalkoblin | Mount Dunsel Cave | Necluda | Show on map |
| 61 | Stalkoblin | Gisa Crater Cave | Tabantha | Show on map |
| 62 | Stalkoblin | Gisa Crater Cave | Tabantha | Show on map |
| 63 | Stalmoblin | Skull Lake Cave | Akkala | Show on map |
| 64 | Stalmoblin | Bottomless Pond Well | Hyrule Field | Show on map |
| 65 | Stalmoblin | Royal Hidden Passage | Hyrule Field | Show on map |
| 66 | Stalmoblin | Cape Cales Cliffbase Cave | Necluda | Show on map |
| 67 | Stalkoblin | Skull Lake | Akkala | Show on map |
| 68 | Stalkoblin | Skull Lake | Akkala | Show on map |
| 69 | Stalkoblin | Skull Lake | Akkala | Show on map |
| 70 | Stalkoblin | Eldin Great Skeleton | Eldin | Show on map |
| 71 | Stalkoblin | Eldin Great Skeleton | Eldin | Show on map |
| 72 | Stalkoblin | Eldin Great Skeleton | Eldin | Show on map |
| 73 | Stalkoblin | Arbiter's Grounds | Gerudo | Show on map |
| 74 | Stalkoblin | Arbiter's Grounds | Gerudo | Show on map |
| 75 | Stalkoblin | Arbiter's Grounds | Gerudo | Show on map |
| 76 | Stalkoblin | Gerudo Desert | Gerudo | Show on map |
| 77 | Stalkoblin | Gerudo Desert | Gerudo | Show on map |
| 78 | Stalkoblin | Gerudo Desert | Gerudo | Show on map |
| 79 | Stalkoblin | Gerudo Desert | Gerudo | Show on map |
| 80 | Stalkoblin | Gerudo Desert | Gerudo | Show on map |
| 81 | Stalkoblin | Gerudo Desert | Gerudo | Show on map |
| 82 | Stalkoblin | Lightning Temple | Gerudo | Show on map |
| 83 | Stalkoblin | Toruma Dunes | Gerudo | Show on map |
| 84 | Stalkoblin | Toruma Dunes | Gerudo | Show on map |
| 85 | Stalkoblin | Toruma Dunes | Gerudo | Show on map |
| 86 | Stalkoblin | Rowan Plain | Great Hyrule Forest | Show on map |
| 87 | Stalkoblin | Rowan Plain | Great Hyrule Forest | Show on map |
| 88 | Stalkoblin | Rowan Plain | Great Hyrule Forest | Show on map |
| 89 | Stalkoblin | Lake Kolomo | Hyrule Field | Show on map |
| 90 | Stalkoblin | Lake Kolomo | Hyrule Field | Show on map |
| 91 | Stalkoblin | Lake Kolomo | Hyrule Field | Show on map |
| 92 | Stalkoblin | Mabe Prairie | Hyrule Field | Show on map |
| 93 | Stalkoblin | Mabe Prairie | Hyrule Field | Show on map |
| 94 | Stalkoblin | Mabe Prairie | Hyrule Field | Show on map |
| 95 | Stalkoblin | Passeri Greenbelt | Hyrule Field | Show on map |
| 96 | Stalkoblin | Passeri Greenbelt | Hyrule Field | Show on map |
| 97 | Stalkoblin | Passeri Greenbelt | Hyrule Field | Show on map |
| 98 | Stalkoblin | Rebonae Bridge | Lanayru | Show on map |
| 99 | Stalkoblin | Rebonae Bridge | Lanayru | Show on map |
| 100 | Stalkoblin | Rebonae Bridge | Lanayru | Show on map |
| 101 | Stalkoblin | Dueling Peaks Stable | Necluda | Show on map |
| 102 | Stalkoblin | Dueling Peaks Stable | Necluda | Show on map |
| 103 | Stalkoblin | Dueling Peaks Stable | Necluda | Show on map |
| 104 | Stalmoblin | Skull Lake | Akkala | Show on map |
| 105 | Stalmoblin | Skull Lake | Akkala | Show on map |
| 106 | Stalmoblin | Lightning Temple | Gerudo | Show on map |
| 107 | Stalmoblin | Hebra North Crest | Hebra | Show on map |
| 108 | Stalmoblin | Hebra North Crest | Hebra | Show on map |
Other monsters are in the enemy overview; cave names are in the cave list.
FAQ
When do Stal enemies appear in Tears of the Kingdom?
How do you kill a Stalkoblin for good?
What do Stal enemies drop?
How much HP do Stal enemies have?
Related Articles
guides
Ocarina of Time Remake Big Poes: All 10 Locations and Ghost Shop Rewards
All ten Big Poe locations in the Ocarina of Time remake, how to make them appear on Epona, and Ghost Shop rewards: 30 rupees each, a bottle at 500 points.
guides
Ocarina of Time Remake Map: Heart Pieces, Gold Skulltulas and Area Maps
Ocarina of Time Switch 2 remake map: all 36 Pieces of Heart, 100 Gold Skulltulas, beans, songs, bottles, minigames and Great Fairies, with in-game maps of 21 areas.
guides
BotW Gerudo Town: How to Enter, Shops, Inn and Vah Naboris
Enter Gerudo Town in Breath of the Wild with the Gerudo disguise, prepare for desert heat and cold, find shops and lodging, and begin Riju’s quest.
Was this helpful?
Thanks for the feedback!