

Kiah Toza Shrine Guide: Master the Orb (BotW)
Finish the snow-ring course, guide the orb across metal platforms and ice, time the launcher, and find Kiah Toza’s Falcon Bow in Breath of the Wild.
How do you reveal Kiah Toza Shrine?
In The Legend of Zelda: Breath of the Wild, this shrine belongs to EX Champion Revali’s Song. Complete the four opening DLC shrines, then visit this Champion’s monument to start its trials. The Champions’ Ballad overview covers those prerequisites and the branch order.
Find the first blue ring near Hebra Peak and shield-surf downhill through the rings in order. Keep the next ring in view; where the route crosses a gap, open the Paraglider to catch the updraft and continue on the far side. Finish the course towards Pikida Stonegrove to reveal the shrine. Bring cold protection and a usable shield before starting.
| Detail | Answer |
|---|---|
| Trial | Master the Orb |
| Main mechanic | Build and time a multi-level rolling-orb course |
| Treasure | 1 chest: Falcon Bow |
| Completion reward | Medoh’s Emblem |
This is an additional DLC shrine and does not count towards the 120 base-game shrines.
How do you solve Master the Orb?
1. Inspect the course from above
Take the central updraft to the upper level. Locate the metal track pieces, the switch beside the conveyor, the seesaw below, the waterfall gap and the bottom launcher. Prepare the fixed parts first; chasing an orb while still building the route makes the timing much harder.
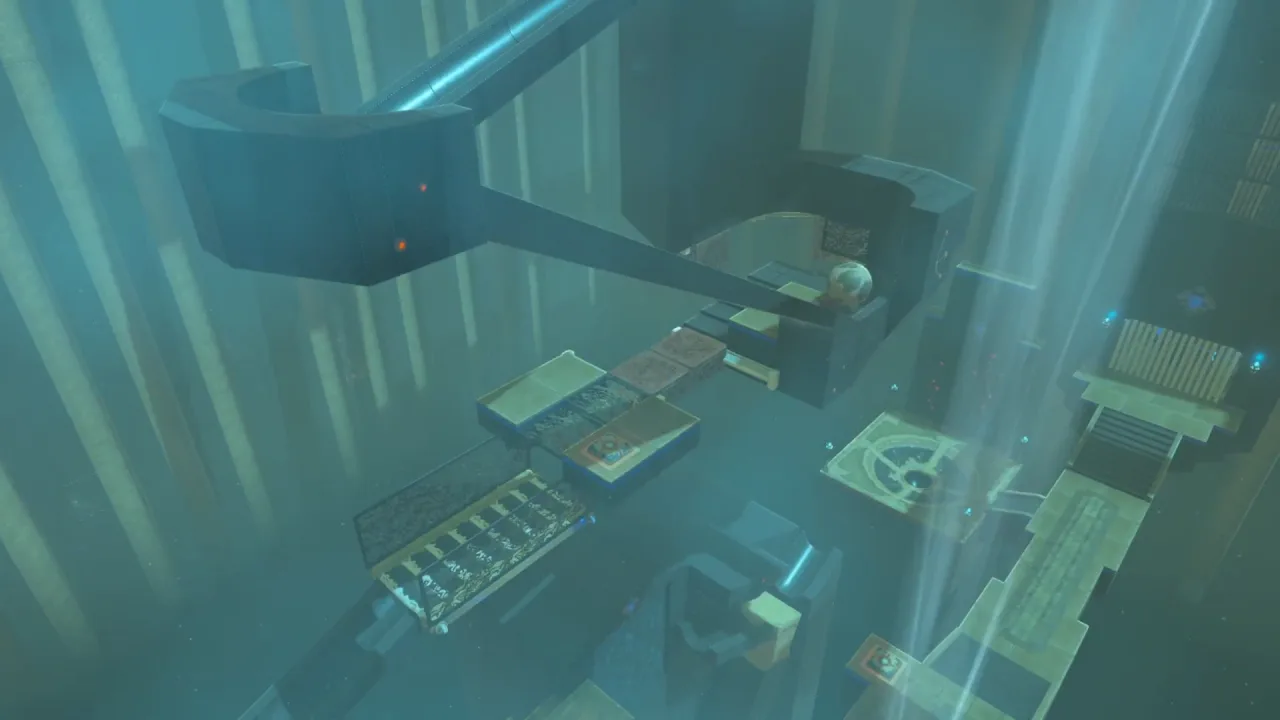
2. Raise the stone block for the chest
Land beside the small pool at the upper level. Use Cryonis beside the stone block and climb onto it. Break that first ice pillar, then create another beneath the stone. The lifted block lets you reach the ladder and chest. Return to the orb course after collecting the bow.
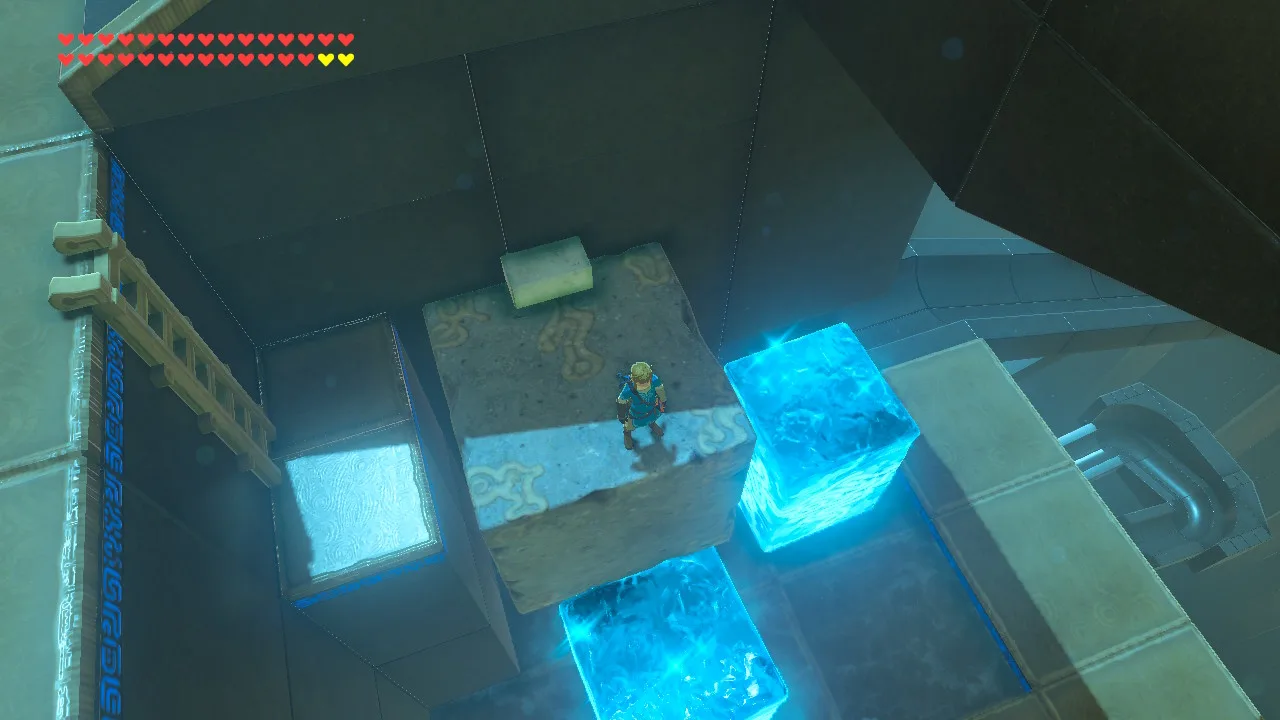
3. Finish the metal bridge and waterfall crossing
At the upper turn, use Magnesis to slide the horizontal pieces into a continuous bridge. Move the upright piece into place as a stop so the orb turns along the track instead of flying off. At the waterfall below, create ice blocks across the missing section. Put the second slightly lower than the first, making a descending path to the next track.
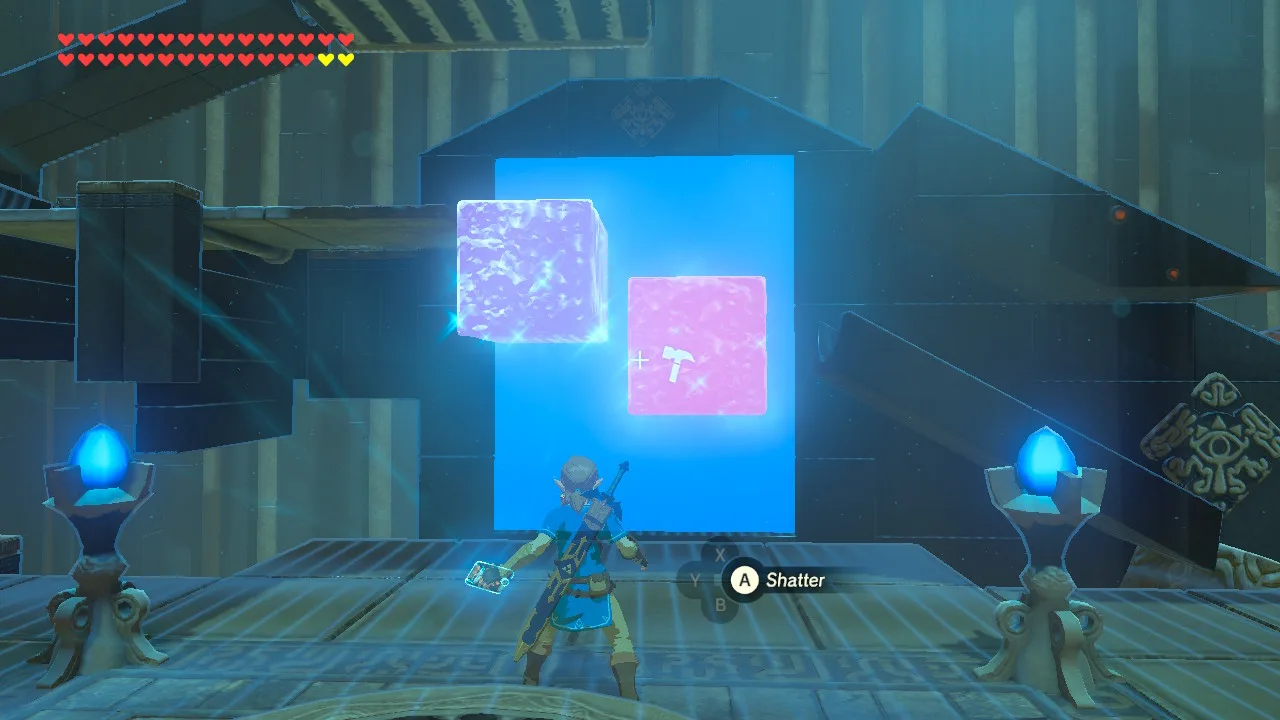
4. Control the conveyor and seesaw
Return to the switch above the lower course. Stand on it to reverse the conveyor and keep it pressed until the orb passes. Watch the orb approach the seesaw below; use Stasis on the seesaw at that moment to hold the useful slope. The orb should roll across the ice you prepared. Glide down towards the bottom switch as it continues.
5. Launch the orb into its socket
Stay off the final pressure plate until the orb reaches the launcher. Step onto it as the orb settles in position to throw the orb into the high socket. Once the gate opens, climb to the monk. If the orb misses, leave the fixed track in place and repeat the conveyor, seesaw and launcher sequence.
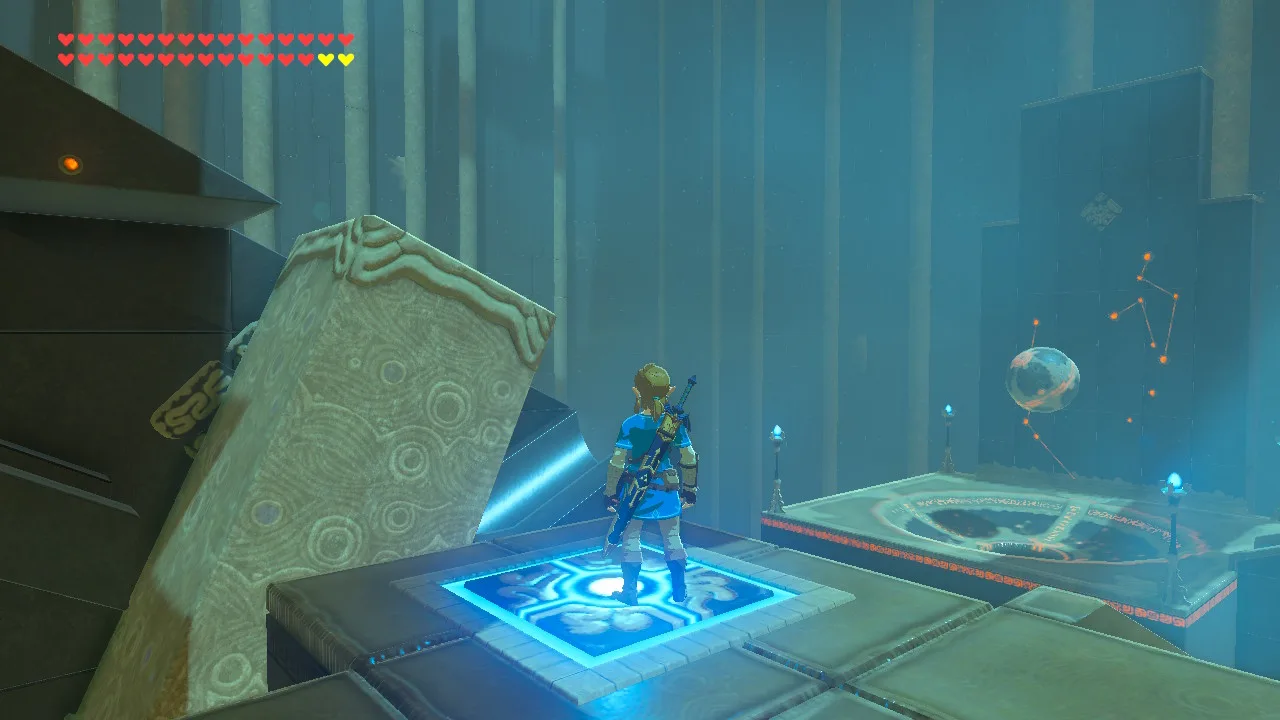
Where is the treasure chest?
The single chest contains a Falcon Bow. It is above the small pool near the top of the shrine. Climb onto the stone block, remove the ice you used as a step, then create ice underneath the stone block to raise it towards the ladder. This can be done before starting the orb sequence.
What can go wrong?
- The orb leaves the upper track: check both the horizontal bridge and the upright stop at the turn.
- It sticks on the ice: lower the second ice block slightly so the route continues downhill.
- The seesaw moves too soon: wait until the orb is close before using Stasis.
- The launcher fires empty: watch the orb reach the bottom before stepping on its switch. A failed orb is replaced, so adjust the failed section and retry.
What do you receive, and where do you go next?
Speak to the monk for Medoh’s Emblem. The other shrines in this branch are Shira Gomar Shrine and Noe Rajee Shrine. Collect all three emblems from this branch, then return to Divine Beast Vah Medoh for the memory rematch. This shrine awards an emblem rather than a Spirit Orb; the main walkthrough explains the next fight.
Related Articles
shrines
Kamia Omuna Shrine Guide: Moving Targets (BotW)
Defeat the Igneo Talus Titan at Lake Darman, time Kamia Omuna’s cannon shots, rotate the target cage, and recover its Diamond chest in Breath of the Wild.
shrines
Kee Dafunia Shrine Guide: The Melting Point (BotW)
Pass the sunrise ring, melt ice into stairs, reveal the Frostblade chest, and lift the final ice cube in Kee Dafunia Shrine in Breath of the Wild.
shrines
Keive Tala Shrine Guide: Big or Small (BotW)
Defeat the Molduking to reveal Keive Tala Shrine, connect its metal-and-water circuit, and solve the laser puzzle for a Radiant Shield in Breath of the Wild.
Was this helpful?
Thanks for the feedback!