

TotK Weapon Durability: Most Durable Weapons, Repair, Fuse
How weapon durability works in Tears of the Kingdom, the most durable weapons of each type, and three ways to keep them: Fuse, Rock Octoroks and Pelison.
Weapons in Tears of the Kingdom break. This page lists the most durable weapons of each type, explains how durability works, and covers the three ways to make a weapon last: fusing a material, feeding it to a Rock Octorok, and saving the material with Pelison. Every weapon’s number is on the full weapon list.
Which weapons are the most durable?
The ten most durable of each type. The durability column is the number of uses before it breaks.
One-handed
| State | Effect | ||||
|---|---|---|---|---|---|
| 352 | Scimitar of the Seven | — | 28 | 60 | |
| 359 | White Sword of the Sky | — | 24 | 45 | |
| 329 | Master Sword | — | 30 | 40 | |
| 343 | Royal Broadsword | Intact | 24 | 35 | Increases the power of flurry rush during perfect dodge |
| 341 | Knight's Broadsword | Intact | 18 | 27 | Powerful attacks when you're down to your last heart |
| 345 | Forest Dweller's Sword | Intact | 16 | 27 | Bursting materials attached to the tip can be reused again and again. |
| 347 | Zora Sword | Intact | 12 | 27 | It yields a high attack power when it gets wet |
| 349 | Feathered Edge | Intact | 13 | 27 | Produces a strong wind |
| 356 | Sword of the Hero | — | 17 | 27 | |
| 354 | Eightfold Blade | Intact | 15 | 26 | Yields more powerful sneakstrikes |
Two-handed
| State | Effect | ||||
|---|---|---|---|---|---|
| 388 | Biggoron's Sword | — | 36 | 60 | |
| 393 | Dusk Claymore | — | 32 | 50 | |
| 374 | Giant Boomerang | Intact | 23 | 40 | |
| 382 | Royal Claymore | Intact | 34 | 40 | Increases the power of flurry rush during perfect dodge |
| 387 | Boulder Breaker | — | 38 | 40 | |
| 394 | Fierce Deity Sword | — | 38 | 35 | |
| 380 | Knight's Claymore | Intact | 24 | 30 | Powerful attacks when you're down to your last heart |
| 384 | Zora Longsword | Intact | 17 | 30 | It yields high attack power when it gets wet. |
| 386 | Cobble Crusher | Intact | 14 | 30 | A great tool for breaking rocks |
| 399 | Sturdy Thick Stick | — | 7 | 26 | High durability |
Spears
| State | Effect | ||||
|---|---|---|---|---|---|
| 424 | Lightscale Trident | — | 22 | 70 | |
| 419 | Royal Halberd | Intact | 18 | 50 | Yields a powerful flurry rush during a perfect dodge |
| 417 | Knight's Halberd | Intact | 14 | 40 | Powerful attacks when you're down to your last heart |
| 423 | Zora Spear | Intact | 11 | 40 | Yields a high attack power when it gets wet |
| 415 | Soldier's Spear | Intact | 10 | 35 | Enables quicker charged attacks |
| 421 | Forest Dweller's Spear | Intact | 14 | 35 | Bursting materials attached to the spearhead can be reused again and again. |
| 426 | Feathered Spear | Intact | 10 | 35 | Produces a strong wind |
| 433 | Sturdy Long Stick | — | 4 | 34 | High durability |
| 413 | Traveler's Spear | Intact | 4 | 30 | |
| 418 | Royal Halberd | Decayed | 7 | 30 | Yields a powerful flurry rush during a perfect dodge |
Bows
| Effect | ||||
|---|---|---|---|---|
| 446 | Royal Bow | 38 | 60 | |
| 451 | Great Eagle Bow | 28 × 3 arrows | 60 | |
| 461 | Steel Lizal Bow | 36 | 50 | |
| 469 | Zonaite Bow | 30 | 50 | Power drains, and arrows can fly much farther according to how long a shot is charged. |
| 445 | Knight's Bow | 26 | 48 | |
| 453 | Phrenic Bow | 10 | 45 | |
| 464 | Savage Lynel Bow | 32 × 3 arrows | 45 | |
| 470 | Demon King's Bow | 2 × hearts, max 60 | 42 | The higher your maximum number of hearts, the more its attack power increases. |
| 448 | Zora Bow | 20 | 40 | |
| 452 | Gerudo Bow | 25 | 40 |
Shields
The Hylian Shield, at 800, lasts longer than the other 32 shields put together (594). More on the shields page.
| Effect | ||||
|---|---|---|---|---|
| 471 | Hylian Shield | 90 | 800 | |
| 489 | Sea-Breeze Shield | 65 | 90 | |
| 487 | Daybreaker | 48 | 60 | |
| 481 | Royal Shield | 55 | 29 | |
| 486 | Radiant Shield | 35 | 26 | |
| 480 | Knight's Shield | 40 | 23 | |
| 483 | Zora Shield | 24 | 20 | |
| 485 | Gerudo Shield | 28 | 20 | |
| 500 | Mighty Zonaite Shield | 50 | 20 | Draws on its stored energy to more efficiently use an attached Zonai device |
| 503 | Savage Lynel Shield | 62 | 20 |
How does durability work?
Each weapon, bow and shield can be used a set number of times before it breaks. You get two warnings: an on-screen message appears when a weapon is badly damaged, and it flashes red in the inventory. The Master Sword is the one exception: using it only drains its energy, and it can be used again after it recharges, which takes about 10 minutes.

Some weapons trade durability for power on purpose. In the game’s words, the Royal Guard’s weapons yield “massive destructive power just before it breaks”, and they are all built with less durability than other weapons of the same power. The Gloom weapons have the highest attack of their types, but the game warns that “its gloom will gradually wear down the body of its wielder”.
How do you repair a weapon?
Let a Rock Octorok swallow equipment before it breaks. This works for ordinary melee weapons, bows and shields, including the Hylian Shield. An item that has already shattered and disappeared from your inventory cannot be repaired.
How do you make it swallow and return the equipment?
- Dismiss your sage avatars, then approach. They can kill the Octorok before you finish. When you get close, it burrows underground with its rock still showing.
- Drop one damaged item from your inventory in front of it. Do not throw it at the enemy or leave a pile of equipment. If necessary, use Ultrahand to place the item on the ground in front of its mouth.
- Back away until it emerges. Stay within sight and wait for it to inhale. Standing right beside the rock keeps it hiding.
- Wait for the chewing and sparkles. Leave it alone during the repair. It spits the equipment toward Link, so sidestep the projectile before collecting it.
- Check your inventory. The red badly damaged warning should be gone; inspect the new bonus too. Save before feeding it if you want to preserve a particular bonus.
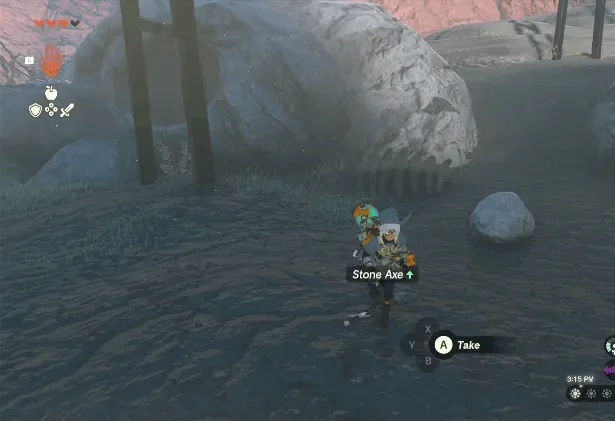
A successful repair does the following:
- Restores durability. A normal fused attachment does not need to be removed first. If the attachment is another piece of equipment, its durability can be restored too.
- Reportedly rerolls the bonus. Attack Up and Durability Up are among the possible bonuses, and equipment with a white bonus fed to another unused Rock Octorok is said to turn yellow. The game parameters have nothing for this, and your existing effect is not guaranteed to stay; see weapon bonuses.
- Keeps the weapon’s identity. A repaired decayed weapon remains decayed. For a better base weapon, use the pristine weapons guide.
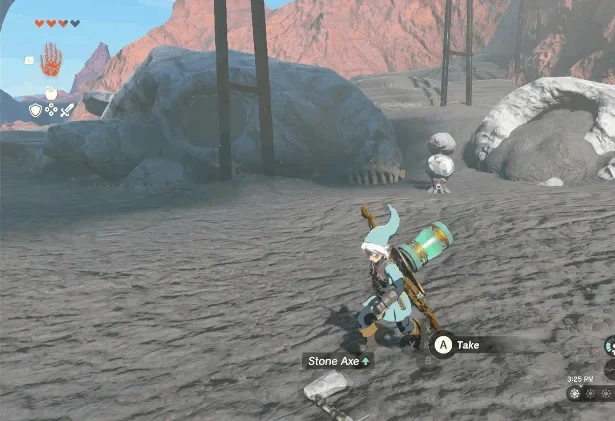
Can the same Octorok repair more than one item?
Each Rock Octorok can successfully repair one item per Blood Moon cycle. Feeding it a second item or briefly leaving and returning does not create an unlimited repair service. The same weapon can be repaired again by a different, unused Octorok.
For a repeatable route, collect your repaired equipment, then defeat the Octorok and mark its position. Return after the next Blood Moon respawns it. The reset depends on a Blood Moon; resting at a campfire overnight is not enough. If you wait beside a spawn through the Blood Moon, travel away and return so the area reloads. How often it comes and what it resets: the Blood Moon guide.
What is a short Rock Octorok repair route?
This route follows four nearby spawns on Eldin’s Flank, north of Death Mountain, from south to north. Travel to Sibajitak Shrine, then head north and slightly east toward stop 1. Continue between the stops without teleporting after every repair. Climb around rocky slopes as needed and look for the exposed rock when you reach each position.
| Stop | Location | Direction from the previous stop |
|---|---|---|
| 1 | Show on map | Head north and slightly east from the shrine to this southern stop |
| 2 | Show on map | Walk northwest |
| 3 | Show on map | Continue north and slightly west along the flank |
| 4 | Show on map | Finish north and slightly east at the route’s northernmost stop |
The map below shows these four spawns. Skip any Octorok you have already used or defeated. For more stops, open the Octorok location map; use the full interactive map for terrain and other nearby objectives.
Loading the terrain map… slow connections can take a few seconds.
Some terrain tiles failed to load.
Drag to move and zoom in to tell the points apart; on a computer, click the map first and the mouse wheel zooms it. Ticks are saved in this browser only; no account is needed.
Progress cannot be saved in this browser session.
Which equipment cannot be repaired directly?
| Equipment | Alternative |
|---|---|
| Master Sword | It cannot be dropped for an Octorok; let its energy recharge |
| Champion equipment: Scimitar of the Seven, Daybreaker, Boulder Breaker, Lightscale Trident and Great Eagle Bow | Fuse the damaged item onto an ordinary weapon or shield that can be repaired, then repair and separate them |
| Legacy equipment, including Biggoron’s Sword, Fierce Deity Sword, Dusk Claymore, Sword of the Hero, White Sword of the Sky, Sea-Breeze Boomerang, Sea-Breeze Shield and Dusk Bow | Use the attachment method below; obtaining the item through amiibo does not change its repair restriction |
| Magic Rod, Magic Scepter, Magic Staff and Demon King’s Bow | Use an ordinary weapon or shield as the base, with the damaged equipment as its attachment |
The order matters when repairing a special item as an attachment:
- If a valuable material is already attached to the damaged weapon, have Pelison separate it in Tarrey Town first so you can keep it.
- Equip an ordinary weapon or shield that an Octorok can repair. Drop the special item and Fuse it onto the ordinary equipment. Adding a material to the special weapon while leaving it as the base does not bypass the restriction.
- Feed the combination to an unused Rock Octorok. Collect it, then have Pelison separate the pieces so you can retrieve both. The special item does not gain a random bonus of its own.
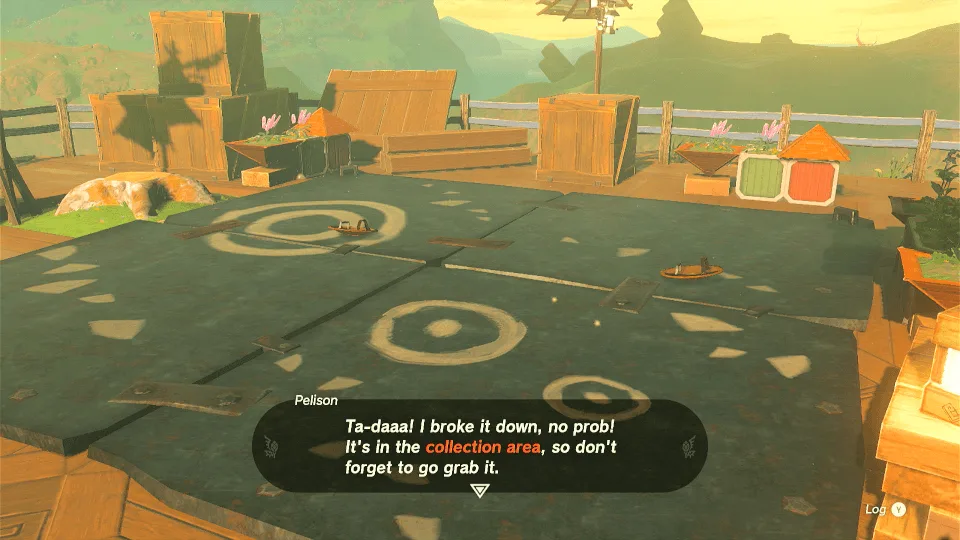
Does Fuse add durability?
Yes, and it is the everyday fix. Fusing a material to a weapon close to breaking adds both durability and attack. Fusing a monster material generally adds 25 durability, but only 10 for Royal Guard and Gloom weapons and for cheap gear — the Rusty weapons, Soup Ladle, Torch, Tree Branch, Wooden Stick weapons, Boat Oar, Farming Hoe, Farmer’s Pitchfork and Fishing Harpoon. The Fuse guide lists the materials that add the most attack.
See also
For more damage without wearing weapons out faster, Mighty food raises attack for a while; the strongest weapons page compares the top weapons of each type.
Which bonuses exist, how high they go and which weapons can roll which: weapon bonuses.
FAQ
Can you repair weapons in Tears of the Kingdom?
Does the Master Sword break?
Does fusing a material add durability?
What is the most durable weapon in Tears of the Kingdom?
Related Articles
weapons
BotW Weapon Bonuses: Max Attack Up, Every Type, How to Get Them
Breath of the Wild weapon bonuses: white and yellow Attack Up ranges for every weapon, the kill points behind them, and the 85 Master Mode yellow chests.
weapons
TotK Weapon Bonuses: Max Attack Up, Types and How to Get Them
Tears of the Kingdom weapon bonuses: Attack Up +3–5 white, +6–10 yellow, what each weapon can roll, kill points, Rock Octorok rerolls and high-attack weapons.
weapons
BotW All Weapons: Attack and Durability of All 185
Every Breath of the Wild weapon, bow and shield with attack or guard, durability and arrows per shot, taken from the game's own weapon data.
Was this helpful?
Thanks for the feedback!