

Mezza Lo Shrine: Crowned Beast and Ancient Trifecta (BotW)
Reveal Mezza Lo Shrine by riding a mountain buck onto the pedestal, then solve Ancient Trifecta and collect the Thunderblade from its chest.
Where is Mezza Lo Shrine?
Look for Kass and the pedestal on Rabia Plain. The nearby pond is a useful landmark for finding mountain bucks; the shrine itself starts underground. Match the marker with the BotW shrine location table, then solve the outdoor quest before looking for an entrance.
| Item | Detail |
|---|---|
| Trial | Ancient Trifecta / 3大智慧 |
| Tower region | Hateno |
| Map-marker coordinates | 2622, -0379, 0258 |
| Type | Rune and rotating-platform puzzle; not a Test of Strength |
| Shrine quest | The Crowned Beast / 兩杆槍野獸 |
| Chests | 1 |
| English name | Mezza Lo Shrine |
| Traditional Chinese name | 米茲‧耀神廟 |
| Simplified Chinese name | 米兹·耀神庙 |
To complete The Crowned Beast:
- Listen to Kass. Agree to hear his ancient song to begin the shrine quest.
- Approach a mountain buck quietly and tame it. Look near the pond; avoid alarming the animal before you can mount it.
- Ride onto the pedestal. Stay mounted as the buck steps onto it. The pedestal turns blue and the shrine rises nearby.
What should you bring?
No combat loadout or elemental resistance is needed — Ancient Trifecta is a rune-and-platform puzzle, not a Test of Strength. Do bring a bow with at least one arrow, since the route requires shooting the crystal from the chest ledge, along with the standard Sheikah Slate runes (Magnesis, Stasis, and Remote Bomb). The prep that actually matters is outside the shrine: mountain bucks flee the moment they spot you, so stealth-boosting gear or an elixir — or at least patient crouch-sneaking — makes taming one far easier.
Video walkthrough
![[Zelda BotW] The Crowned Beast Quest Guide - Mezza Lo Shrine](https://i.ytimg.com/vi/_InRgrOh82M/hqdefault.jpg)
How do you solve Ancient Trifecta?
The crystal controls the rotating platform. Keep the metal box blocking the beam while you set up the route, and save the bomb beside the crystal for the final crossing.
| Equipment or rune | Use in this route |
|---|---|
| Magnesis | Move the beam-blocking box and the metal chest |
| Stasis | Pause the laser emitter while boarding |
| Remote Bomb | Activate the crystal for the final crossing |
| Bow and arrows | Activate the crystal from the chest stop |
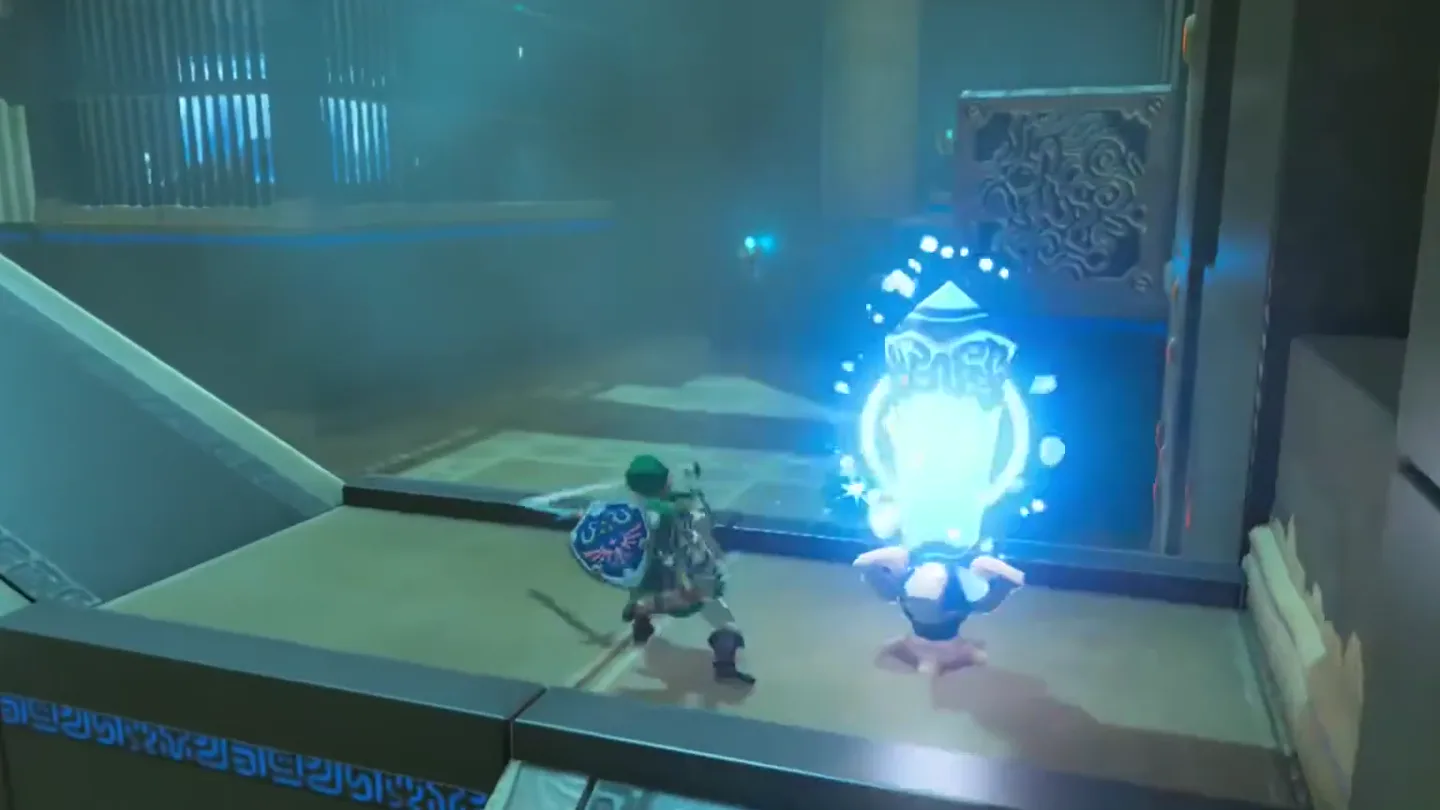
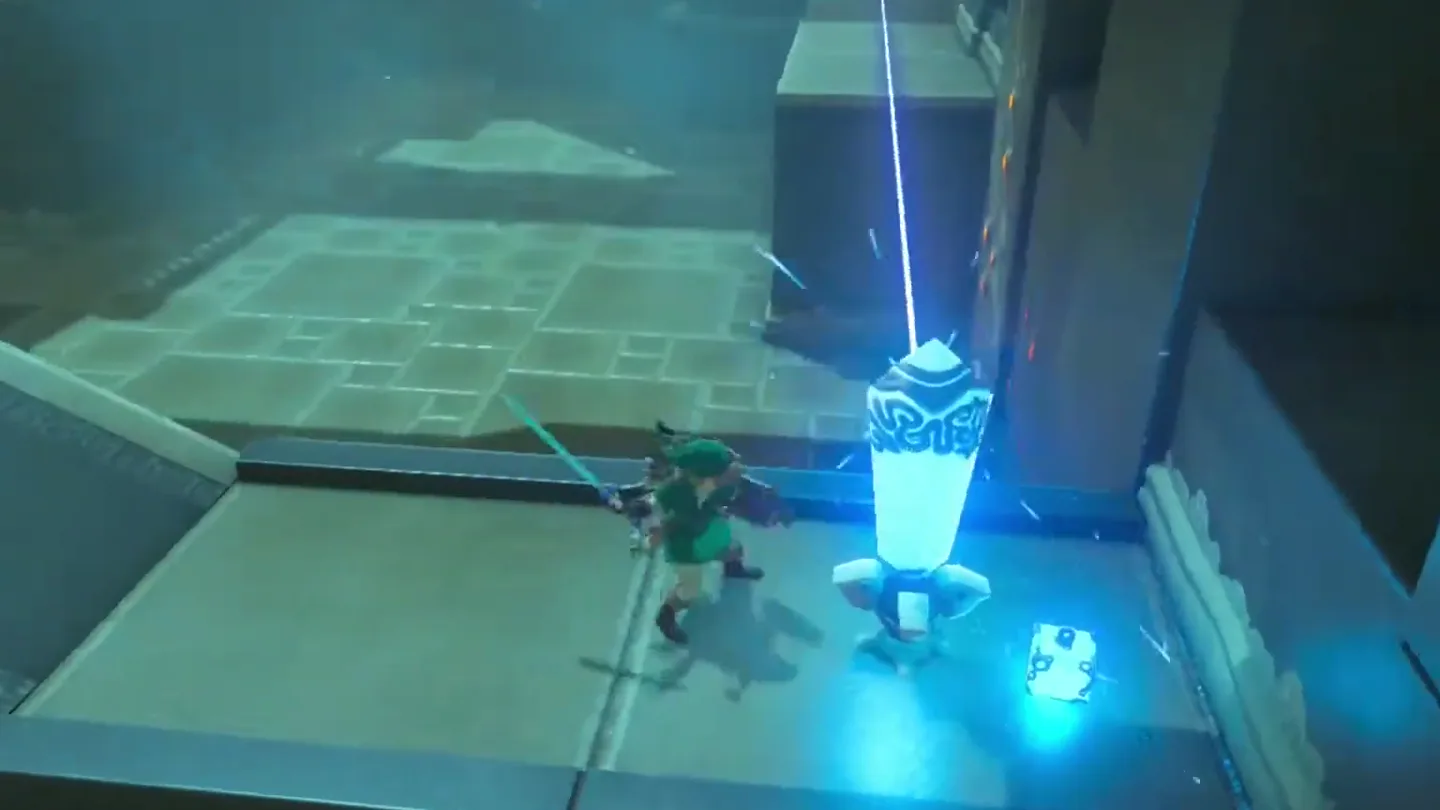
1. Align Platform and Place Bomb
Align the platform with the ramp. Go up the ramp to the right of the entrance and strike the crystal until the moving platform meets the ramp.
Leave a Remote Bomb beside the crystal. Keep it there, undetonated, for the end of the route.
2. Ride to Chest and Prepare Switch Weight
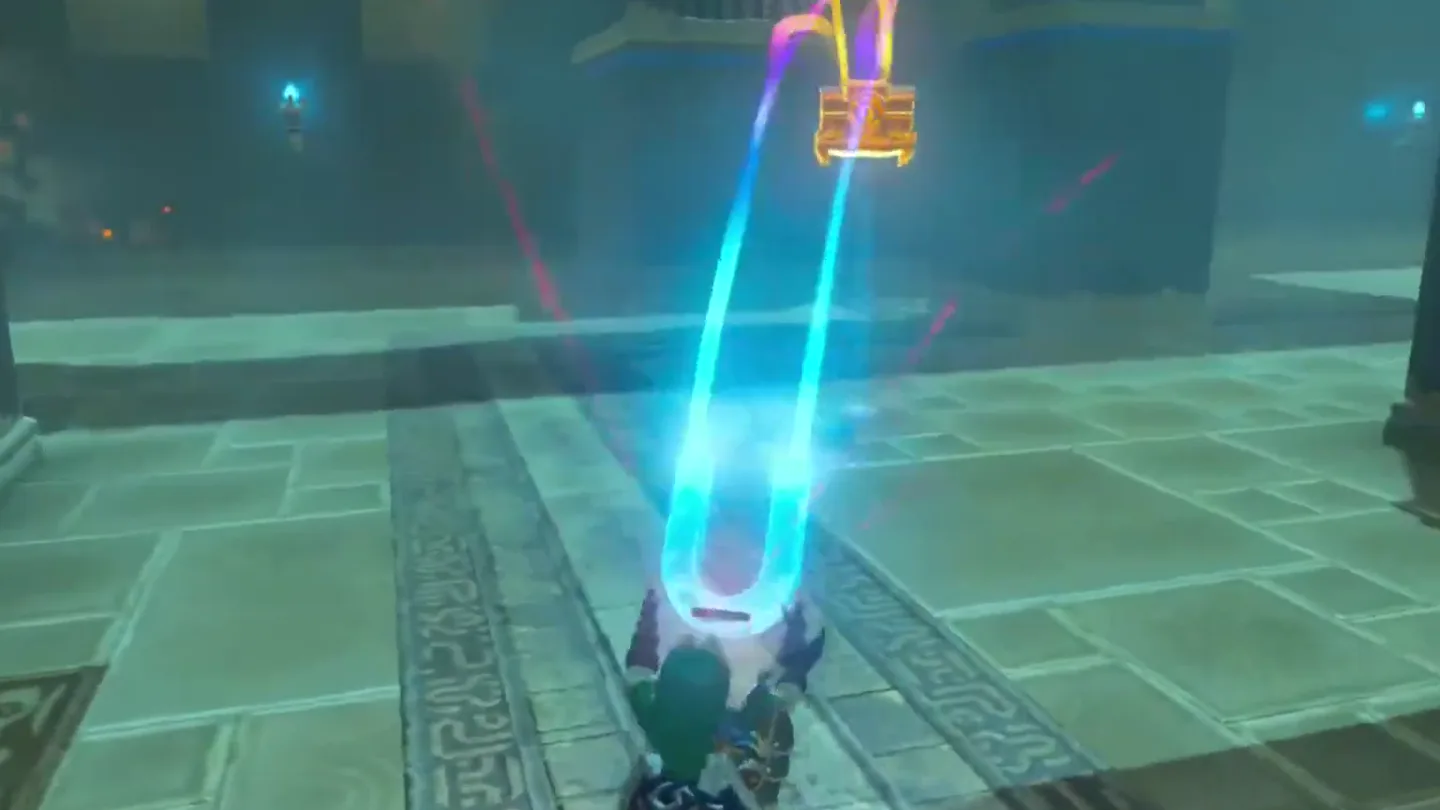
Freeze the laser emitter with Stasis, board, then move the box. From the platform, use Magnesis to remove the metal box blocking the beam. When Stasis ends, the beam activates the crystal and carries you to the chest stop.
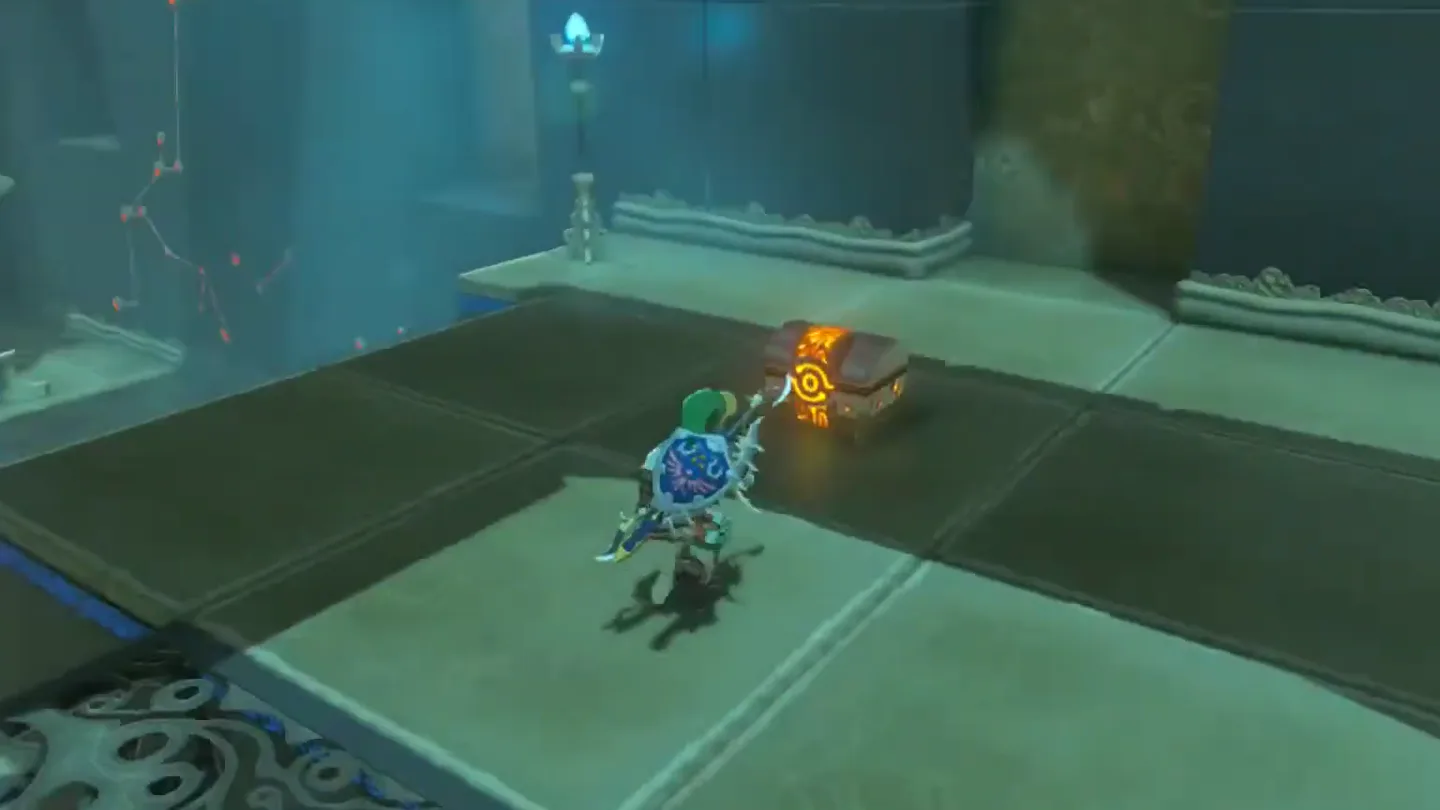
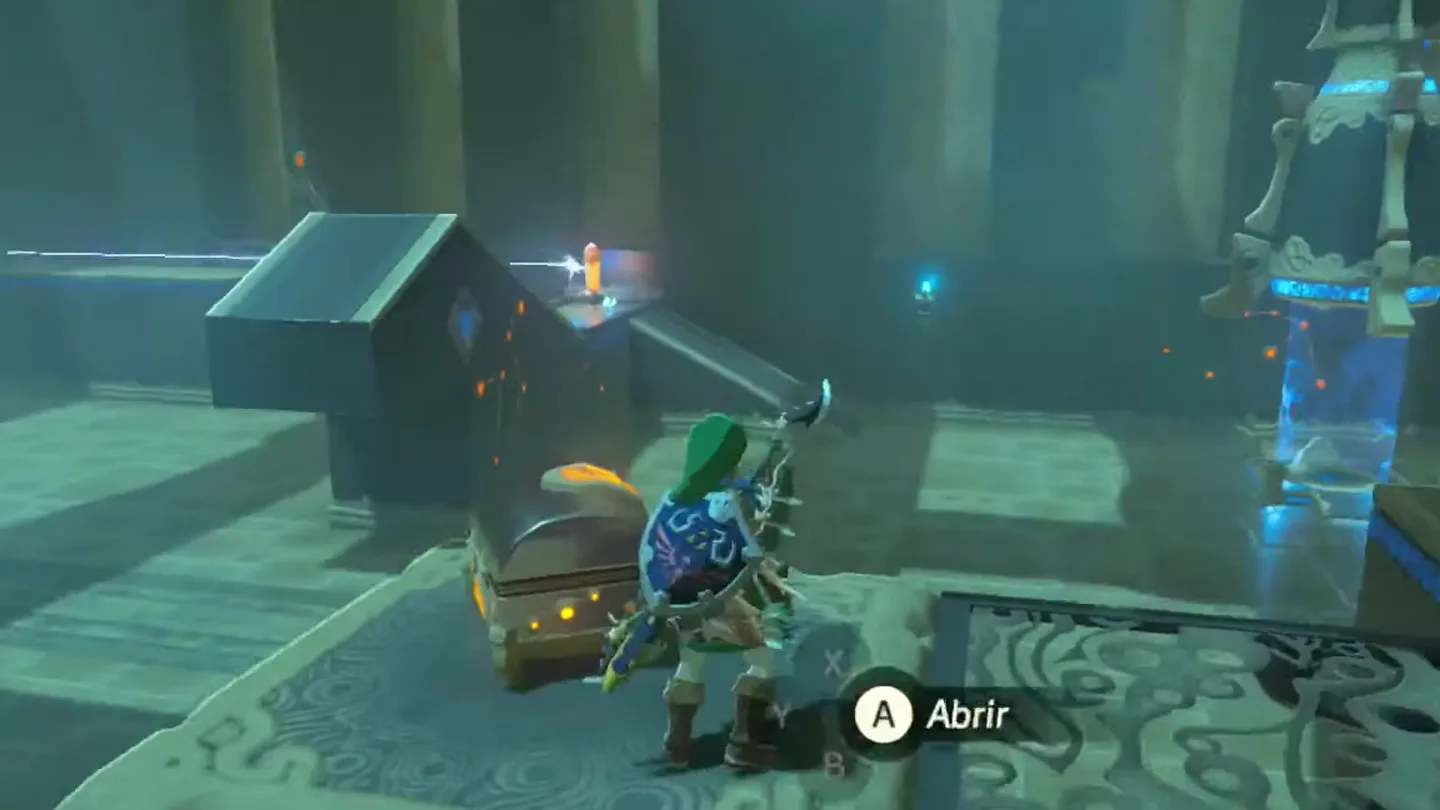
Open the chest. Step onto its ledge and collect the Thunderblade before moving the chest itself.
Move the empty chest toward the floor switch. Use Magnesis to transfer it to the platform’s next stop.
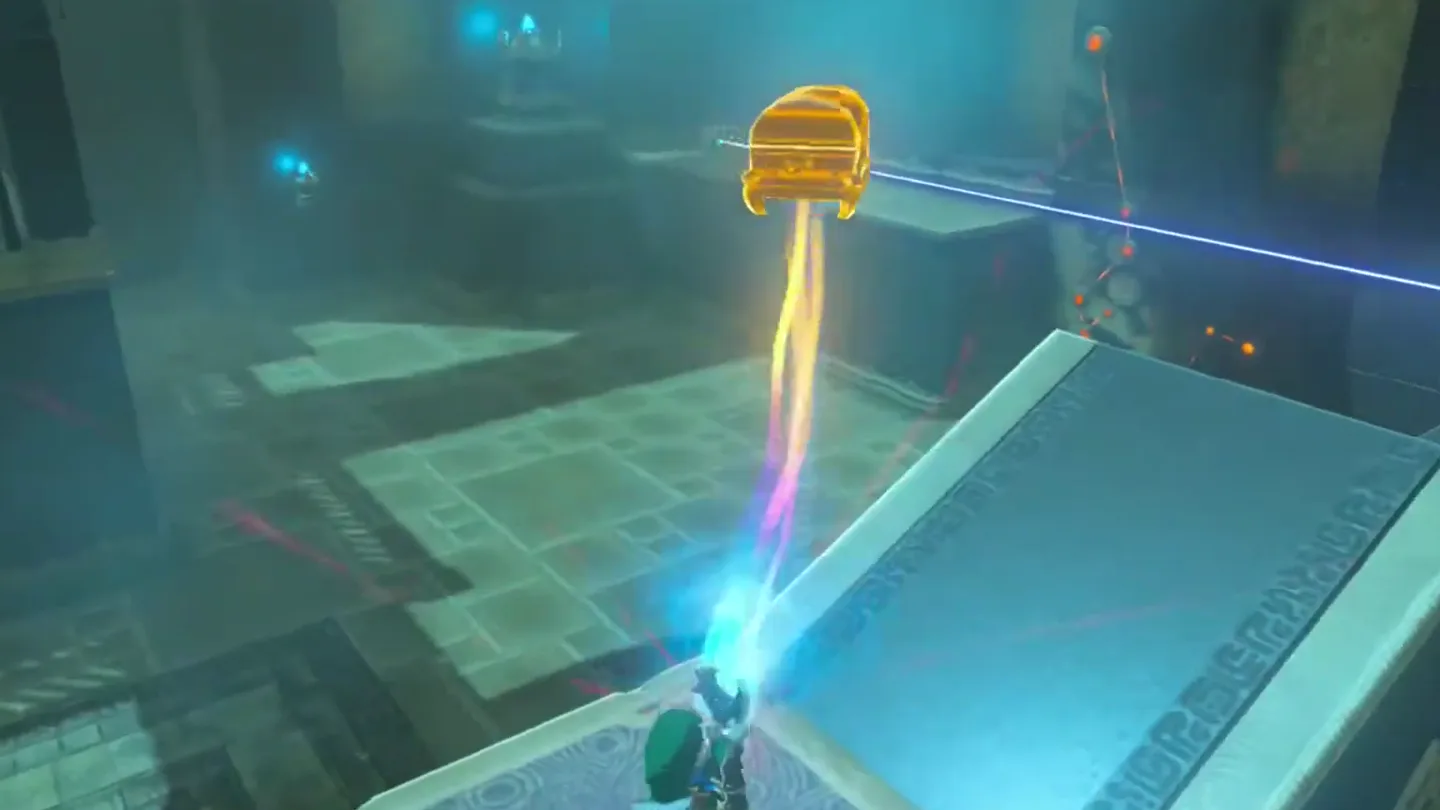
3. Activate Switch and Reach the Altar
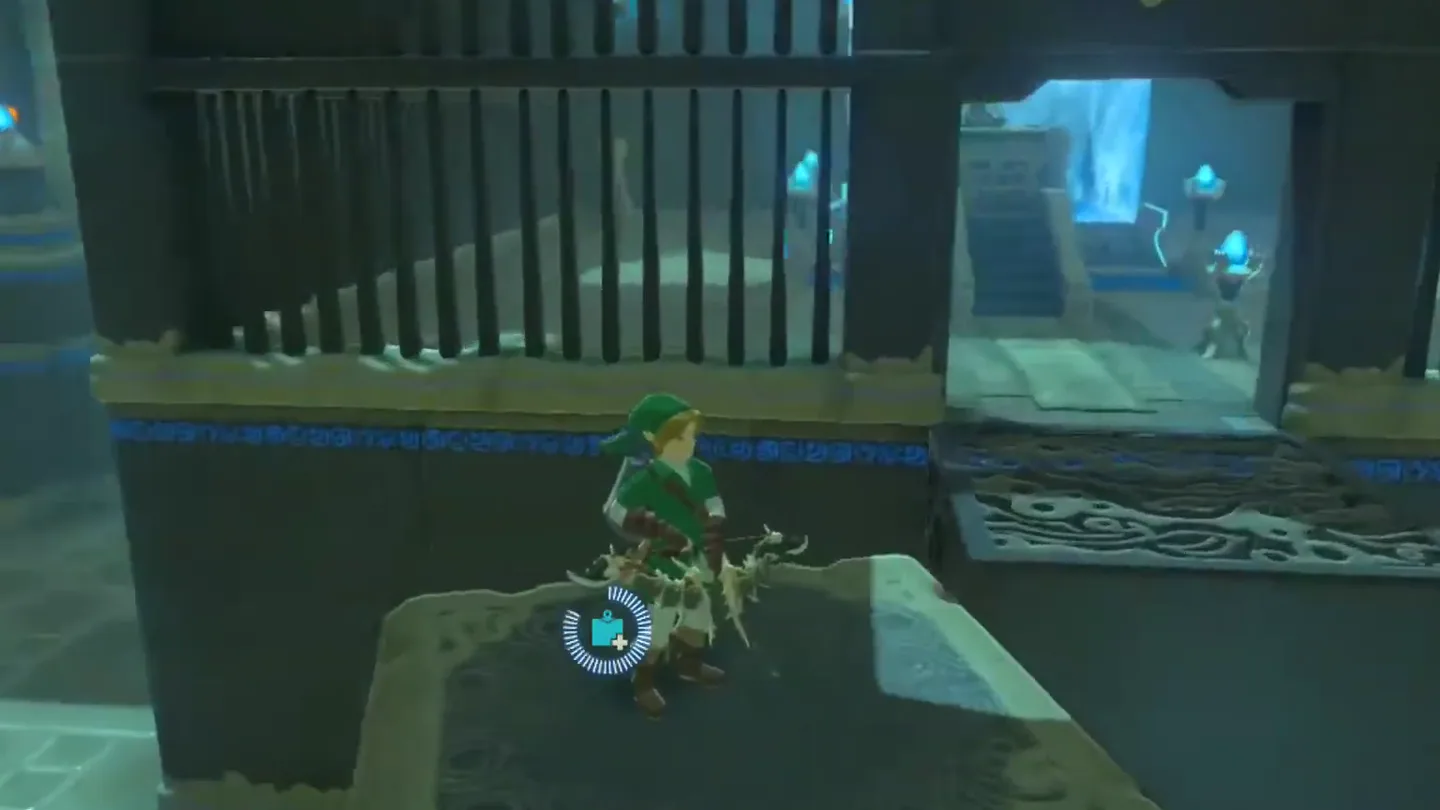
Shoot the crystal and weigh down the switch. Ride to that stop, then use Magnesis to settle the chest onto the floor switch. The gate to the monk opens.
Board again and detonate the waiting bomb. Leave the chest holding the switch down; the explosion activates the crystal and moves you to the altar stop.
Pass through the gate and speak to the monk. Receive the Spirit Orb to finish the shrine.
Where is the chest, and what is inside?
| Chest | Contents | How to get it |
|---|---|---|
| 1 | Thunderblade | Ride the platform from the entry ramp to the chest ledge. Open it before using the metal chest to hold down the floor switch. |
What do people miss here?
- The Crowned Beast asks for the horned mountain buck, and he roams with the rest of the herd — it’s easy to spook the other deer before you’re close enough to mount. Crouch and close in slowly from a distance instead of walking straight at the herd.
- When the pedestal turns blue, don’t circle it looking for an entrance — the shrine surfaces slightly up the hill from Kass, not right beside the pedestal.
- The metal cube behind the crystal is hiding a laser. Pull it away before you’re standing on the platform (and before the laser is frozen with Stasis) and the beam will strike the crystal, sending the platform around the room empty — you’ll have to re-align it with the ramp and start the ride over.
- Your floor-switch weight has to travel with you: before each hop, Magnesis the emptied metal chest (or the metal box) onto the platform. Arriving at the gate stop empty-handed leaves the portcullis shut.
- The platform only steps clockwise through four stops — ramp, chest ledge, gate switch, altar — so a mistimed trigger isn’t a disaster: activate the crystal again and it keeps cycling until the platform is back where you need it.
What else is nearby?
| Shrine | Direction | Straight-line distance | Region |
|---|---|---|---|
| Rucco Maag Shrine | east | 712 | Lanayru |
| Soh Kofi Shrine | northwest | 772 | Lanayru |
| Lakna Rokee Shrine | southwest | 830 | Dueling Peaks |
Which related guides help next?
- All BotW shrine locations: continue planning from the Hateno tower section.
- How to find shrines: use the shrine checklist and map markers to guide your search.
- Lakna Rokee Shrine: a nearby shrine southwest of Mezza Lo.
- Tears of the Kingdom vs. Breath of the Wild: compare the games and choose the matching guide collection.
FAQ
How do I make Mezza Lo Shrine appear?
What is in the Mezza Lo Shrine chest?
How do I reach the altar after opening the gate?
Is Mezza Lo Shrine a Test of Strength?
Related Articles
guides
Breath of the Wild Captured Memories: All 13 Locations and Rewards
All 12 photo locations from Zelda's album plus the 13th memory in Impa's painting, with coordinates, nearby shrines, the Champion's Tunic and the extra ending scene.
guides
Breath of the Wild Great Fairy Fountains: Locations, Costs and Horse God
Where the four Great Fairy Fountains and the Horse God Malanya are in Breath of the Wild, what each fairy costs to release, and how many you need per armor upgrade.
guides
Hyrule Castle Walkthrough: Entry Routes, Hylian Shield and Final Prep
How to get into Hyrule Castle in Breath of the Wild: five entry routes, the Hylian Shield and other loot by room, and what to prepare before the final battle.
Was this helpful?
Thanks for the feedback!