

TotK Lightroots: All 120 Locations and Names
All 120 Lightroots in the Depths of Tears of the Kingdom, with official names, map locations and the shrine above each one, and why the shrine map finds them.
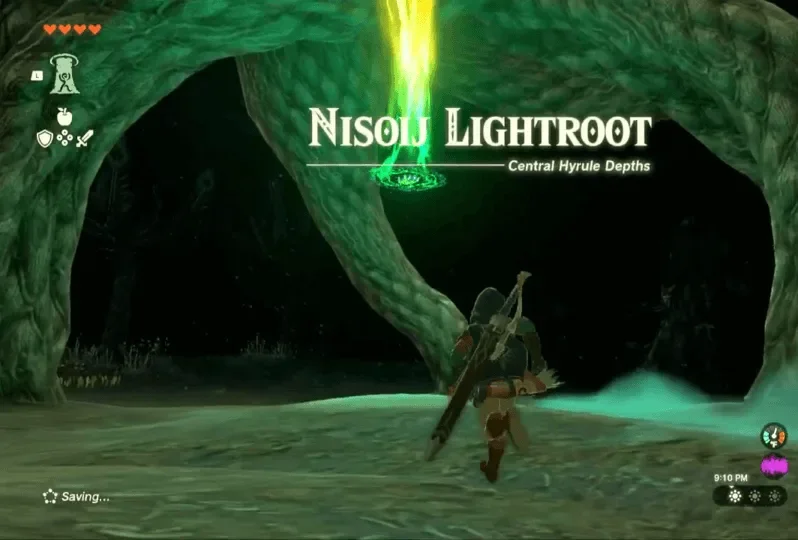
The Depths are pitch black until you light them. Lightroots are the lamps: the game says that when you touch one, “the lightroot dispelled the darkness and brightened the surrounding area.” This page lists all 120 with their official names, locations and the shrine above each.
How do Lightroots work?
- Light. Touching a Lightroot lights up the area around it — the Depths stay dark everywhere else.
- Gloom. A game tip: “If you suffer the effects of gloom, you can return to the surface or visit a lightroot to recover from it.”
How do you find a Lightroot?
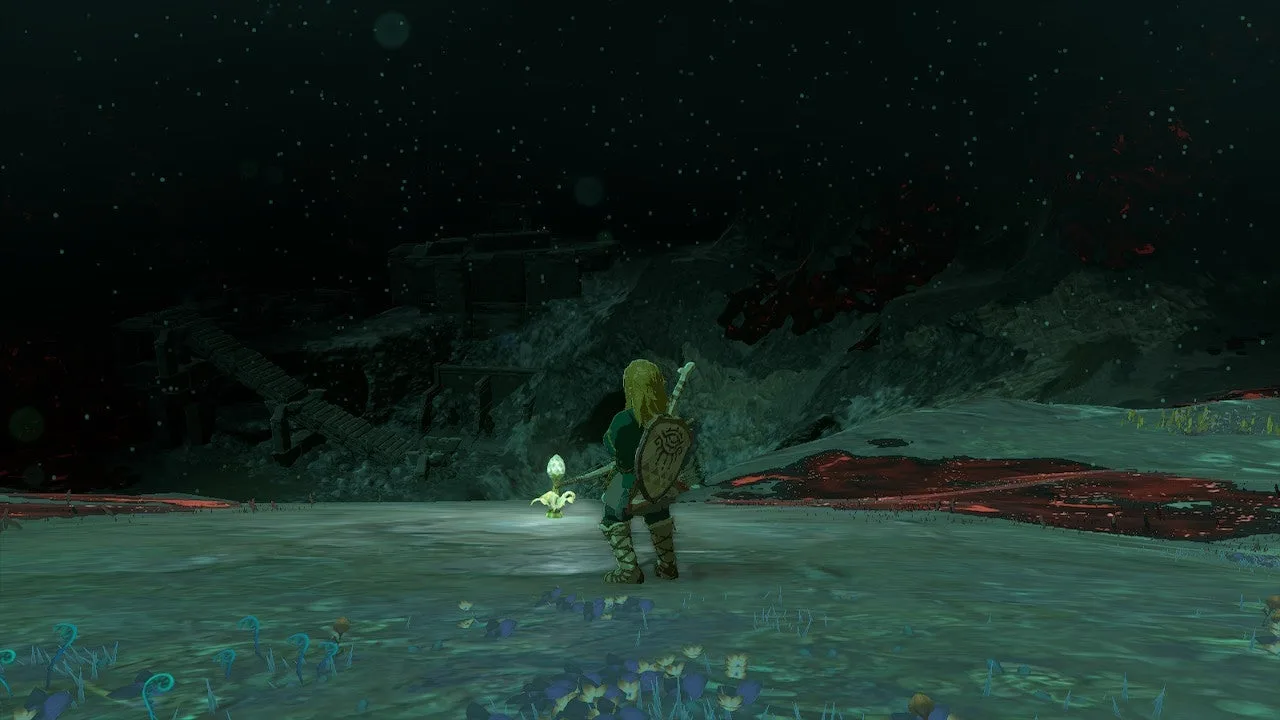
Use the shrine map. Every Lightroot lies under a surface shrine — the map data puts each one within about 25 map units of the spot directly below its shrine — and its name is the shrine’s name spelled backwards: Jochi-ihiga Shrine sits over Agihi-ihcoj Lightroot. So the all shrine locations list is also a Lightroot map. The sky shrines have no Lightroot.

Where are all 120 Lightroots?
Loading the terrain map… slow connections can take a few seconds.
Some terrain tiles failed to load.
Drag to move and zoom in to tell the points apart; on a computer, click the map first and the mouse wheel zooms it. Ticks are saved in this browser only; no account is needed.
Progress cannot be saved in this browser session.
“Depths landmark” is the nearest place name in the Depths; the region is the region of the shrine above. By region: Hyrule Field 25, Gerudo 16, Eldin 14, Necluda 14, Lanayru 13, Akkala 10, Hebra 9, Tabantha 9, Great Hyrule Forest 7, Faron 3.
Hyrule Field (25)
Click “Show on map” to move the map above to that spot.
| # | Lightroot | Depths landmark | Region | Location | Shrine above it |
|---|---|---|---|---|---|
| 1 | Amo-ne Lightroot | Left-Arm Depot | Hyrule Field | Show on map | En-oma Shrine |
| 2 | Apapes Lightroot | Gloom's Approach | Hyrule Field | Show on map | Sepapa Shrine |
| 3 | Camobatures Lightroot | Gloom's Lair | Hyrule Field | Show on map | Serutabomac Shrine |
| 4 | Gadohsi Lightroot | Gustaf Canyon Mine | Hyrule Field | Show on map | Ishodag Shrine |
| 5 | Iayusus Lightroot | Daphnes Canyon Mine | Hyrule Field | Show on map | Susuyai Shrine |
| 6 | Kawakanis Lightroot | Gustaf Canyon Mine | Hyrule Field | Show on map | Sinakawak Shrine |
| 7 | Kogoir Lightroot | Secret Spring of Revival | Hyrule Field | Show on map | Riogok Shrine |
| 8 | Koradat Lightroot | Hylia Canyon Mine | Hyrule Field | Show on map | Tadarok Shrine |
| 9 | Mu-ustust Lightroot | Floating Coliseum | Hyrule Field | Show on map | Tsutsu-um Shrine |
| 10 | Muzasu Lightroot | Dalite Grove | Hyrule Field | Show on map | Usazum Shrine |
| 11 | Nabahi-ikat Lightroot | Lindor Canyon Mine | Hyrule Field | Show on map | Taki-ihaban Shrine |
| 12 | Napanos Lightroot | Blupee Burrow | Hyrule Field | Show on map | Sonapan Shrine |
| 13 | Netamnet Lightroot | Gloom's Lair | Hyrule Field | Show on map | Tenmaten Shrine |
| 14 | Netinet Lightroot | Grove of Time | Hyrule Field | Show on map | Teniten Shrine |
| 15 | Nihcayam Lightroot | Daphnes Canyon Mine | Hyrule Field | Show on map | Mayachin Shrine |
| 16 | Nisoij Lightroot | Plains Bargainer Statue | Hyrule Field | Show on map | Jiosin Shrine |
| 17 | Nogukoyk Lightroot | Great Abandoned Central Mine | Hyrule Field | Show on map | Kyokugon Shrine |
| 18 | Nojoj Lightroot | Crenel Canyon Mine | Hyrule Field | Show on map | Jojon Shrine |
| 19 | Nuzimak Lightroot | Grove of Time | Hyrule Field | Show on map | Kamizun Shrine |
| 20 | Oyimay Lightroot | Applean Grove | Hyrule Field | Show on map | Yamiyo Shrine |
| 21 | Sikurukam Lightroot | Rhoam Canyon Mine | Hyrule Field | Show on map | Makurukis Shrine |
| 22 | Sinonoyk Lightroot | Forgotten Foundation | Hyrule Field | Show on map | Kyononis Shrine |
| 23 | Stakijat Lightroot | Plains Bargainer Statue | Hyrule Field | Show on map | Tajikats Shrine |
| 24 | Tikanur Lightroot | Rhoam Canyon Mine | Hyrule Field | Show on map | Runakit Shrine |
| 25 | Zi-ner Lightroot | Crenel Canyon Mine | Hyrule Field | Show on map | Ren-iz Shrine |
Gerudo (16)
Click “Show on map” to move the map above to that spot.
| # | Lightroot | Depths landmark | Region | Location | Shrine above it |
|---|---|---|---|---|---|
| 1 | Amakawis Lightroot | South Lomei Depths Labyrinth | Gerudo | Show on map | Siwakama Shrine |
| 2 | Gataharak Lightroot | Gerudo Underground Cemetery | Gerudo | Show on map | Karahatag Shrine |
| 3 | Gonatoyrim Lightroot | Gerudo Dark Skeleton | Gerudo | Show on map | Miryotanog Shrine |
| 4 | Gonatoyros Lightroot | Abandoned Gerudo Mine | Gerudo | Show on map | Soryotanog Shrine |
| 5 | Jadukakar Lightroot | Nabooru Canyon Mine | Gerudo | Show on map | Rakakudaj Shrine |
| 6 | Kasari Lightroot | Gerudo Underground Cemetery | Gerudo | Show on map | Irasak Shrine |
| 7 | Kawatik Lightroot | Granajh Canyon Mine | Gerudo | Show on map | Kitawak Shrine |
| 8 | Kawiraus Lightroot | Abandoned Kara Kara Mine | Gerudo | Show on map | Suariwak Shrine |
| 9 | Kimakarut Lightroot | Abandoned Kara Kara Mine | Gerudo | Show on map | Turakamik Shrine |
| 10 | Mihcihc Lightroot | Abandoned Kara Kara Mine | Gerudo | Show on map | Chichim Shrine |
| 11 | Mustuto Lightroot | Gerudo Canyon Mine | Gerudo | Show on map | Otutsum Shrine |
| 12 | Rasinaduk Lightroot | Abandoned Gerudo Mine | Gerudo | Show on map | Kudanisar Shrine |
| 13 | Sisustom Lightroot | South Lomei Depths Labyrinth | Gerudo | Show on map | Motsusis Shrine |
| 14 | Stamayam Lightroot | Agaat Canyon Mine | Gerudo | Show on map | Mayamats Shrine |
| 15 | Tatayam Lightroot | Abandoned Kara Kara Mine | Gerudo | Show on map | Mayatat Shrine |
| 16 | Umamustor Lightroot | Abandoned Kara Kara Mine | Gerudo | Show on map | Rotsumamu Shrine |
Eldin (14)
Click “Show on map” to move the map above to that spot.
| # | Lightroot | Depths landmark | Region | Location | Shrine above it |
|---|---|---|---|---|---|
| 1 | Anonisik Lightroot | Abandoned Lanayru Mine | Eldin | Show on map | Kisinona Shrine |
| 2 | Cugukaram Lightroot | Abandoned Eldin Mine | Eldin | Show on map | Marakuguc Shrine |
| 3 | Gedihcayam Lightroot | Ancient Underground Fortress | Eldin | Show on map | Mayachideg Shrine |
| 4 | Katenim Lightroot | Gleeok Den | Eldin | Show on map | Minetak Shrine |
| 5 | Katijabis Lightroot | Scorching Coliseum | Eldin | Show on map | Sibajitak Shrine |
| 6 | Katoij Lightroot | Scorching Coliseum | Eldin | Show on map | Jiotak Shrine |
| 7 | Kawamit Lightroot | Abandoned Eldin Mine | Eldin | Show on map | Timawak Shrine |
| 8 | Kayam Lightroot | Eldin Dark Skeleton | Eldin | Show on map | Mayak Shrine |
| 9 | Kisomom Lightroot | Rok Grove | Eldin | Show on map | Momosik Shrine |
| 10 | Misisi Lightroot | Scorching Coliseum | Eldin | Show on map | Isisim Shrine |
| 11 | Mustis Lightroot | Scorching Coliseum | Eldin | Show on map | Sitsum Shrine |
| 12 | Nipahsom Lightroot | Ancient Underground Fortress | Eldin | Show on map | Moshapin Shrine |
| 13 | Tayamik Lightroot | Akkala House of Bones | Eldin | Show on map | Kimayat Shrine |
| 14 | Uukukis Lightroot | Gleeok Den | Eldin | Show on map | Sikukuu Shrine |
Necluda (14)
Click “Show on map” to move the map above to that spot.
| # | Lightroot | Depths landmark | Region | Location | Shrine above it |
|---|---|---|---|---|---|
| 1 | Arusakam Lightroot | Abandoned Kakariko Mine | Necluda | Show on map | Makasura Shrine |
| 2 | Busus Lightroot | Right-Arm Depot | Necluda | Show on map | Susub Shrine |
| 3 | Kimimadena Lightroot | Walnot Canyon Mine | Necluda | Show on map | Anedamimik Shrine |
| 4 | Kimnaz Lightroot | Abandoned Hateno Mine | Necluda | Show on map | Zanmik Shrine |
| 5 | Kisihayam Lightroot | Retsam Grove | Necluda | Show on map | Mayahisik Shrine |
| 6 | Kotimab Lightroot | Dunsel Canyon Mine | Necluda | Show on map | Bamitok Shrine |
| 7 | Mimufis Lightroot | Abandoned Lurelin Mine | Necluda | Show on map | Sifumim Shrine |
| 8 | Ni-iraram Lightroot | Lone Island Coliseum | Necluda | Show on map | Marari-in Shrine |
| 9 | Sijotu Lightroot | Dracozu Altar | Necluda | Show on map | Utojis Shrine |
| 10 | Sohse Lightroot | Dueling Canyons Mine | Necluda | Show on map | Eshos Shrine |
| 11 | U-u-ujoj Lightroot | Floria Canyon Mine | Necluda | Show on map | Joju-u-u Shrine |
| 12 | Uisihcoj Lightroot | Construct Factory | Necluda | Show on map | Jochisiu Shrine |
| 13 | Uogoj Lightroot | Canyon of Awakening Mine | Necluda | Show on map | Jogou Shrine |
| 14 | Yikot Lightroot | Meda Lavafalls | Necluda | Show on map | Tokiy Shrine |
Lanayru (13)
Click “Show on map” to move the map above to that spot.
| # | Lightroot | Depths landmark | Region | Location | Shrine above it |
|---|---|---|---|---|---|
| 1 | A-nehi Lightroot | Ploymus Canyon Mine | Lanayru | Show on map | Ihen-a Shrine |
| 2 | Kawagom Lightroot | Abandoned Lanayru Mine | Lanayru | Show on map | Mogawak Shrine |
| 3 | Kegopa Lightroot | Ruto Canyon Mine | Lanayru | Show on map | Apogek Shrine |
| 4 | Korakut Lightroot | Applean Grove | Lanayru | Show on map | Tukarok Shrine |
| 5 | Korom Lightroot | Plains Bargainer Statue | Lanayru | Show on map | Morok Shrine |
| 6 | Kuzimoy Lightroot | Lanayru Canyon Mine | Lanayru | Show on map | Yomizuk Shrine |
| 7 | Migo-o Lightroot | Canyon of Awakening Mine | Lanayru | Show on map | O-ogim Shrine |
| 8 | Sekioam Lightroot | Tabahl Grove | Lanayru | Show on map | Maoikes Shrine |
| 9 | Siakij Lightroot | Walnot Canyon Mine | Lanayru | Show on map | Jikais Shrine |
| 10 | Takaruk Lightroot | Tabahl Grove | Lanayru | Show on map | Kurakat Shrine |
| 11 | Uasnoj Lightroot | Crenel Canyon Mine | Lanayru | Show on map | Jonsau Shrine |
| 12 | Uinoj Lightroot | Abandoned Lanayru Mine | Lanayru | Show on map | Joniu Shrine |
| 13 | Usukaz Lightroot | Bargainer Statue | Lanayru | Show on map | Zakusu Shrine |
Akkala (10)
Click “Show on map” to move the map above to that spot.
| # | Lightroot | Depths landmark | Region | Location | Shrine above it |
|---|---|---|---|---|---|
| 1 | Agihi-ihcoj Lightroot | Abandoned Tarrey Mine | Akkala | Show on map | Jochi-ihiga Shrine |
| 2 | Akinatanis Lightroot | Wellspring of Power | Akkala | Show on map | Sinatanika Shrine |
| 3 | Kawikatisar Lightroot | Abandoned Tarrey Mine | Akkala | Show on map | Rasitakiwak Shrine |
| 4 | Kawisar Lightroot | Lomei Depths Labyrinth | Akkala | Show on map | Rasiwak Shrine |
| 5 | Kimimeg Lightroot | Rist Mine | Akkala | Show on map | Gemimik Shrine |
| 6 | Kuhsagi Lightroot | Lomei Depths Labyrinth | Akkala | Show on map | Igashuk Shrine |
| 7 | Niuzimod Lightroot | Ancient Underground Fortress | Akkala | Show on map | Domizuin Shrine |
| 8 | Sikutamak Lightroot | Akkala House of Bones | Akkala | Show on map | Kamatukis Shrine |
| 9 | Sisinatag Lightroot | Ploymus Canyon Mine | Akkala | Show on map | Gatanisis Shrine |
| 10 | Ui-ihcoj Lightroot | Wellspring of Power | Akkala | Show on map | Jochi-iu Shrine |
Hebra (9)
Click “Show on map” to move the map above to that spot.
| # | Lightroot | Depths landmark | Region | Location | Shrine above it |
|---|---|---|---|---|---|
| 1 | Ikatoayam Lightroot | North Lomei Depths Labyrinth | Hebra | Show on map | Mayaotaki Shrine |
| 2 | Kato Lightroot | Sherfin's Lavafalls | Hebra | Show on map | Otak Shrine |
| 3 | Mu-ufatur Lightroot | Hebra Canyon Mine | Hebra | Show on map | Rutafu-um Shrine |
| 4 | Muihcoro Lightroot | Cliff Bargainer Statue | Hebra | Show on map | Orochium Shrine |
| 5 | Muotue Lightroot | Goflam's Lavafalls | Hebra | Show on map | Eutoum Shrine |
| 6 | Narusis Lightroot | Hebra Canyon Mine | Hebra | Show on map | Sisuran Shrine |
| 7 | Nupisoyuat Lightroot | Sturnida Lavafalls | Hebra | Show on map | Tauyosipun Shrine |
| 8 | U-nazohso Lightroot | North Lomei Depths Labyrinth | Hebra | Show on map | Oshozan-u Shrine |
| 9 | Worihas Lightroot | Corvash Canyon Mine | Hebra | Show on map | Sahirow Shrine |
Tabantha (9)
Click “Show on map” to move the map above to that spot.
| # | Lightroot | Depths landmark | Region | Location | Shrine above it |
|---|---|---|---|---|---|
| 1 | Aduon Lightroot | Hebra Canyon Mine | Tabantha | Show on map | Nouda Shrine |
| 2 | Kataki Lightroot | Cuho Canyon Mine | Tabantha | Show on map | Ikatak Shrine |
| 3 | Kawakarut Lightroot | Gerudo Canyon Mine | Tabantha | Show on map | Turakawak Shrine |
| 4 | Kawumoro Lightroot | Abandoned Hebra Mine | Tabantha | Show on map | Oromuwak Shrine |
| 5 | Koro-nui Lightroot | Cuho Canyon Mine | Tabantha | Show on map | Iun-orok Shrine |
| 6 | Sasag Lightroot | Gerudo Canyon Mine | Tabantha | Show on map | Gasas Shrine |
| 7 | Sikatag Lightroot | Abandoned Hebra Mine | Tabantha | Show on map | Gatakis Shrine |
| 8 | So-oaw Lightroot | Abandoned Hebra Mine | Tabantha | Show on map | Wao-os Shrine |
| 9 | Yisuayam Lightroot | Cliff Bargainer Statue | Tabantha | Show on map | Mayausiy Shrine |
Great Hyrule Forest (7)
Click “Show on map” to move the map above to that spot.
| # | Lightroot | Depths landmark | Region | Location | Shrine above it |
|---|---|---|---|---|---|
| 1 | Eknupup Lightroot | Korok Grove | Great Hyrule Forest | Show on map | Pupunke Shrine |
| 2 | Nikakik Lightroot | Drena Canyon Mine | Great Hyrule Forest | Show on map | Kikakin Shrine |
| 3 | Ramobnukas Lightroot | Forest Coliseum | Great Hyrule Forest | Show on map | Sakunbomar Shrine |
| 4 | Rikonasum Lightroot | Korok Grove | Great Hyrule Forest | Show on map | Musanokir Shrine |
| 5 | Sijnin Lightroot | Korok Grove | Great Hyrule Forest | Show on map | Ninjis Shrine |
| 6 | Uihcoke Lightroot | Minshi Grove | Great Hyrule Forest | Show on map | Ekochiu Shrine |
| 7 | Uoyoyuik Lightroot | Cliff Bargainer Statue | Great Hyrule Forest | Show on map | Kiuyoyou Shrine |
Faron (3)
Click “Show on map” to move the map above to that spot.
| # | Lightroot | Depths landmark | Region | Location | Shrine above it |
|---|---|---|---|---|---|
| 1 | Kohsustu Lightroot | Dracozu Altar | Faron | Show on map | Utsushok Shrine |
| 2 | Muokuij Lightroot | Construct Factory | Faron | Show on map | Jiukoum Shrine |
| 3 | Nikohsi Lightroot | Pappetto Grove | Faron | Show on map | Ishokin Shrine |
What do you get for lighting all 120?
The Dispelling Darkness Medal. The game describes it as “an award for one who has conquered the darkness by lighting up every lightroot. This special item commemorates blessings received.” When the last one is lit, the game says: “You found every lightroot. They have dispelled all of the darkness.”
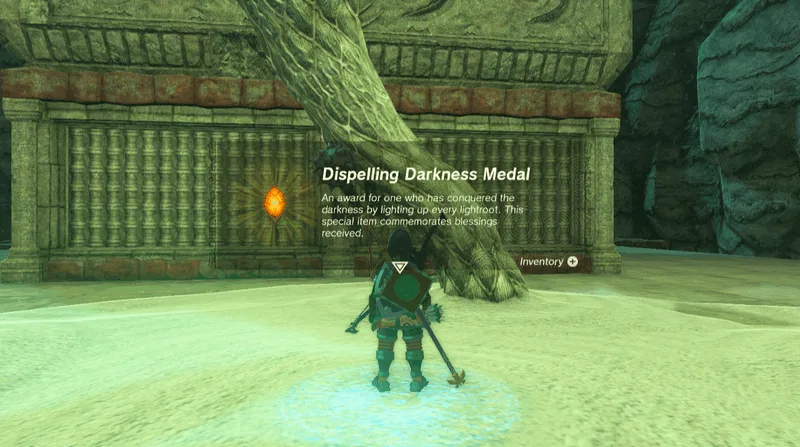
The Dispelling Darkness Medal and the six Monster Medals are compared on the Monster Medals page.
See also
More in the Depths: all 36 chasms, Yiga schematics, Frox locations and Old Map treasures.
While exploring, collect pristine weapons: activate nearby Lightroots, then check the dark figures holding weapons on stone mounds.
FAQ
How many Lightroots are there in Tears of the Kingdom?
How do you find Lightroots?
What do you get for lighting every Lightroot?
Related Articles
guides
TotK Abandoned Mines: All 10 Forge Constructs and Trades
The ten abandoned mines in the Tears of the Kingdom Depths: where they are, Forge Construct trade rates, the Schema Stone at each mine and where Kohga fights.
guides
TotK Coliseums: All 6 Depths Coliseums, Enemies and Rewards
All six Depths coliseums in Tears of the Kingdom: where each is, the nearest chasm, enemies and rounds, the headgear in each chest, and Blood Moon resets.
guides
TotK Weapon Farming: Royal Guard, Royal, Savage Lynel Bow Spots
Tears of the Kingdom weapon farming: Royal Guard gear in the Hyrule Castle Sanctum, pristine Depths spirits, Black Hinox Royal Bows, Lynel bows, Blood Moon resets.
Was this helpful?
Thanks for the feedback!