

TotK Bubbul Gems: All 147 Bubbulfrogs and Koltin Rewards
All 147 Bubbulfrogs in Tears of the Kingdom with cave map locations, plus every reward Koltin trades for Bubbul Gems and the running total.
Every cave in Tears of the Kingdom hides one Bubbulfrog, and every Bubbulfrog drops one Bubbul Gem. This page lists all 147 frogs by region with the cave each lives in, then everything Koltin gives you for the gems.
How many Bubbul Gems are there?
| Count | |
|---|---|
| Bubbulfrogs in the game data | 147 |
| Caves (one frog each) | 147 |
| Frogs whose cave the game data names | 112 |
| Frogs paired with a cave by distance (marked ≈) | 35 |
| Gems for everything in Koltin’s shop | 46 |
| Gems for the final reward, Koltin’s Fabric | 147 |
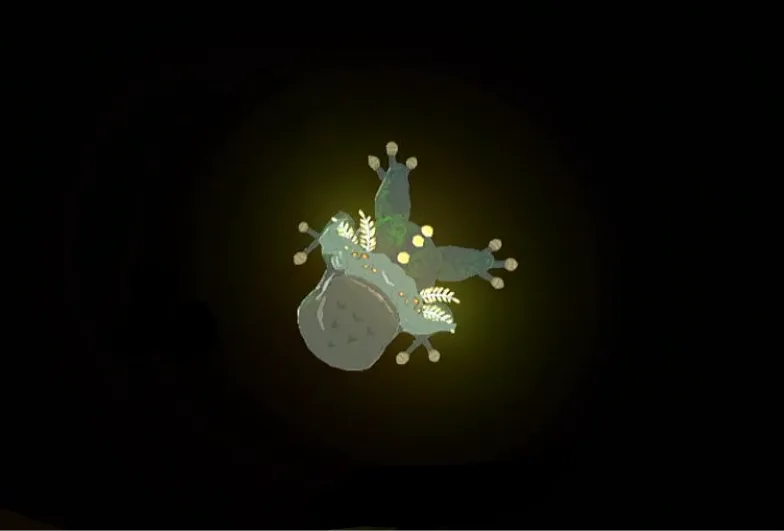
Where is every Bubbulfrog?
Loading the terrain map… slow connections can take a few seconds.
Some terrain tiles failed to load.
Drag to move and zoom in to tell the points apart; on a computer, click the map first and the mouse wheel zooms it. Ticks are saved in this browser only; no account is needed.
Progress cannot be saved in this browser session.
Each row is one frog. “Show on map” marks the frog itself, inside the cave, not the entrance; the entrances are on the cave page.
Gerudo (23)
Click “Show on map” to move the map above to that spot.
| # | Cave | Nearest landmark | Region | Location |
|---|---|---|---|---|
| 1 | Ancient Altar Ruins | East Barrens | Gerudo | Show on map |
| 2 | Ancient Prison Ruins ≈ | Palu Wasteland | Gerudo | Show on map |
| 3 | Central Gerudo Cave | Gerudo Desert | Gerudo | Show on map |
| 4 | East Gerudo Ruins Cave | East Gerudo Ruins | Gerudo | Show on map |
| 5 | Gerudo Canyon Mine | Gerudo Canyon Stable | Gerudo | Show on map |
| 6 | Gerudo Great Skeleton | Dragon's Exile | Gerudo | Show on map |
| 7 | Gerudo Sanctuary | North Gerudo Ruins | Gerudo | Show on map |
| 8 | Koukot Plateau Cave | Koukot Plateau | Gerudo | Show on map |
| 9 | Lower Spectacle Rock Cave | Stalry Plateau | Gerudo | Show on map |
| 10 | Meadela's Mantle Cave | Meadela's Mantle | Gerudo | Show on map |
| 11 | Mount Nabooru Cave | Mount Nabooru | Gerudo | Show on map |
| 12 | Mount Nabooru South Cave | Gerudo Canyon Pass | Gerudo | Show on map |
| 13 | Mystathi's Shelf Cave | Gerudo Summit | Gerudo | Show on map |
| 14 | Oasis Source | Kara Kara Bazaar | Gerudo | Show on map |
| 15 | Quicksand Lake Cave | Palu Wasteland | Gerudo | Show on map |
| 16 | South Gerudo Cave | East Barrens | Gerudo | Show on map |
| 17 | Spectacle Rock Cave | Spectacle Rock | Gerudo | Show on map |
| 18 | Statue of the Eighth Heroine Cave | Statue of the Eighth Heroine | Gerudo | Show on map |
| 19 | Taafei Hill Cave | Zirco Mesa | Gerudo | Show on map |
| 20 | Tamio River Downstream Cave | Laparoh Mesa | Gerudo | Show on map |
| 21 | Valley of Silent Statues | Gerudo Town | Gerudo | Show on map |
| 22 | West Gerudo Underground Ruins | West Gerudo Ruins | Gerudo | Show on map |
| 23 | Yiga Blademaster Station | Zirco Mesa | Gerudo | Show on map |
Necluda (23)
Click “Show on map” to move the map above to that spot.
| # | Cave | Nearest landmark | Region | Location |
|---|---|---|---|---|
| 1 | Atun Valley Cave | Atun Valley | Necluda | Show on map |
| 2 | Byroad to Lanayru Wetlands | Rikoka Hills | Necluda | Show on map |
| 3 | Calora Lake Cave | Rodai Lake | Necluda | Show on map |
| 4 | Cape Cales Cliffbase Cave | Cape Cales | Necluda | Show on map |
| 5 | Corta Lake Cave | Riola Spring | Necluda | Show on map |
| 6 | Cucco Hideaway ≈ | Pillars of Levia | Necluda | Show on map |
| 7 | Deepback Bay Cave | Solewood Range | Necluda | Show on map |
| 8 | Dueling Peaks North Cave | Dueling Peaks | Necluda | Show on map |
| 9 | Dueling Peaks South Cave | Dueling Peaks | Necluda | Show on map |
| 10 | Eventide Island Cave ≈ | Koholit Rock | Necluda | Show on map |
| 11 | Floria River Upstream Excavation ≈ | Harker Lake | Necluda | Show on map |
| 12 | Kakariko Village Cave | East Hill | Necluda | Show on map |
| 13 | Lanayru Road East Cave | Purifier Lake | Necluda | Show on map |
| 14 | Mapla Point Cave | Mapla Point | Necluda | Show on map |
| 15 | Mount Dunsel Cave | Mount Dunsel | Necluda | Show on map |
| 16 | Mount Floria Cave | Mount Floria | Necluda | Show on map |
| 17 | Oakle's Navel Cave | Mount Rozudo | Necluda | Show on map |
| 18 | Rassla Lake Cave ≈ | Ubota Point | Necluda | Show on map |
| 19 | Retsam Forest Cave ≈ | Retsam Forest | Necluda | Show on map |
| 20 | Rodai Lakefront Tunnel | Rodai Lake | Necluda | Show on map |
| 21 | Sarjon Woods Cave ≈ | Keelay Plain | Necluda | Show on map |
| 22 | Tobio's Hollow Cave ≈ | Spring of Courage | Necluda | Show on map |
| 23 | Ubota Point Cave | Lakeside Stable | Necluda | Show on map |
Lanayru (22)
Click “Show on map” to move the map above to that spot.
| # | Cave | Nearest landmark | Region | Location |
|---|---|---|---|---|
| 1 | Ancient Zora Waterworks ≈ | East Reservoir Lake | Lanayru | Show on map |
| 2 | Boné Pond East Cave ≈ | Zora River | Lanayru | Show on map |
| 3 | Cave Under Zora's Domain | Zora's Domain | Lanayru | Show on map |
| 4 | Fort Hateno Cave | Fort Hateno | Lanayru | Show on map |
| 5 | Horon Lagoon Cave | Horon Lagoon | Lanayru | Show on map |
| 6 | Lanayru Road South Cave ≈ | Robred Dropoff | Lanayru | Show on map |
| 7 | Luto's Channel ≈ | Rutala River | Lanayru | Show on map |
| 8 | Oren Bridge Cave ≈ | Oren Bridge | Lanayru | Show on map |
| 9 | Ploymus Mountain Cave ≈ | Lulu Lake | Lanayru | Show on map |
| 10 | Pristine Sanctum ≈ | Lulu Lake | Lanayru | Show on map |
| 11 | Ralis Channel ≈ | Veiled Falls | Lanayru | Show on map |
| 12 | Rebonae Bridge Cave | Rebonae Bridge | Lanayru | Show on map |
| 13 | Reservoir Lakefront Cavern ≈ | Shatterback Point | Lanayru | Show on map |
| 14 | Robred Dropoff Cave ≈ | Robred Dropoff | Lanayru | Show on map |
| 15 | Sahasra Slope Cave | Sahasra Slope | Lanayru | Show on map |
| 16 | Tabahl Woods Cave ≈ | Zora River | Lanayru | Show on map |
| 17 | Tarm Point Cave ≈ | Lodrum Headland | Lanayru | Show on map |
| 18 | Upland Zorana Byroad ≈ | Zora River | Lanayru | Show on map |
| 19 | Upland Zorana Foothill Cave ≈ | Upland Zorana | Lanayru | Show on map |
| 20 | Upland Zorana Mountainside Cave ≈ | Zora River | Lanayru | Show on map |
| 21 | Upland Zorana Summit Cave | Zora River | Lanayru | Show on map |
| 22 | Walnot Mountain Cave | Walnot Mountain | Lanayru | Show on map |
Hyrule Field (21)
Click “Show on map” to move the map above to that spot.
| # | Cave | Nearest landmark | Region | Location |
|---|---|---|---|---|
| 1 | Ancient Tree Stump Cave | Ancient Tree Stump | Hyrule Field | Show on map |
| 2 | Coliseum Ruins Cave | Coliseum Ruins | Hyrule Field | Show on map |
| 3 | Cora Lakefront Cave | Cora Lake | Hyrule Field | Show on map |
| 4 | Crenel Hills Cave | Crenel Hills | Hyrule Field | Show on map |
| 5 | Crenel Peak Cave | Crenel Peak | Hyrule Field | Show on map |
| 6 | Great Plateau Foothill Cave | Forest of Spirits | Hyrule Field | Show on map |
| 7 | Lake Hylia Whirlpool Cave | Lake Hylia | Hyrule Field | Show on map |
| 8 | Lindor's Brow Cave | Lindor's Brow | Hyrule Field | Show on map |
| 9 | North Hyrule Plain Cave | North Hyrule Plain | Hyrule Field | Show on map |
| 10 | Passeri Greenbelt Cave | West Castle Town | Hyrule Field | Show on map |
| 11 | Ranch Ruins Cave | Mabe Village Ruins | Hyrule Field | Show on map |
| 12 | River of the Dead Waterfall Cave | Mount Hylia | Hyrule Field | Show on map |
| 13 | Royal Hidden Passage | Hyrule Castle | Hyrule Field | Show on map |
| 14 | Sage Temple Cave ≈ | Sage Temple Ruins | Hyrule Field | Show on map |
| 15 | Satori Mountain Cave | Satori Mountain | Hyrule Field | Show on map |
| 16 | Satori Mountain Foothill Cave | Satori Mountain | Hyrule Field | Show on map |
| 17 | Shrine of Resurrection ≈ | River of the Dead | Hyrule Field | Show on map |
| 18 | Stalry Plateau Cave | Mount Hylia | Hyrule Field | Show on map |
| 19 | Tanagar Canyon East Cave | Tanagar Canyon | Hyrule Field | Show on map |
| 20 | Thundra Plateau Cave | Thundra Plateau | Hyrule Field | Show on map |
| 21 | Whistling Hill Cave | Whistling Hill | Hyrule Field | Show on map |
Eldin (18)
Click “Show on map” to move the map above to that spot.
| # | Cave | Nearest landmark | Region | Location |
|---|---|---|---|---|
| 1 | Cephla Lake Cave ≈ | Lake Intenoch | Eldin | Show on map |
| 2 | Death Mountain East Tunnel | Death Mountain | Eldin | Show on map |
| 3 | Death Mountain Foothill Cave | Death Mountain West Site | Eldin | Show on map |
| 4 | Death Mountain West Tunnel | Death Mountain West Site | Eldin | Show on map |
| 5 | Deplian Badlands Cave | Deplian Badlands | Eldin | Show on map |
| 6 | East Restaurant Cave | Gortram Cliff | Eldin | Show on map |
| 7 | Foothill Monster Den | Lake Intenoch | Eldin | Show on map |
| 8 | Gorko Tunnel | Darb Pond | Eldin | Show on map |
| 9 | Goronbi River Cave | Stolock Bridge | Eldin | Show on map |
| 10 | Isle of Rabac Gallery | YunoboCo HQ | Eldin | Show on map |
| 11 | Lake Darman Monster Den | Death Caldera | Eldin | Show on map |
| 12 | Lake Ferona Cave | Eldin Canyon | Eldin | Show on map |
| 13 | Lake Intenoch Cave | Darb Pond | Eldin | Show on map |
| 14 | Lizard's Burrow | Lake Darman | Eldin | Show on map |
| 15 | Southern Mine ≈ | Southern Mine | Eldin | Show on map |
| 16 | West Restaurant Cave | Goronbi River | Eldin | Show on map |
| 17 | YunoboCo HQ East Cave | YunoboCo HQ | Eldin | Show on map |
| 18 | YunoboCo HQ South Cave | YunoboCo HQ | Eldin | Show on map |
Hebra (12)
Click “Show on map” to move the map above to that spot.
| # | Cave | Nearest landmark | Region | Location |
|---|---|---|---|---|
| 1 | East Biron Snowshelf Cave ≈ | Biron Snowshelf | Hebra | Show on map |
| 2 | Hebra Great Skeleton | Hebra North Summit | Hebra | Show on map |
| 3 | Hebra Headspring Cave | Hebra Headspring | Hebra | Show on map |
| 4 | Hebra Mountains Northwest Cave | Selmie's Spot | Hebra | Show on map |
| 5 | Hebra South Summit Cave | Talonto Peak | Hebra | Show on map |
| 6 | Icefall Foothills Cave | Icefall Foothills | Hebra | Show on map |
| 7 | Lake Kilsie Cave | Lake Kilsie | Hebra | Show on map |
| 8 | Mount Drena Foothill Cave | Great Fairy Fountain | Hebra | Show on map |
| 9 | North Biron Snowshelf Cave | Biron Snowshelf | Hebra | Show on map |
| 10 | Pikida Stonegrove Northwest Cave | Pikida Stonegrove | Hebra | Show on map |
| 11 | Rospro Pass Cave | Hebra South Summit | Hebra | Show on map |
| 12 | Talonto Peak Cave | Talonto Peak | Hebra | Show on map |
Akkala (8)
Click “Show on map” to move the map above to that spot.
| # | Cave | Nearest landmark | Region | Location |
|---|---|---|---|---|
| 1 | Akkala Citadel Ruins Cave | Akkala Citadel Ruins | Akkala | Show on map |
| 2 | Akkala Citadel Ruins Summit Cave | Akkala Citadel Ruins | Akkala | Show on map |
| 3 | Construction Site Cave | Hudson Construction Site | Akkala | Show on map |
| 4 | North Akkala Beach Cave | Lomei Labyrinth Island | Akkala | Show on map |
| 5 | Skull Lake Cave | Tempest Gulch | Akkala | Show on map |
| 6 | Tarrey Town Tunnel | Tarrey Town | Akkala | Show on map |
| 7 | Ulria Grotto East Cave | Ulria Grotto | Akkala | Show on map |
| 8 | Ulria Grotto South Cave | Ulria Grotto | Akkala | Show on map |
Tabantha (8)
Click “Show on map” to move the map above to that spot.
| # | Cave | Nearest landmark | Region | Location |
|---|---|---|---|---|
| 1 | Ancient Columns Cave | Ancient Columns | Tabantha | Show on map |
| 2 | Brightcap Cave | Strock Lake | Tabantha | Show on map |
| 3 | Gisa Crater Cave | Gisa Crater | Tabantha | Show on map |
| 4 | Kopeeki Drifts Cave | Kopeeki Drifts | Tabantha | Show on map |
| 5 | Sturnida Springs Cave | Lake Kilsie | Tabantha | Show on map |
| 6 | Tabantha Hills Cave | Tama Pond | Tabantha | Show on map |
| 7 | Tanagar Canyon West Cave | Piper Ridge | Tabantha | Show on map |
| 8 | West Lake Totori Cave | Flight Range | Tabantha | Show on map |
Faron (5)
Click “Show on map” to move the map above to that spot.
| # | Cave | Nearest landmark | Region | Location |
|---|---|---|---|---|
| 1 | Finra Woods Excavation Site ≈ | Pagos Woods | Faron | Show on map |
| 2 | Komo Shoreline Cave ≈ | Highland Stable | Faron | Show on map |
| 3 | Pagos Woods Excavation Site ≈ | Pagos Woods | Faron | Show on map |
| 4 | Popla Foothills Excavation Site | Deya Lake | Faron | Show on map |
| 5 | Puffer Beach Overhead Cave | Puffer Beach | Faron | Show on map |
Great Sky Island (4)
Click “Show on map” to move the map above to that spot.
| # | Cave | Nearest landmark | Region | Location |
|---|---|---|---|---|
| 1 | Bottomless Cave ≈ | Great Sky Island | Great Sky Island | Show on map |
| 2 | Mining Cave ≈ | Great Sky Island | Great Sky Island | Show on map |
| 3 | Pit Cave ≈ | Great Sky Island | Great Sky Island | Show on map |
| 4 | Pondside Cave ≈ | Great Sky Island | Great Sky Island | Show on map |
Great Hyrule Forest (3)
Click “Show on map” to move the map above to that spot.
| # | Cave | Nearest landmark | Region | Location |
|---|---|---|---|---|
| 1 | Pico Pond Cave | Pico Pond | Great Hyrule Forest | Show on map |
| 2 | Rauru Hillside Cave | Rauru Settlement Ruins | Great Hyrule Forest | Show on map |
| 3 | Yiga Clan Maritta Branch | Aldor Foothills | Great Hyrule Forest | Show on map |
The regions here are where each frog is, so a few counts differ from the cave page, which goes by the entrance.
What does Koltin give for Bubbul Gems?
Kilton’s brother Koltin collects Bubbul Gems. Your first gem goes to him in The Hunt for Bubbul Gems!; after that, in The Search for Koltin, each gem you hand over counts towards the next reward.
| # | Reward | Gems | Total |
|---|---|---|---|
| 1 | Bokoblin Mask | 1 | 1 |
| 2 | Moblin Mask | 2 | 3 |
| 3 | Hinox Toenail ×3 | 2 | 5 |
| 4 | Mystic Robe | 3 | 8 |
| 5 | Fire Keese Eyeball ×8 | 3 | 11 |
| 6 | Lizalfos Mask | 3 | 14 |
| 7 | Ice-Breath Lizalfos Tail ×8 | 3 | 17 |
| 8 | Mystic Trousers | 4 | 21 |
| 9 | White-Maned Lynel Mace Horn | 4 | 25 |
| 10 | Horriblin Mask | 4 | 29 |
| 11 | Gleeok Wing ×2 | 4 | 33 |
| 12 | Lynel Mask | 4 | 37 |
| 13 | Gleeok Thunder Horn ×3 | 4 | 41 |
| 14 | Mystic Headpiece | 5 | 46 |
| 15 | Koltin’s Fabric | 101 | 147 |
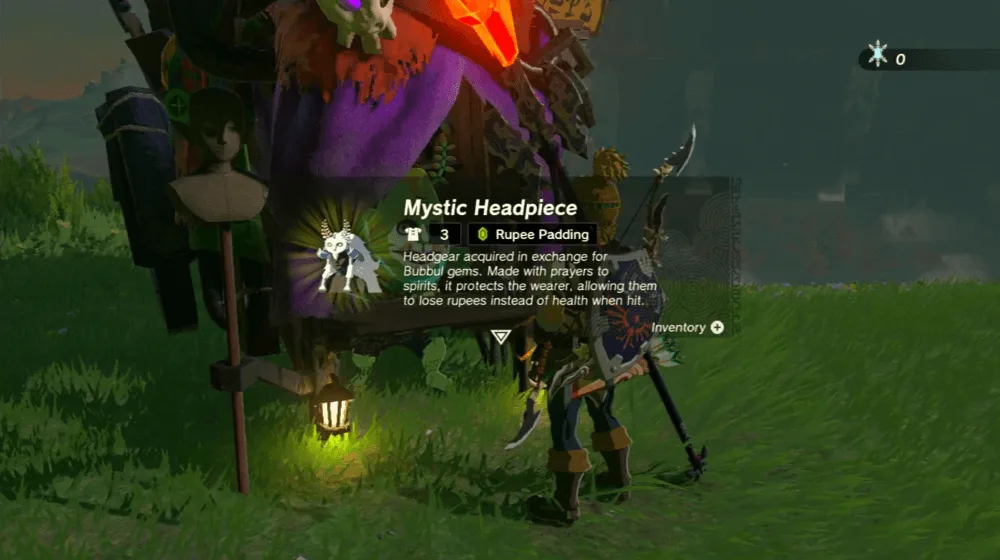
The Mystic set cannot be upgraded; see the Mystic set. Koltin’s Fabric is a paraglider fabric.
Whether the five monster masks really let you blend in is covered on jewelry and monster masks.
Where do I find Koltin?
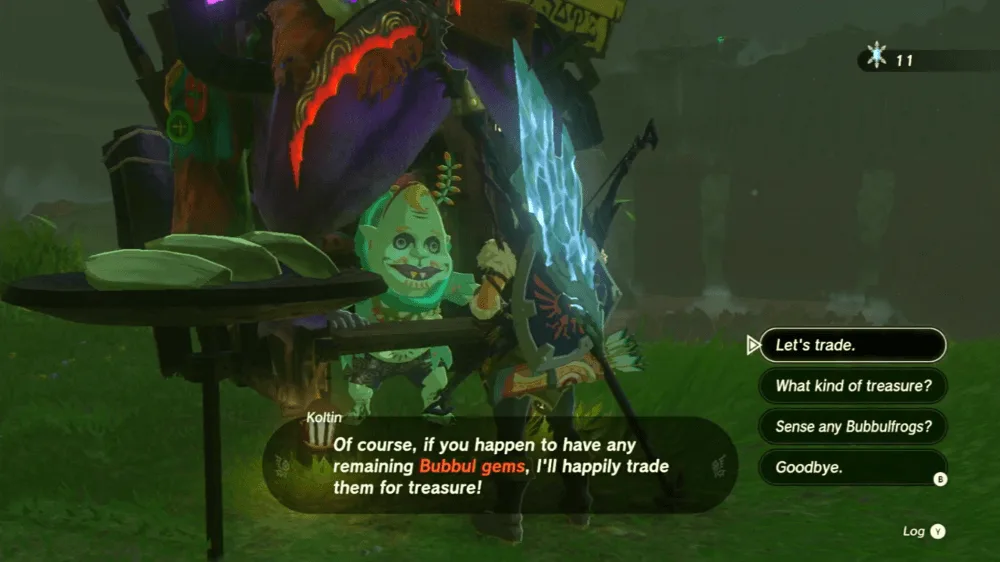
Koltin and Kilton stand by their balloon near Woodland Stable, at Pico Pond (Show on map). Talking to Kilton starts The Hunt for Bubbul Gems!, and Pico Pond Cave next to them has a Bubbulfrog for your first gem. After that Koltin travels: Kilton, who moves to Tarrey Town, tells you where he is, and he can also turn up anywhere after 9 pm. The quest log puts it this way: Koltin “is traveling around Hyrule at night with his stall seeking out Bubbul gems”.
Video walkthrough

See also
More to collect: all 147 caves, all 58 wells, the 31 Old Maps and every armor piece.
FAQ
How many Bubbul Gems are there in Tears of the Kingdom?
How many Bubbul Gems do I need?
Where is Koltin?
Does every cave have a Bubbulfrog?
Related Articles
guides
TotK Cherry Blossom Tree Locations: All 8 Trees
All 8 cherry-blossom trees in Tears of the Kingdom on a map. Offer a fruit at one and Satori marks every nearby cave with a pillar of light.
guides
TotK Caves Map: All 147 Cave Locations by Region
Map and list of all 147 Tears of the Kingdom caves by region: every entrance, the shrines, armor chests, Misko's treasures and monsters inside.
guides
Ocarina of Time Remake Big Poes: All 10 Locations and Ghost Shop Rewards
All ten Big Poe locations in the Ocarina of Time remake, how to make them appear on Epona, and Ghost Shop rewards: 30 rupees each, a bottle at 500 points.
Was this helpful?
Thanks for the feedback!