

TotK Dragons: Routes, Chasms and Dragon Parts
Where Farosh, Naydra, Dinraal and the Light Dragon fly in Tears of the Kingdom, which chasms they use, how to get each dragon part and what the parts are for.
Four dragons fly over Hyrule in Tears of the Kingdom: Dinraal (fire), Farosh (lightning), Naydra (ice) and the Light Dragon. None of them can be beaten, but every hit on the right body part knocks off a material. This page draws each route from the game’s own rail data, lists the chasms the three elemental dragons use, and covers every part: where it comes from, its fuse attack, cooking bonus and price.
Where do the four dragons fly?
Loading the terrain map… slow connections can take a few seconds.
Some terrain tiles failed to load.
- Dinraal (30)
- Farosh (21)
- Naydra (17)
- Light Dragon (52)
Drag to move and zoom in to tell the points apart; on a computer, click the map first and the mouse wheel zooms it. Ticks are saved in this browser only; no account is needed.
Progress cannot be saved in this browser session.
Each point is one point of the rail the dragon flies along, numbered in flying order; the filter picks one dragon. Switch to the Depths layer for the underground half of the three elemental loops, and to the sky layer for the Light Dragon’s high loop. Coordinates are X, Y as the in-game map shows them.
| Dragon | Comes out of | Surface route | Dives into | Nearest Skyview Tower to the exit |
|---|---|---|---|---|
| Dinraal | East Akkala Plains Chasm (4030, 2181) | Akkala coast, Skull Lake, Eldin’s Flank, Deplian Badlands, Thyphlo Ruins | Drenan Highlands Chasm (-0071, 2984) | Ulri Mountain, about 550 away |
| Farosh | East Gerudo Chasm (-2491, -3068) | Gerudo Canyon, Mount Nabooru, Stalry Plateau, Lake Hylia | Hills of Baumer Chasm (0222, -2119) | Gerudo Canyon, about 890 away |
| Naydra | Naydra Snowfield Chasm (3605, -1344) | Lanayru Range, Retsam Forest, Ebon Mountain, Stinger Cliffs, Meda Mountain, Oakle’s Navel, Bonooru’s Stand | East Hill Chasm (1974, -0846) | Mount Lanayru, about 250 away |
| Light Dragon | — | A clockwise loop around the whole map (below) | Never | — |
Distances are map units between the chasm and the tower markers. All chasms are on the chasm map; towers on the Skyview Tower page.
What does each route look like underground?
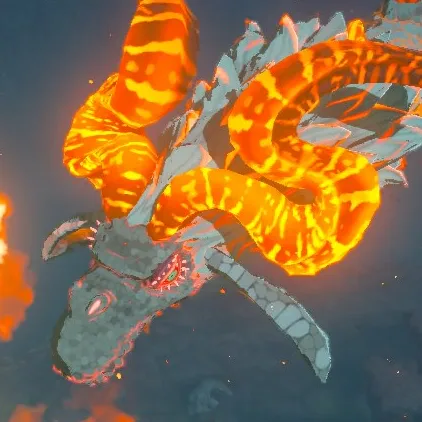
The three elemental dragons fly half their loop in the Depths, heading back toward the chasm they came out of.
| Dragon | Depths route, in order (the place on the surface above) |
|---|---|
| Dinraal | Drenan Highlands, the Deplian Badlands, Eldin Great Skeleton, Lake Darman, Gut Check Rock, Skull Lake, Malanya Spring, Bloodleaf Lake, East Akkala Plains |
| Farosh | Deya Village Ruins, Lake Hylia, Farosh Hills, Pagos Woods, Faron Woods, Cora Lake, Zokassa Ridge, Mount Granajh, Daval Peak, South Lomei Labyrinth, Champion’s Gate, East Gerudo Ruins |
| Naydra | East Hill, then from Quatta’s Shelf along the Rutala River, Rabia Plain, Trotter’s Downfall and Lanayru Road - East Gate back to Naydra Snowfield |
Dinraal flies highest of the three: over Skull Lake its rail rises to 830, briefly reaching sky height. Naydra peaks at 700 over the Cliffs of Quince and Farosh at 550 over Gerudo Canyon.
When do the dragons appear?
Always. The game places each dragon once and gives it a closed loop, so there is no time-of-day schedule: if you cannot see one, it is on another part of its loop, often in the Depths. Waiting at a chasm works because every elemental dragon passes through its two chasms on every lap.
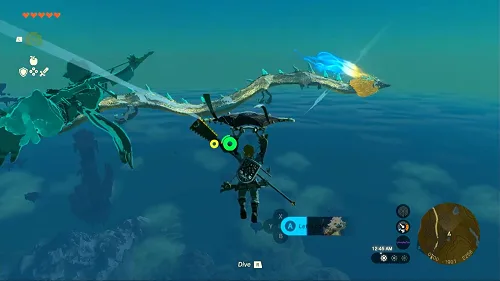
The Light Dragon has three loops in the data. The first is a short loop the game names after the first island, the path the dragon flies while you are still on the Great Sky Island. After that it flies a clockwise circuit around the whole map, through Eldin, Lanayru, Necluda, Gerudo Canyon, Hyrule Field, Tabantha, Hebra and Akkala. The circuit exists twice, high (altitude 1,600 to 2,370, in the sky layer) and low (700 to 1,000), and a story flag decides which one is active.
Which part drops from where?
| Part | How to get it | Fuse attack | Cooking: time added | Sells for |
|---|---|---|---|---|
| Scale | Hit the body | 16 (Light Dragon 12) | +1:00 | 150 |
| Claw (Light Dragon: Talon) | Hit a claw or foot | 18 (14) | +3:00 | 180 |
| Shard of Fang | Hit the head | 20 (16) | +10:00 | 250 |
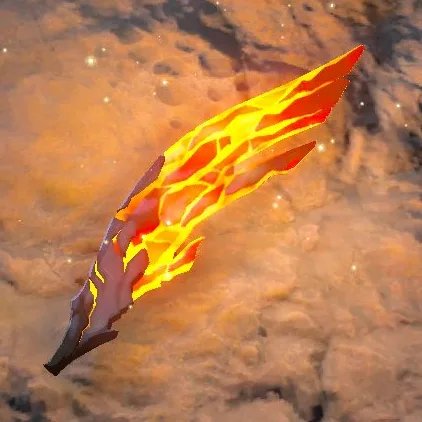
| Horn | Hit a horn | 26 (20) | +30:00 | 300 |
| Shard of Spike | Pick it up from the back, under the spikes | 16 (12) | +1:20 | 30 |
Fuse attack, cooking time and prices are the game’s own item values and are the same for Dinraal, Farosh and Naydra; the Light Dragon differs only in fuse attack.
How do you farm dragon parts?
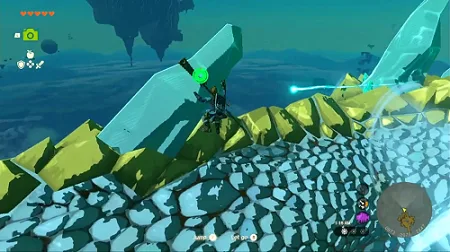
- Get above the dragon. Launch from the Skyview Tower nearest its chasm (see the first table) or glide down from a sky island, and aim to land on its back.
- Dress for the element. Dinraal burns and sets wooden weapons alight, Naydra freezes and Farosh throws lightning at metal. The Flamebreaker, Snowquill and Rubber sets cover the three.
- Hit the part you want. Strike or shoot a glowing body part: the horn for a horn, the head for a fang shard, a claw for a claw, anywhere on the body for a scale.
- Collect the Spike shards. While you are on its back, walk along the spikes and pick up the Shards of Spike underneath.
- Wait ten real minutes. After one part drops the dragon gives nothing for ten minutes of real time. Opening menus to pass time does not help, so stay on it or come back later.
What are dragon parts used for?
Fusing. A dragon horn adds 26 attack to a weapon, the Light Dragon’s Horn 20. The Shard of Spike descriptions say they are “very destructive” when fused and carry the dragon’s element (shock, fire or ice); Light Dragon parts instead heal you, in the game’s words “a mysterious healing power when attached to a weapon”. See the fuse guide.
Cooking. A scale, claw, fang shard or horn in any dish guarantees a Critical Success and adds the time in the table; a horn pushes an effect to 30 minutes. Details on best recipes.
Armor upgrades. The Great Fairies ask for dragon parts on these pieces (where the fairies are):
| Armor | Dragon parts needed (star: amount) |
|---|---|
| Cap of the Wild | Farosh: Scale ★1 ×2, Claw ★2 ×2, Shard of Fang ★3 ×2, Shard of Spike ★3 ×5 and ★4 ×10, Horn ★4 ×2 |
| Tunic of the Wild | Naydra: the same amounts |
| Trousers of the Wild | Dinraal: the same amounts |
| Fierce Deity Mask / Armor / Boots | One part per star from Dinraal (Mask), Naydra (Armor) or Farosh (Boots): Scale ★1, Claw ★2, Shard of Fang ★3, Horn ★4 |
| Tunic of Memories | Light Dragon’s Scale ★1, Talon ★2, Shard of Fang ★3, Horn ★4, one each; plus two horns: Farosh’s ★2, Naydra’s ★3, Dinraal’s ★4 |
| Champion’s Leathers | Light Dragon’s Scale ★1, Talon ★2, Shard of Fang ★3, Horn ★4, two each |
| Snow Boots | Naydra’s Scale ×2 at ★4 |
More on the Hero of the Wild set, the Fierce Deity set and all upgrade materials.
Selling. A horn sells for 300 rupees, but horns and fang shards are the bottleneck for the upgrades above, so keep them until your armor is done.
FAQ
Where is Dinraal in Tears of the Kingdom?
Do the dragons only appear at night?
How often can you get dragon parts?
Which dragon part is best for fusing?
Why is the Light Dragon flying lower than before?
Related Articles
weapons
TotK Pristine Weapons: Depths Locations and Respawn Rules
Find pristine weapons in Tears of the Kingdom: shadow soldiers, regional weapon pools, decayed-weapon unlocks, Blood Moon respawns and collection tips.
guides
TotK Hateno Mayoral Election: Quests, Mushrooms and Rewards
Complete the Hateno election in Tears of the Kingdom: all eight mushroom recipients, cheese, both secrets, rewards, unlocks and fixes for stalled quests.
guides
TotK Hearty Ingredient Farming: Radish, Truffle and Fish Routes
Find all seven Hearty ingredients in Tears of the Kingdom with sky-island, cave and fish routes, cooking values, and reserves for armor upgrades.
Was this helpful?
Thanks for the feedback!